---
updatedAt: 2025-11-13T23:01:11.000Z
agentTools:
  projectIndex: https://docs.botsonic.com/llms.txt
---

# Zendesk Support Integration

Learn how to enable your chatbot to submit a ticket to your Zendesk account

This integration allows your users to submit a ticket to your Zendesk account through your Botsonic chatbot

<HTMLBlock>{`
<div style="position: relative; padding-bottom: 45.960264900662246%; height: 0;"><iframe src="https://www.loom.com/embed/1d67dc7c5b40480fb3104de3ec352942?sid=05ebf9e2-4bce-4c98-89a8-97a4864c9421" frameborder="0" webkitallowfullscreen mozallowfullscreen allowfullscreen style="position: absolute; top: 0; left: 0; width: 100%; height: 100%;"></iframe></div>
`}</HTMLBlock>

<br />

# Step 1 - Connect and Install

1. Navigate to your Botsonic Dashboard by clicking on \[Home] from the left hand side menu. Then click and open the Bot you want to connect. *If you haven't created a Bot yet, read this[Quick Start Guide](https://docs.botsonic.com/docs/quick-start).*

   <Image align="center" className="border" border={true} src="https://files.readme.io/a53671f-Your_Bots.png" />

<br />

2. Click \[Integrations] from the left hand side menu, then click \[Apps]

   <Image align="center" className="border" border={true} src="https://files.readme.io/1b8a673-image.png" />

<br />

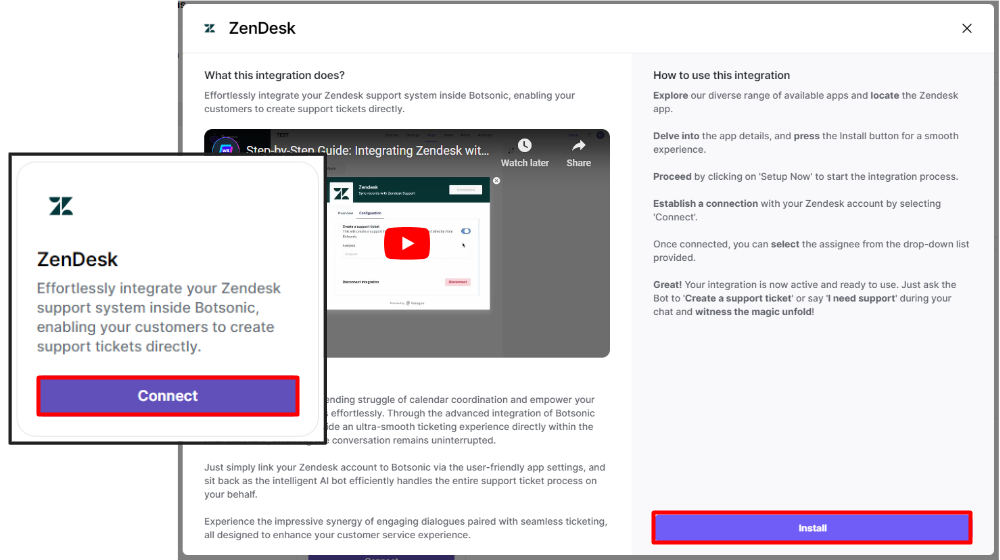
3. Look for the \[Zendesk] integration. Click \[Connect], then click \[Install]
   ![](https://files.readme.io/5de7f9e-image.png)

   <br />

<br />

4. Go to \[Installed apps], then click \[Setup Now] on the Zendesk integration

   * Click \[Connect] on the Zendesk dialogue box
   * Then click \[Allow]

   <Image align="center" className="border" border={true} src="https://files.readme.io/c438e25-image.png" />

   <br />

   <Image align="center" width="80% " src="https://files.readme.io/93ea7e2-image.png" />

<br />

* <Image align="center" className="border" width="50% " border={true} src="https://files.readme.io/29ecc31-image.png" />

  <br />

5. Enter your zendesk subdomain, then click \[Continue]

   <Image align="center" width="80% " src="https://files.readme.io/fc5bcfb-image.png" />

<br />

6. Enable the \[Create support ticket] toggle, then select an \[Assignee] from the dropdown list.

   <Image align="center" width="80% " src="https://files.readme.io/f98ff36-image.png" />

<br />

<br />

# Step 2 - Test the Integration

**Note: Make sure your Botsonic chatbot is trained with an uploaded file or FAQ that answers the question/message that you're posting**

1. Engage with your Botsonic chatbot, eg. "I need support," then click the \[Create a support ticket] button.

   <Image align="center" width="50% " src="https://files.readme.io/661c58d-image.png" />

<br />

2. The chatbot will ask you to provide your name and email address.

   <Image align="center" width="50% " src="https://files.readme.io/f1daf98-image.png" />

<br />

3. Go to your Zendesk account and search for the newly created ticket

   <Image align="center" className="border" border={true} src="https://files.readme.io/368b376-image.png" />

<br />

4. Open and respond to the ticket.

   <Image align="center" className="border" border={true} src="https://files.readme.io/54b5429-image.png" />

<br />

<br />

<Callout icon="👉" theme="default">
  ### To disconnect or delete the Zendesk integration

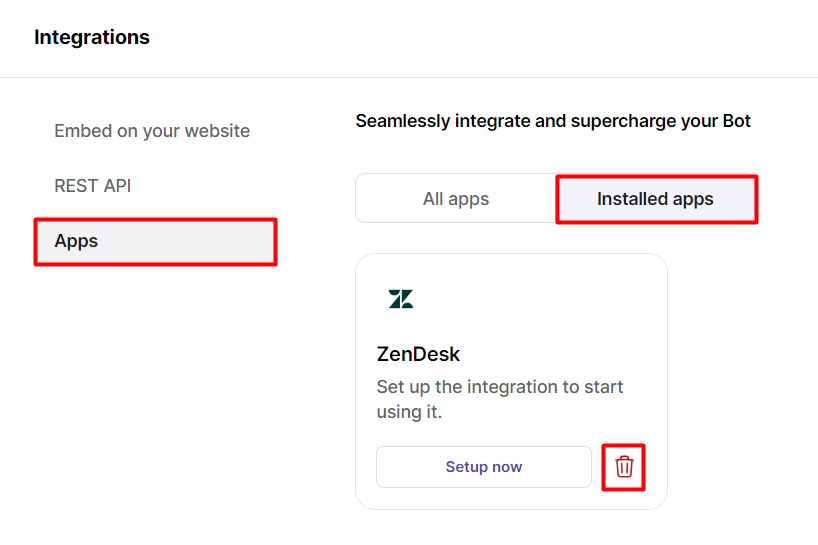
  Go to the chatbot's Integration Page > Apps > Installed Apps, then click the \[trash] icon to disconnect the integration.
  ![](https://files.readme.io/5c896a9-image.png)
</Callout>