
Consent Agreement
To ensure compliance with policies like GDPR, you can create and integrate a custom consent and privacy popup when a chat is initiated.
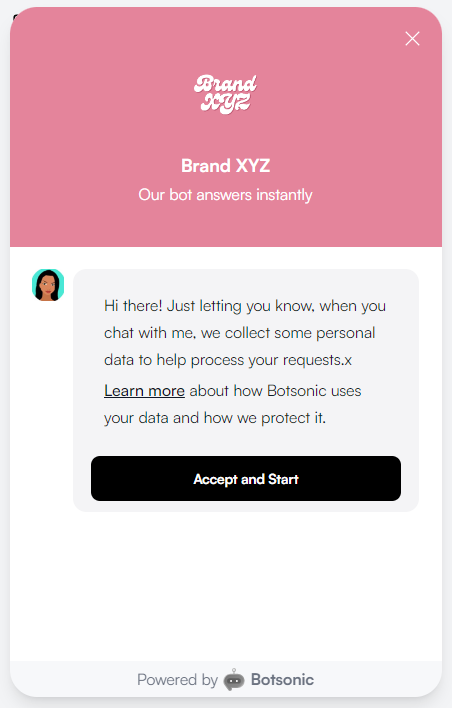
This integration automatically displays a consent agreement message with an acceptance button when a user initiates a conversation. The user must agree before proceeding to interact with the chatbot. This ensures you are in compliance with policies like GDPR.
Step 1 - Connect & Install
-
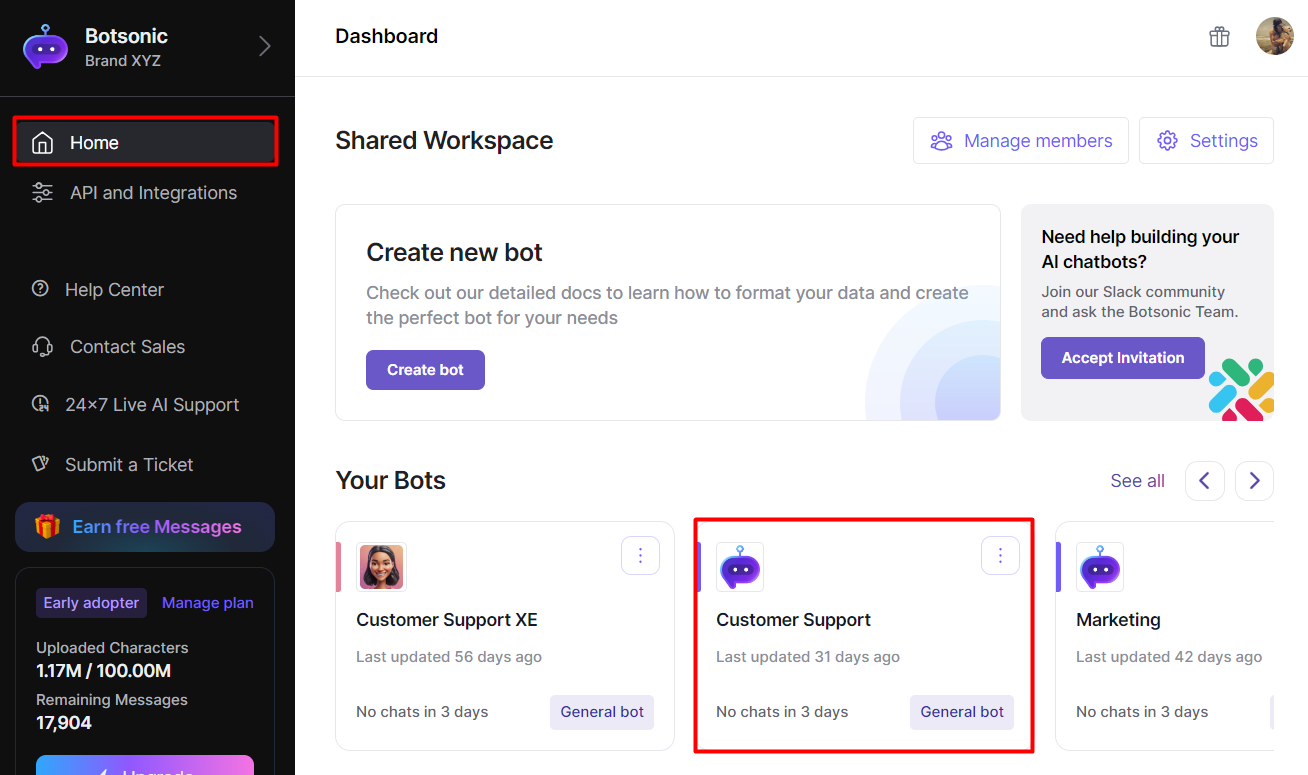
Navigate to your Botsonic Dashboard by clicking on [Home] from the left hand side menu. Then click and open the Bot you want to connect. If you haven't created a Bot yet, read thisQuick Start Guide.
-
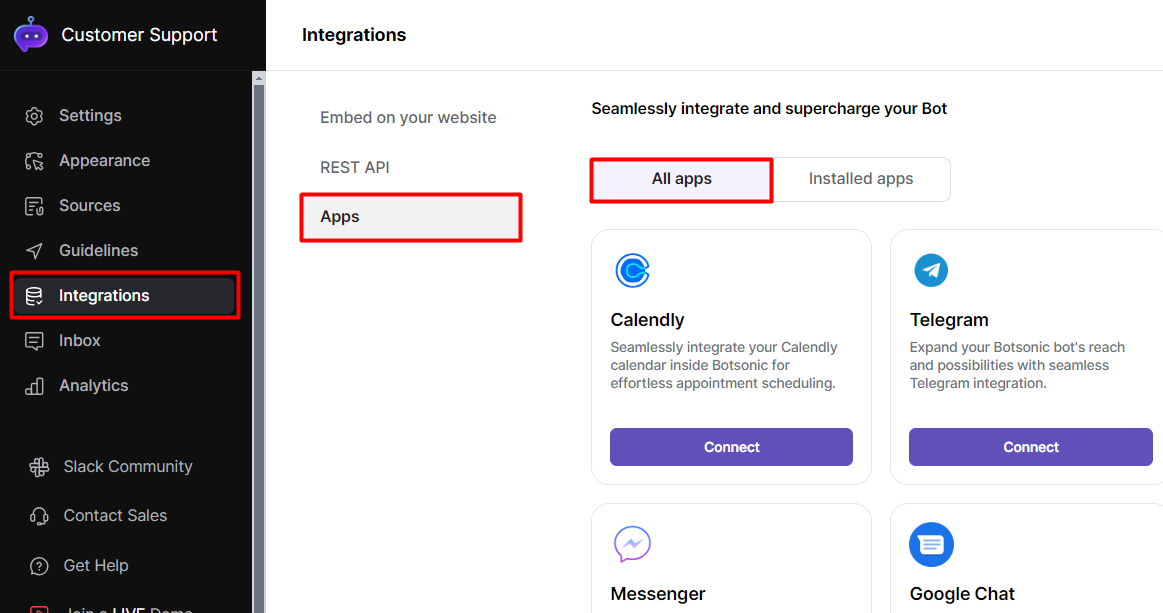
Click [Integrations] from the left hand side menu, then click [Apps]
-
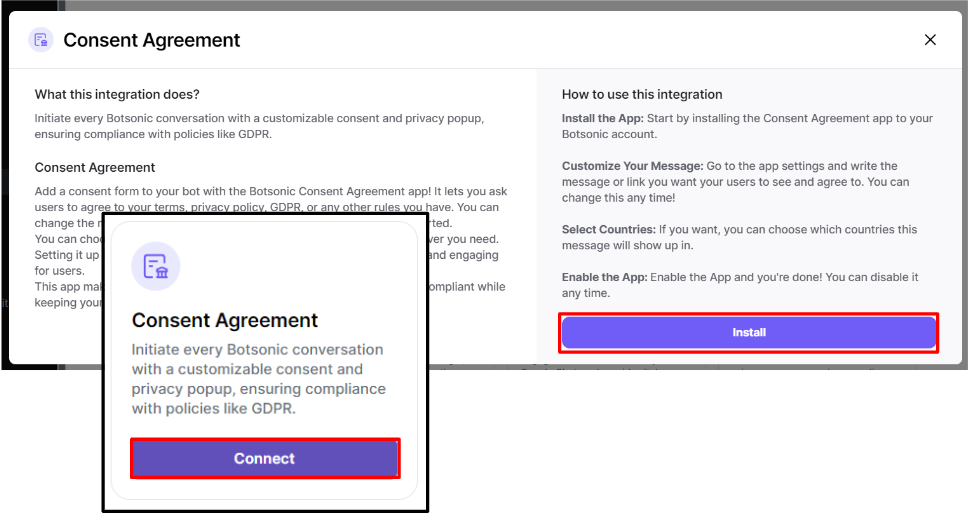
Look for the [Consent Agreement] integration. Click [Connect], then click [Install]
Step 2 - Customize the Consent Agreement Form
-
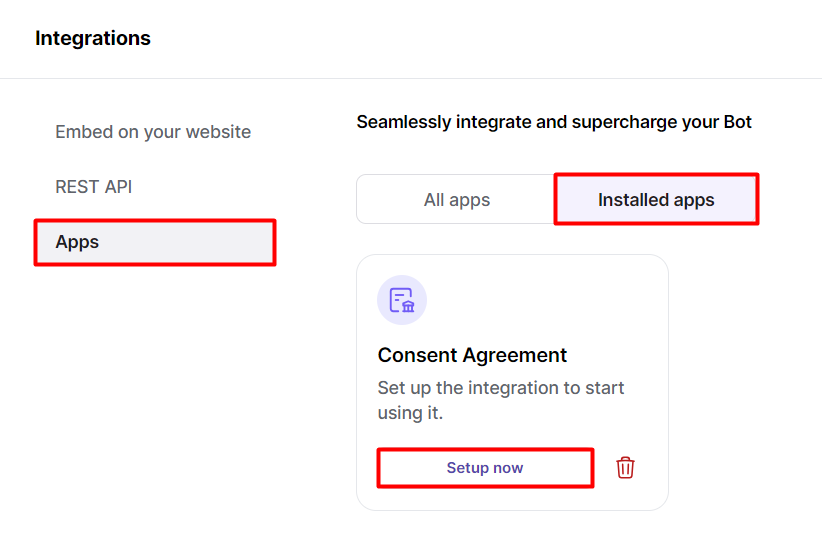
Go to [Installed apps], then click [Setup Now] on the Consent Agreement integration
-
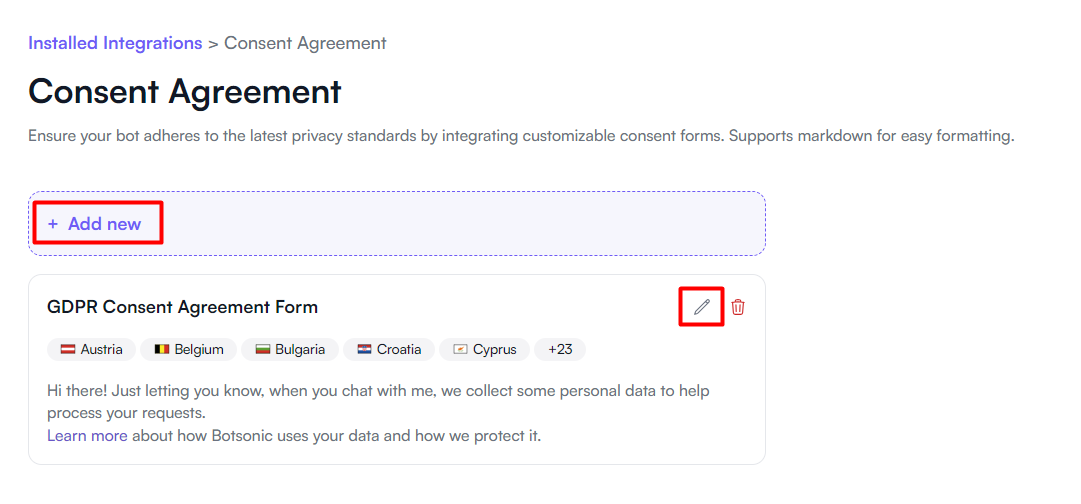
By default, a GDPR Consent Agreement Template is already added on the settings. Simply click the [edit] icon and customize the message as you see fit. Otherwise, you can click the [Add new] button to create a new consent agreement form from scratch.
-
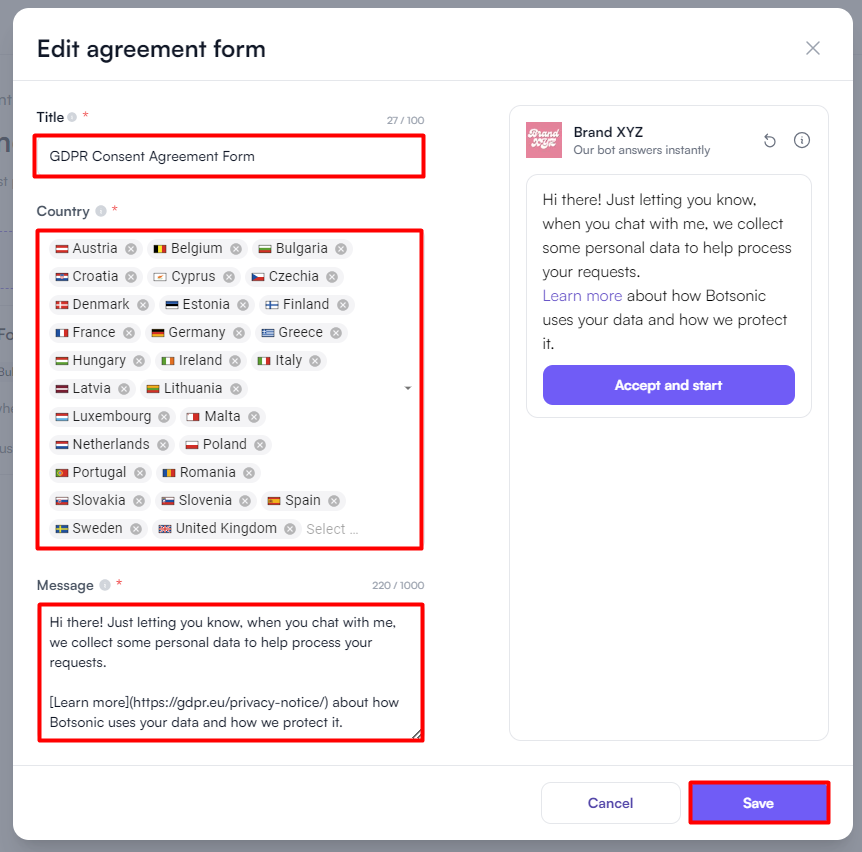
Edit and customize the following fields on the agreement form, then click [Save]
- Title: Enter a name for the consent form
- Country: Select countries where the consent is applicable, click the [x] icon to remove it from the list. Note: If you're testing it, make sure your country is selected.
- Message: Customze the message you want to be displayed on the form
Step 3 - Enable & Test
-
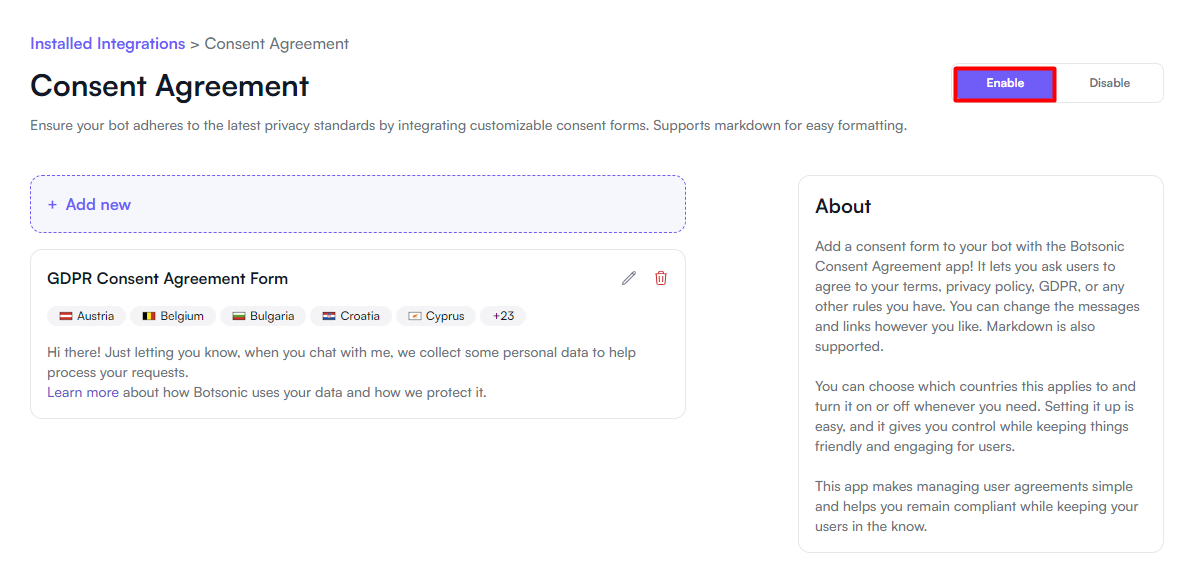
Click the [Enable] button
-
Initiate a conversation with the chatbot. You should see the consent agreement message with the accept button displayed on the chat interface.

Updated 8 months ago