
Import Files from Confluence
Learn how to import files from Confluence to use as a training source for your Botsonic chatbot.
This guide will walk you through the steps to import files from Confluence to use as a training source for your Botsonic chatbot.
*Note: Only available on Enterprise Plan.
Step 1 - View Bot Settings
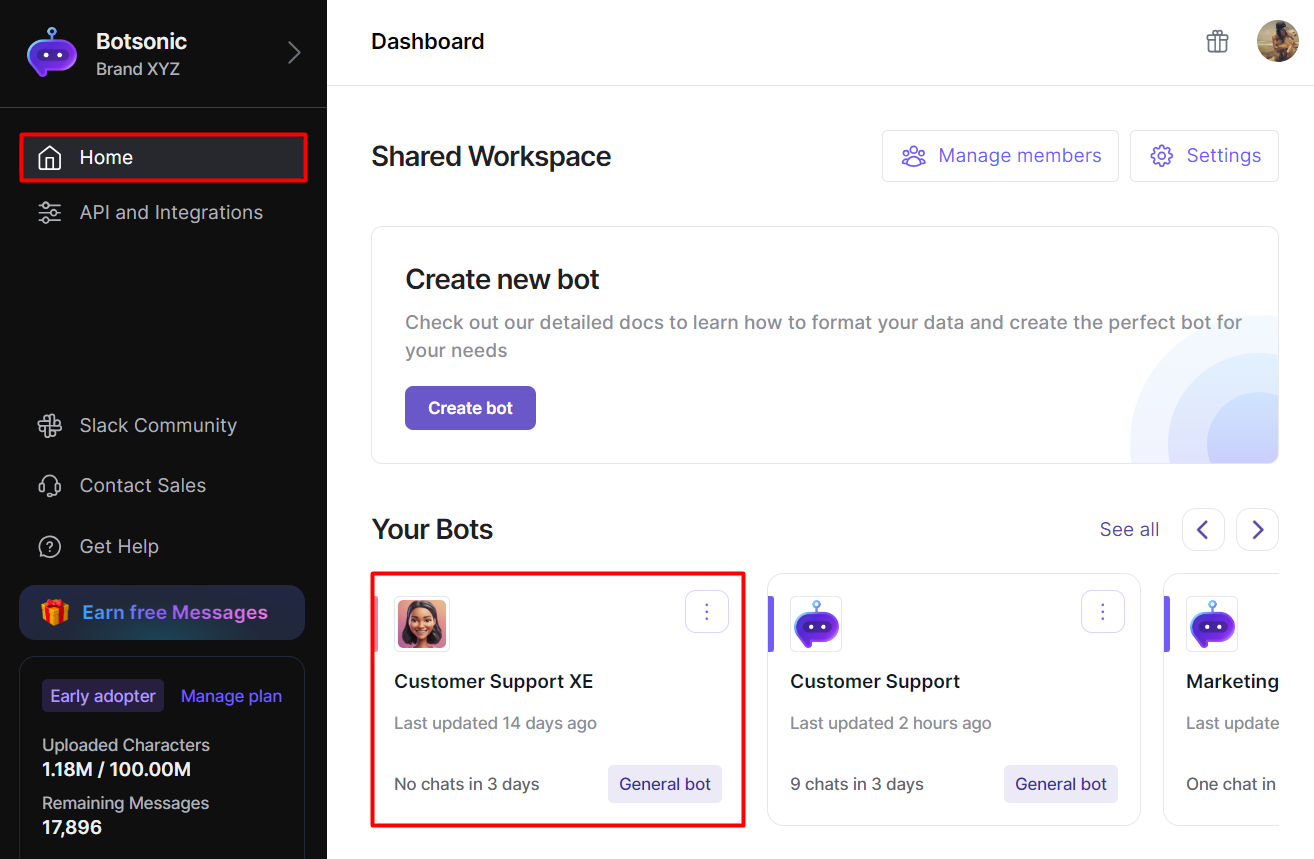
Navigate to your Botsonic Dashboard by clicking on [Home] from the left hand side menu. Then click and open the Bot you want to connect. If you haven't created a Bot yet, read thisQuick Start Guide.
Step 2 - Connect Atlassian / Confluence
- Click on [Sources], then click on [Apps].
- Look for the [Confluence] app then click [Connect].
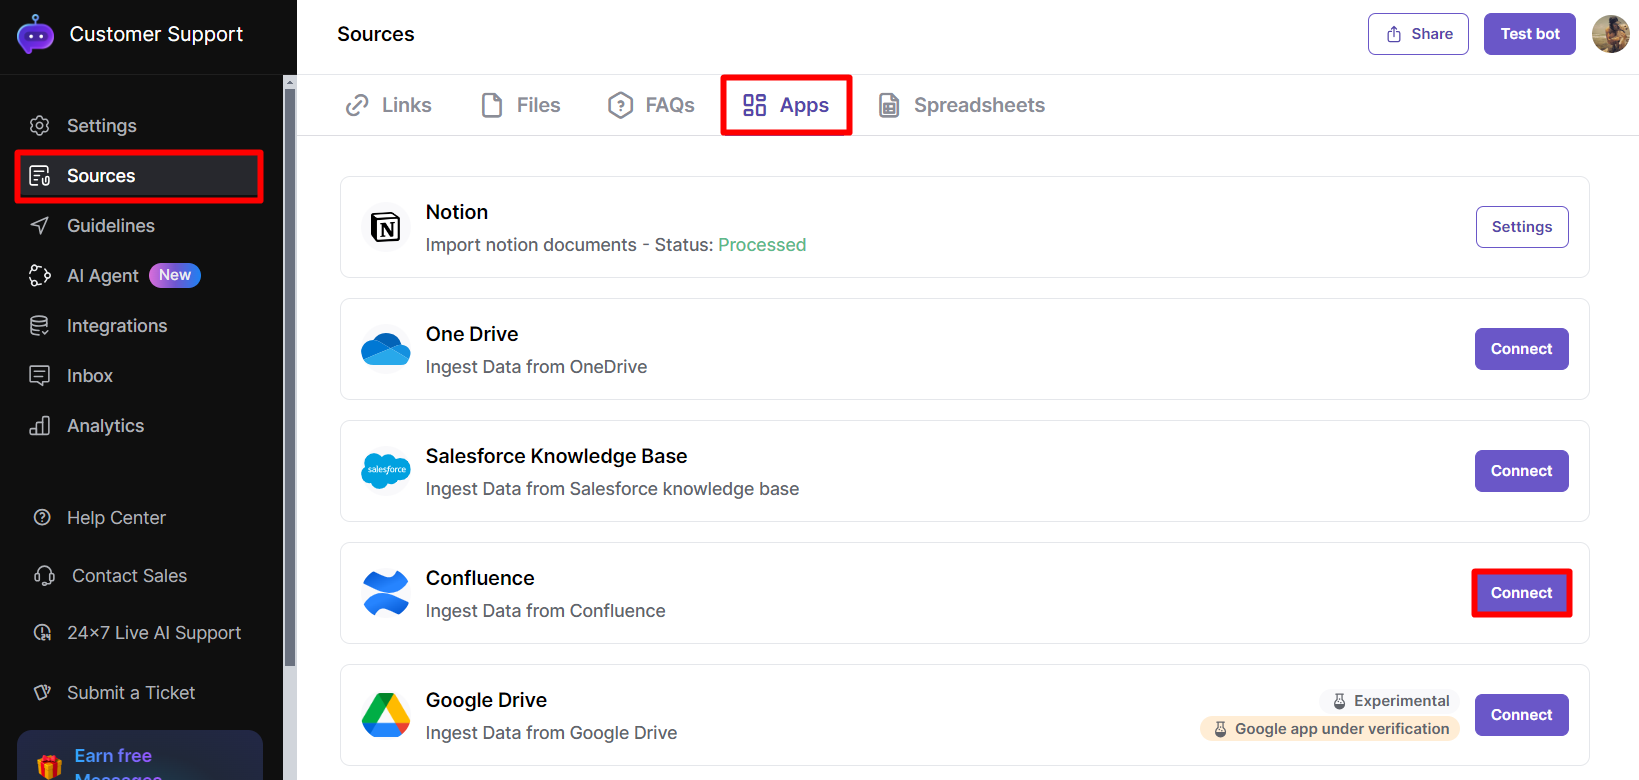
*If status is still inactive, you'll see another [Connect] button, click on it.

- Sign in to your Atlassian account.
- Click [Allow] to grant the necessary permissions.

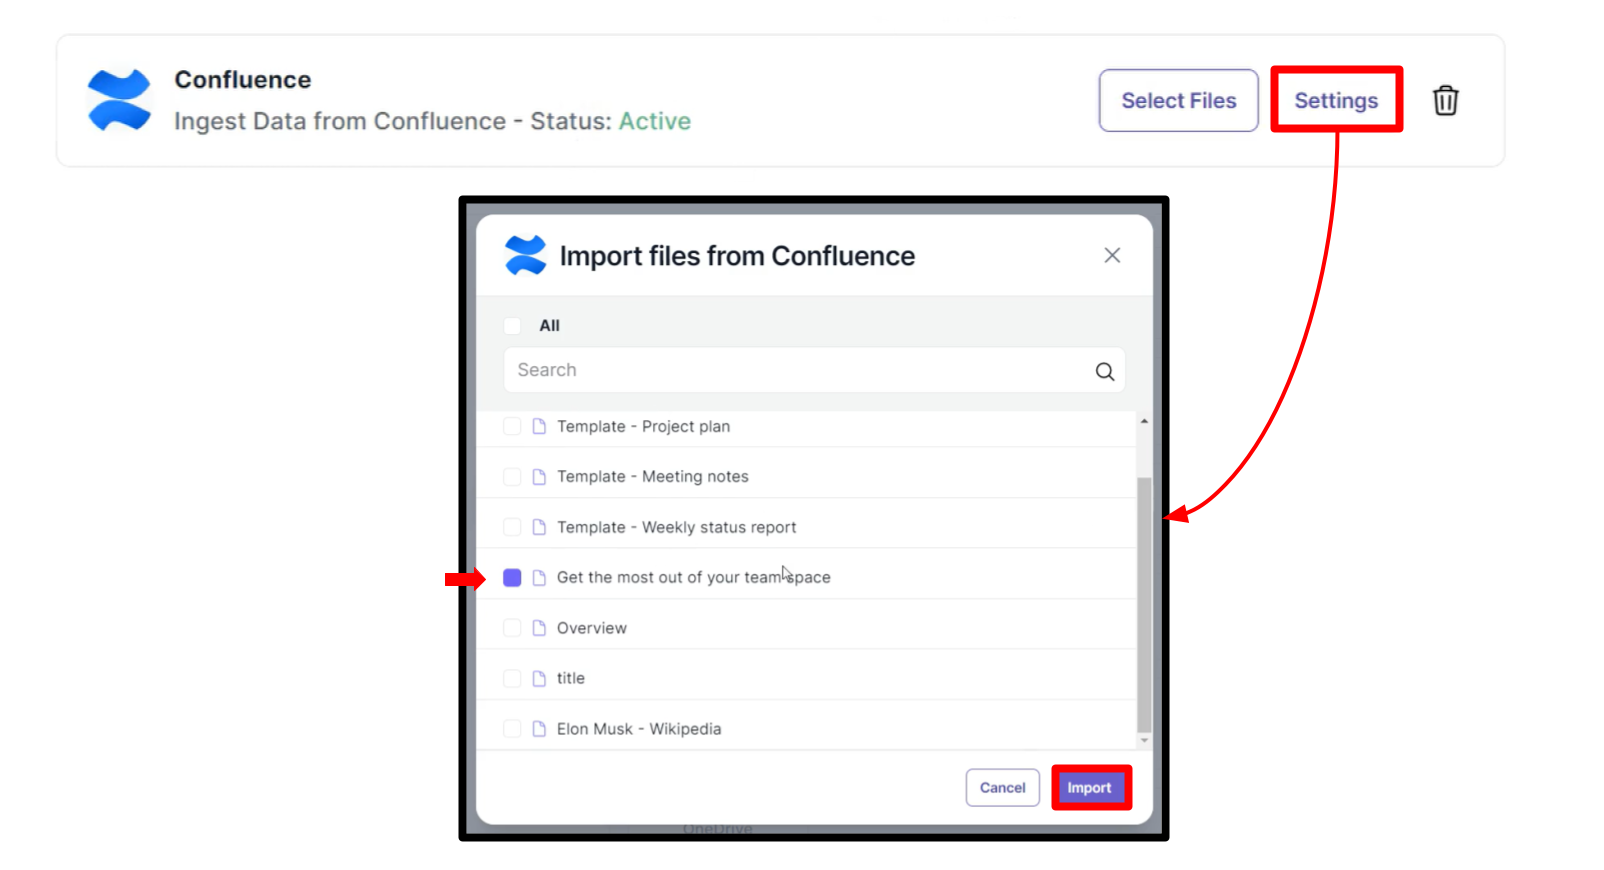
Step 3 - Select the Files to Import
- Click [Select Files].
- Choose the files you want to import from Confluence.
- Click [Import].
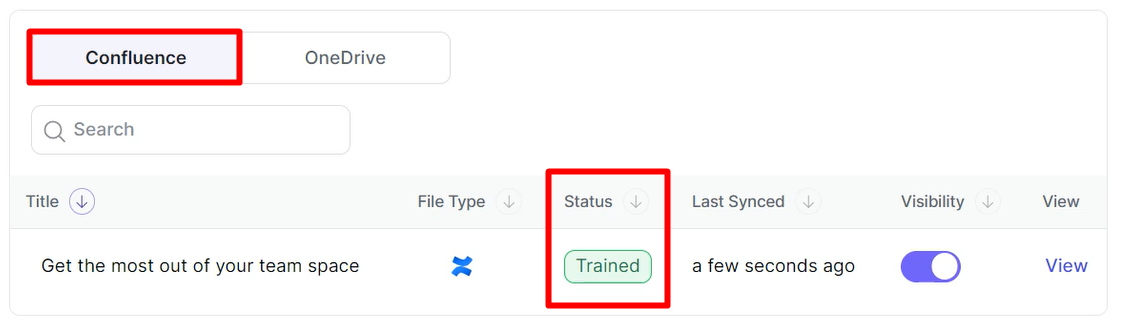
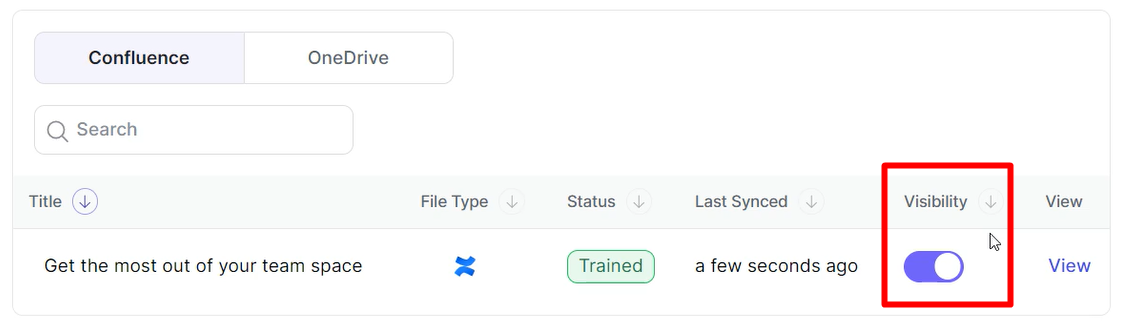
Step 4 - View status of uploaded file
- Click on the [Confluence] tab below the list of apps to view the file you uploaded.
- View file statuses as: Waiting, Processed, and Trained.
Enable or Disable File Visibility as Reference
Toggle ON to set the uploaded files to be shown as a reference on your chatbot's responses.
Updated 9 months ago
Did this page help you?