Google Tag Manager Integration
Learn how to set up Google Tag Manager to track user interactions and behaviors within your Chatbot using GA4
Setting up Google Tag Manager (GTM) for Google Analytics 4 (GA4) event routing for Botsonic Events involves configuring GTM to send specific events generated by Botsonic to your GA4 property. This integration allows you to track user interactions and behaviors within your chatbot using GA4.
Before you begin
- Google Tag Manager (GTM) Container Setup: Ensure that you have already set up a GTM container and have access to its ID. This container will be used to manage and deploy tags for tracking Botsonic Events in Google Analytics 4 (GA4).
- GTM Installed on Your Website: Verify that GTM is properly installed on your website. This involves adding the GTM container snippet to all pages of your website to enable tracking and tag management.
Step 1 - Set up the Data Layer Variable
Visit https://tagmanager.google.com/#/home and select the Container you've installed on your website which will be used for event tracking and routing.
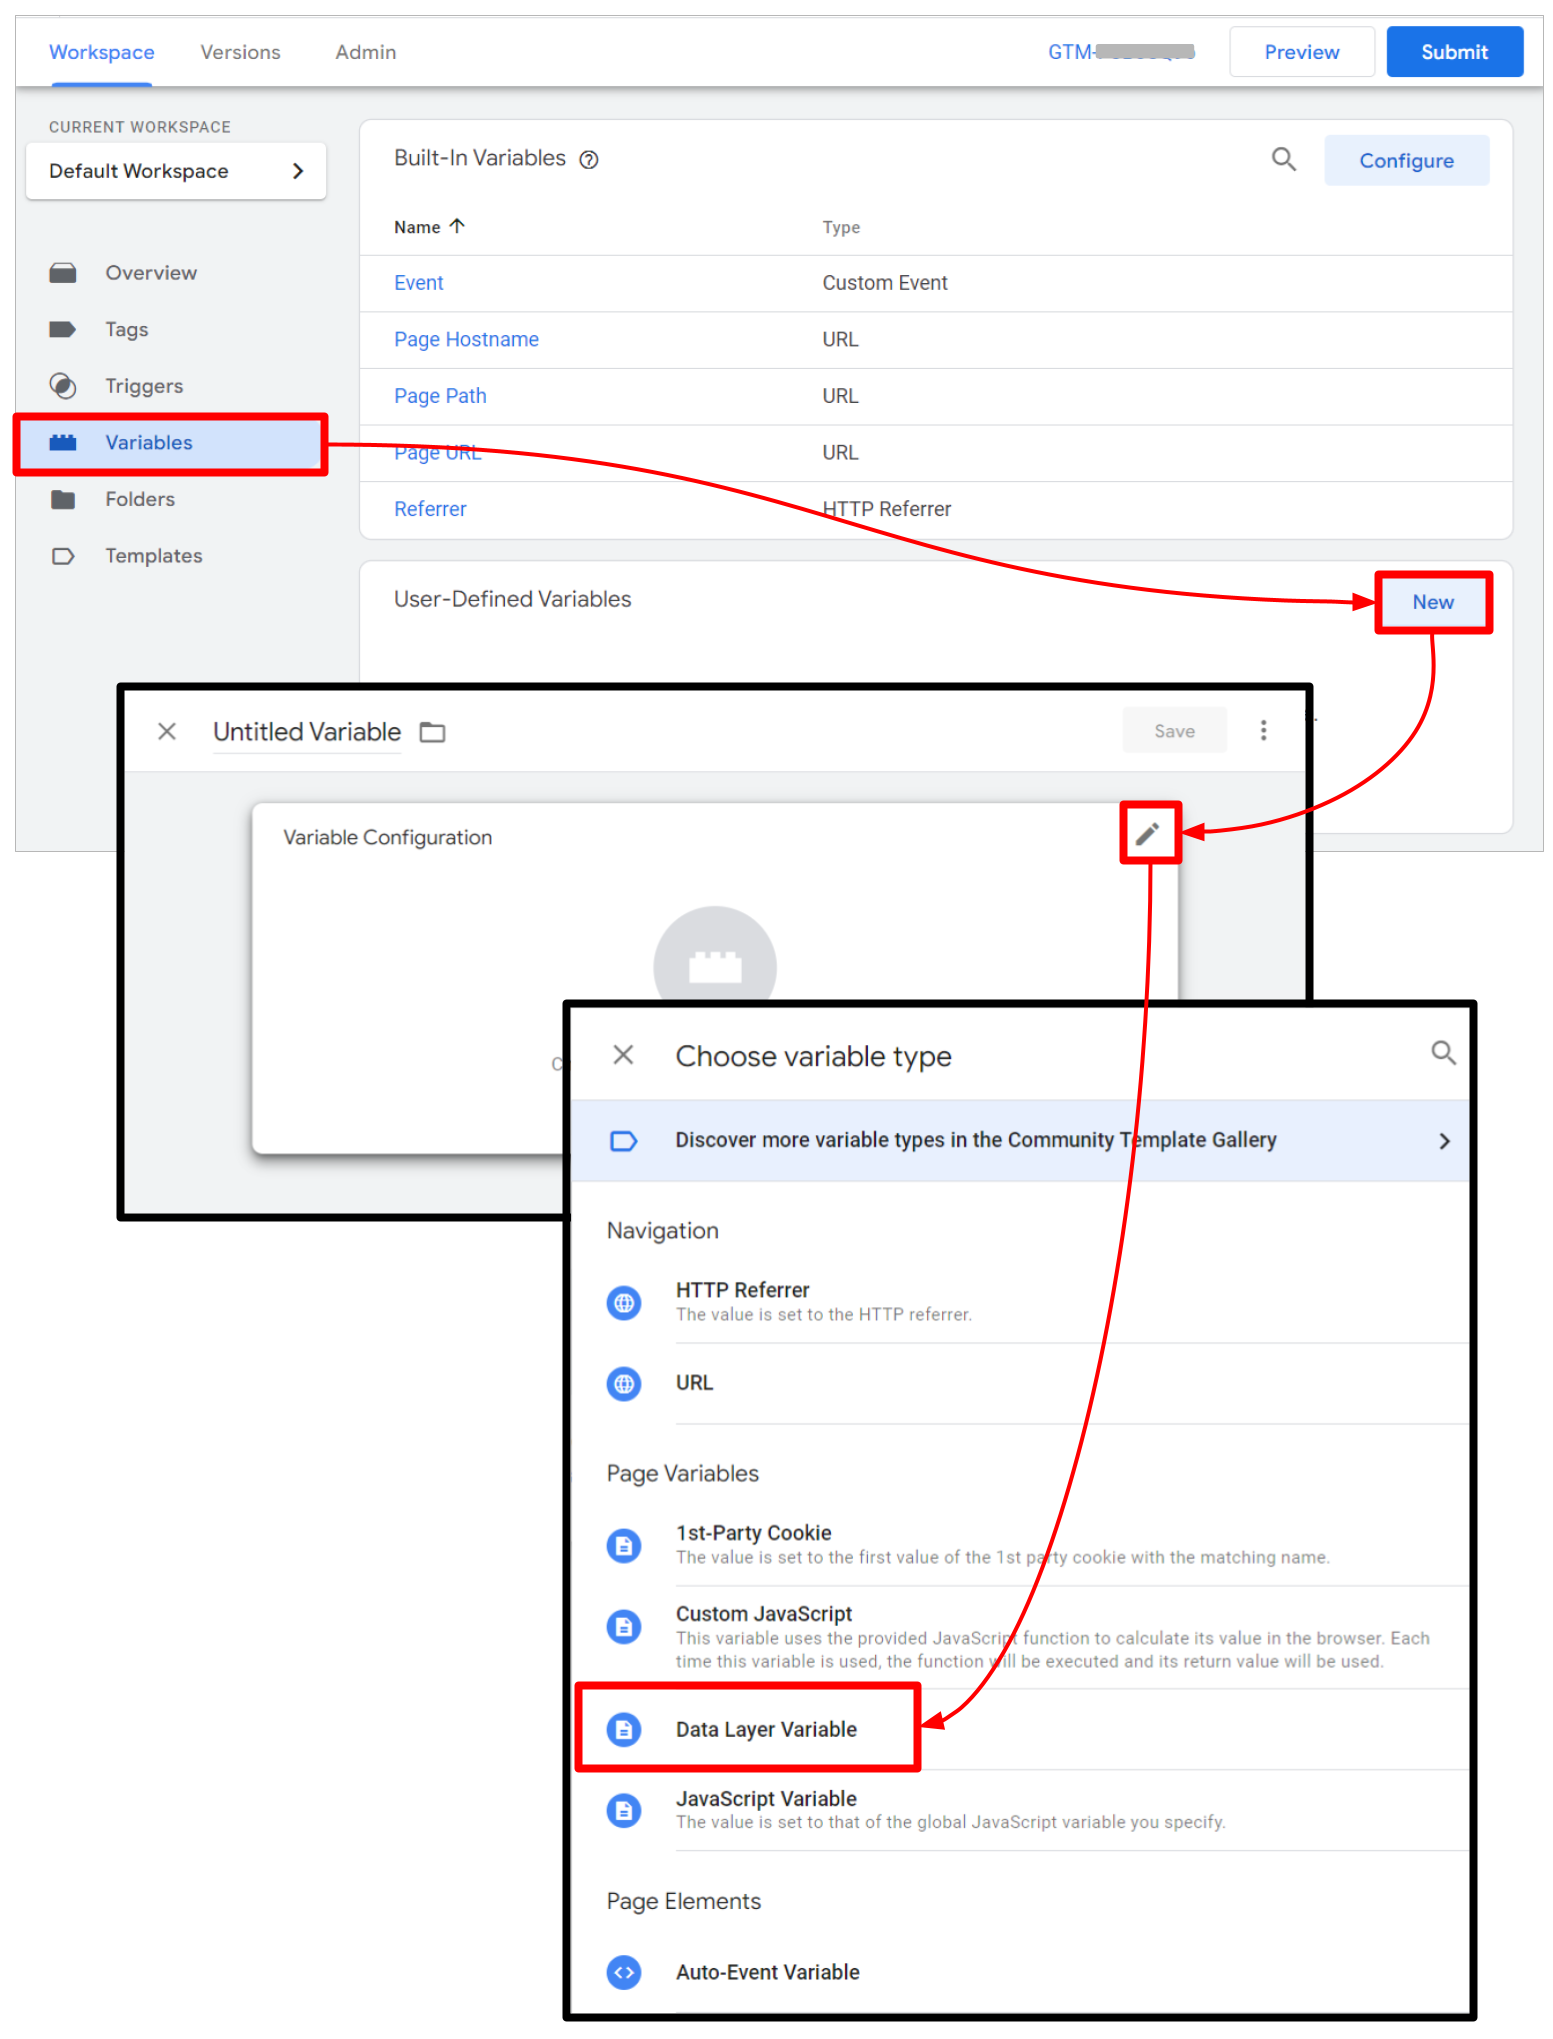
- In the [Variables] page, click [New] to create a new variable.
- Then click the [edit] icon to configure the variable, then select the [Data Layer Variable]
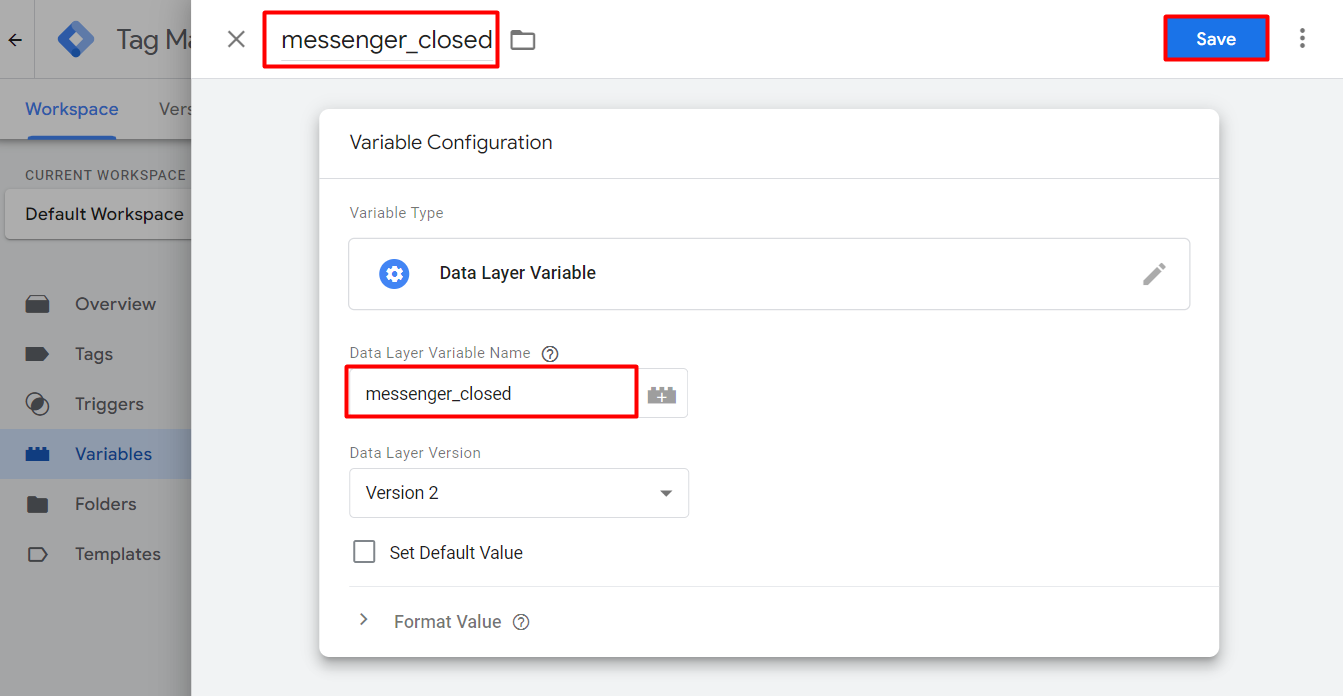
- Give the Data Layer variable a name. The name should be the same on the variable title space and the Data Layer variable field.
- Click [Save]
Step 2 - Set up Triggers
-
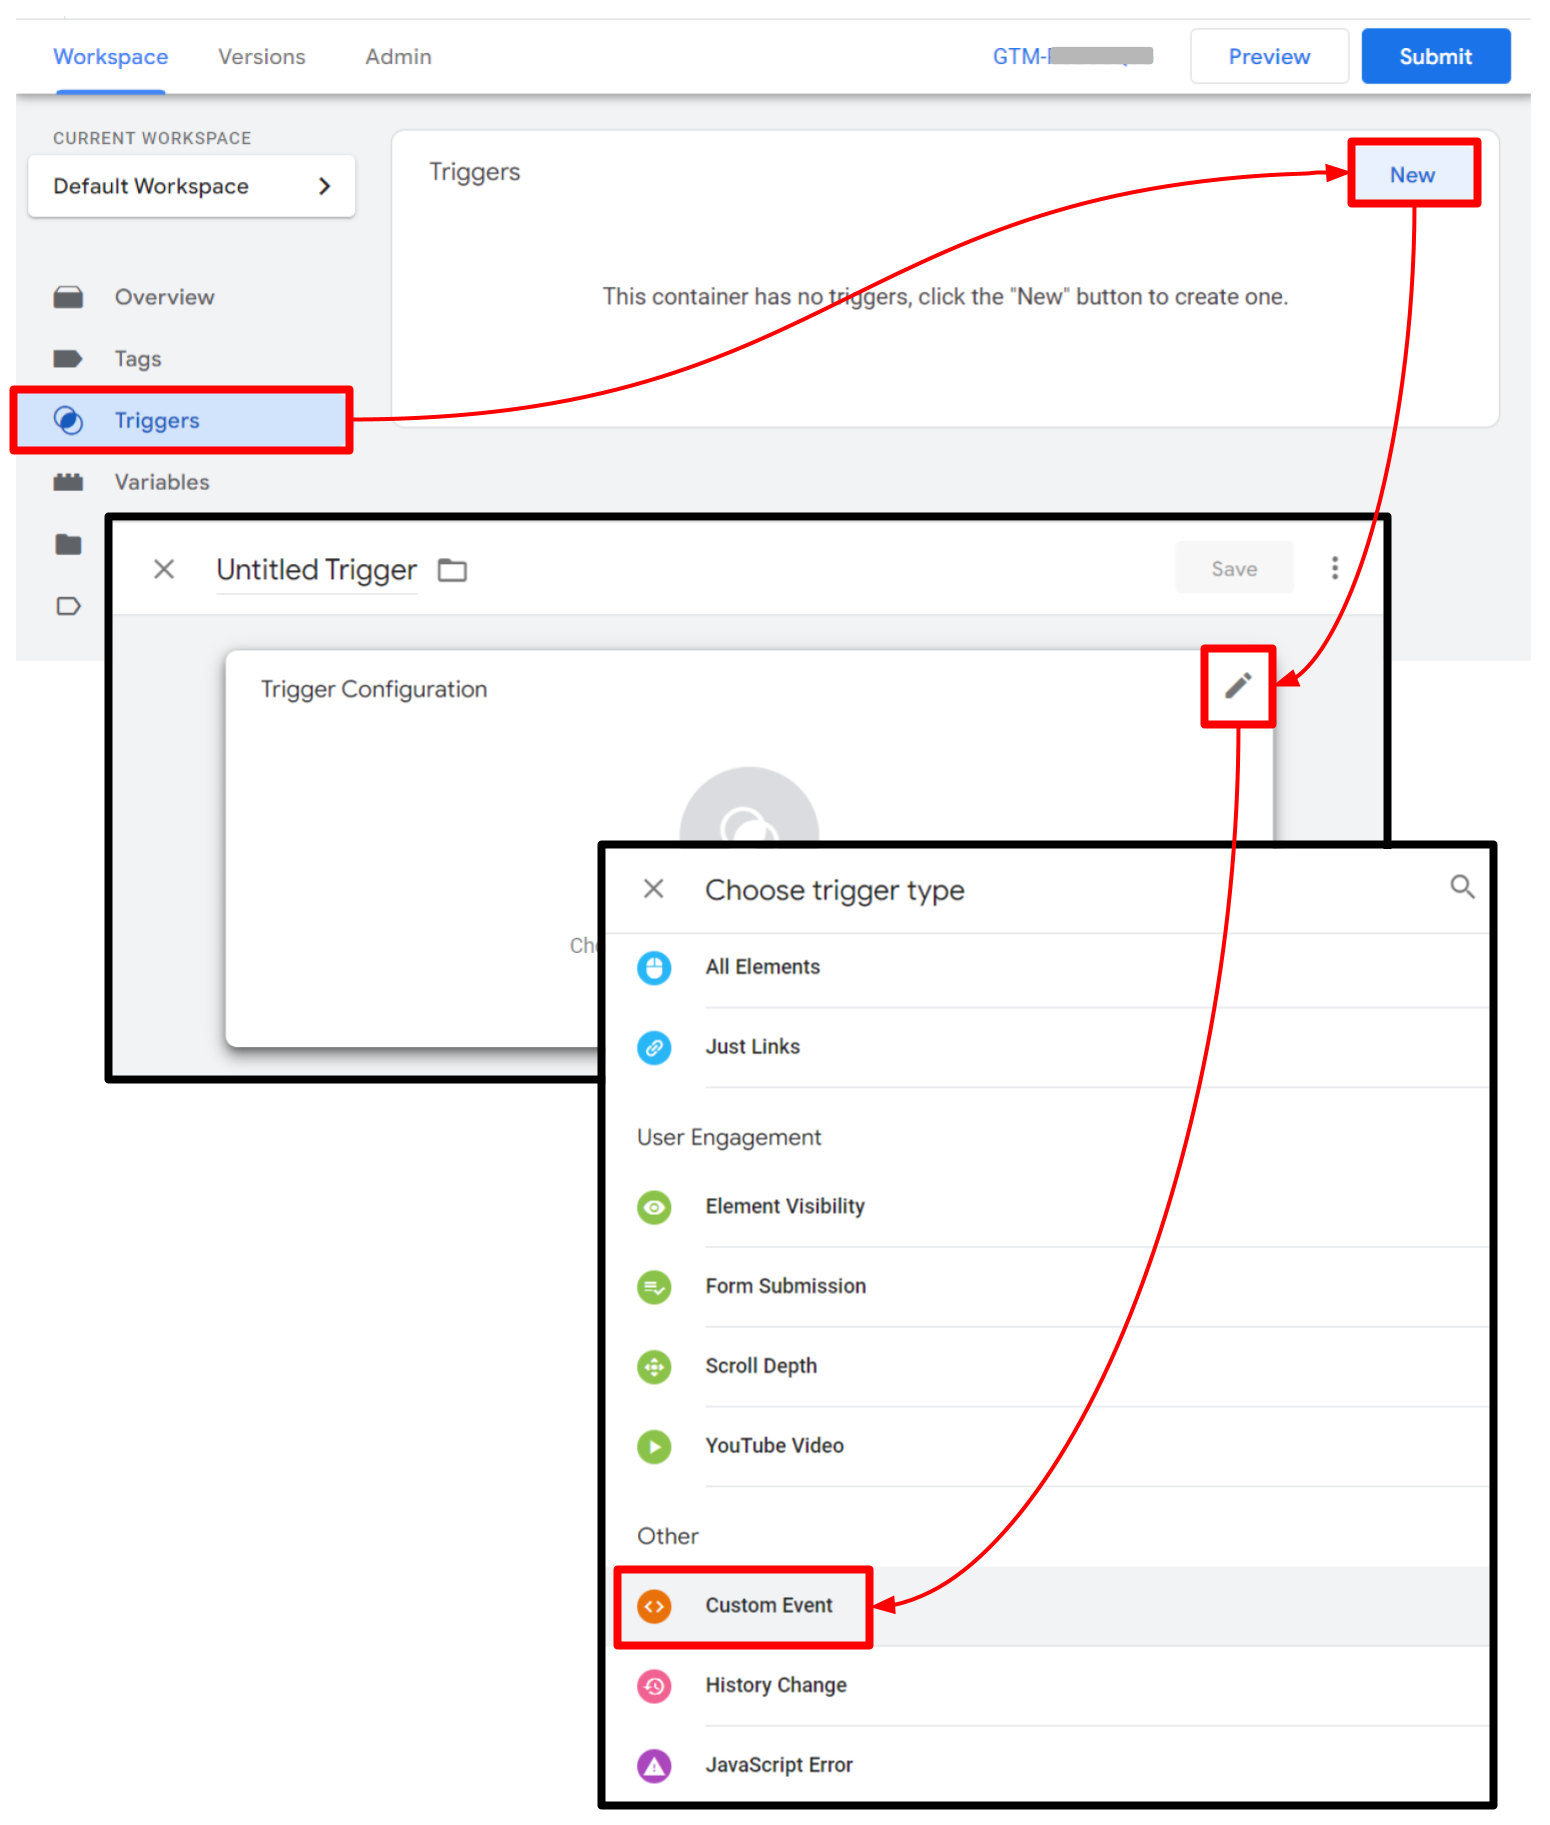
In the [Triggers] page, click [New] to create a new trigger.
-
Click the [edit] icon to configure the trigger, then select [Custom Event]. We currently support the following triggers:
- Messenger Closed
- Messenger Opened
- Message Sent
- Starter Question Clicked
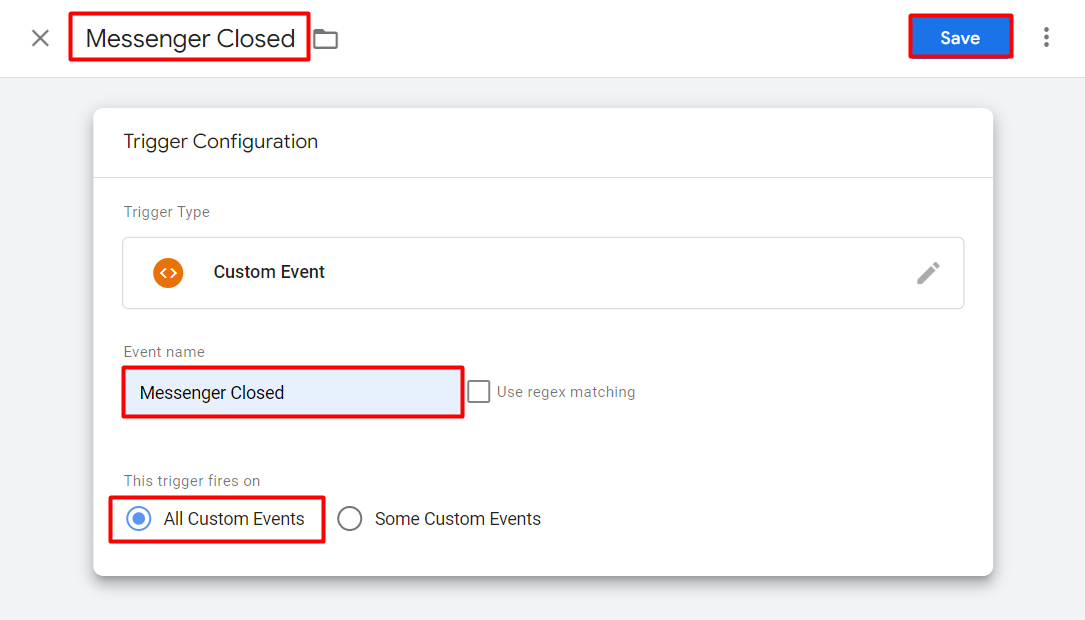
- The trigger title name must match the event name field, and should fire on [All Custom Events]
- Click [Save]
Step 3 - Set up Tags
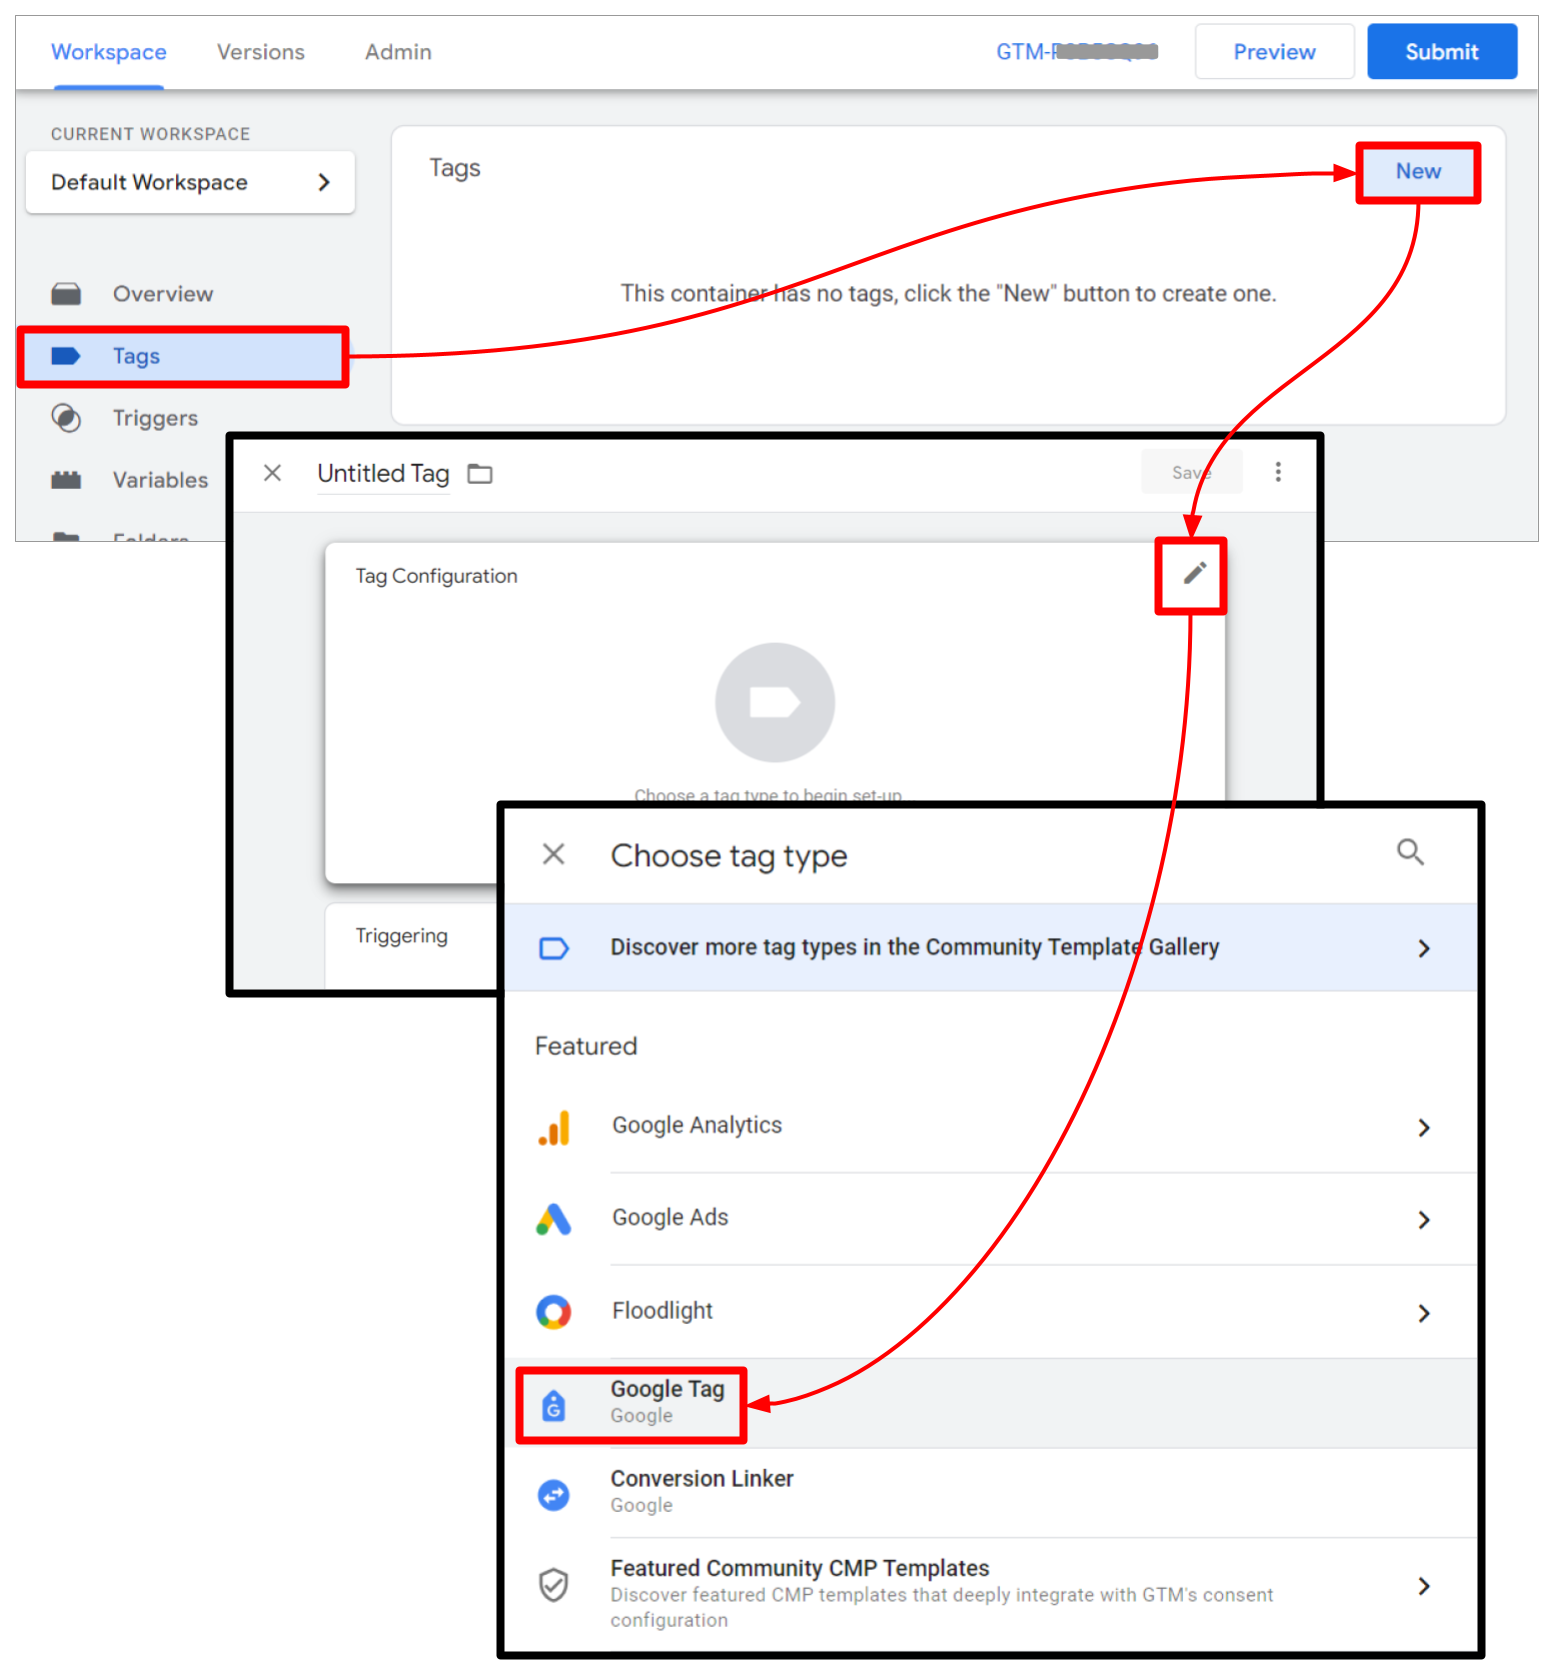
- In the [Tags] page, click [New] to create a new tag.
- Click the [edit] icon to configure the tag, then select [Google Tag]
-
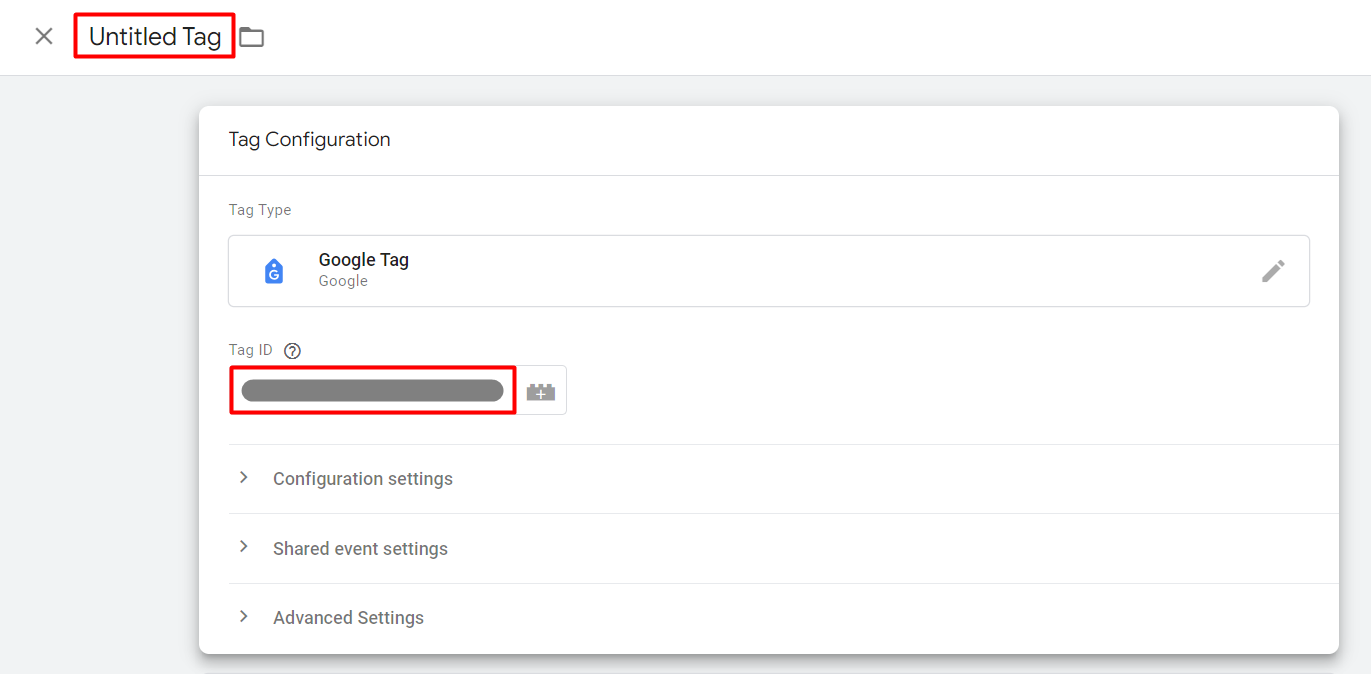
Setup the following, then click [Save]
-
Measurement ID and Event name
-
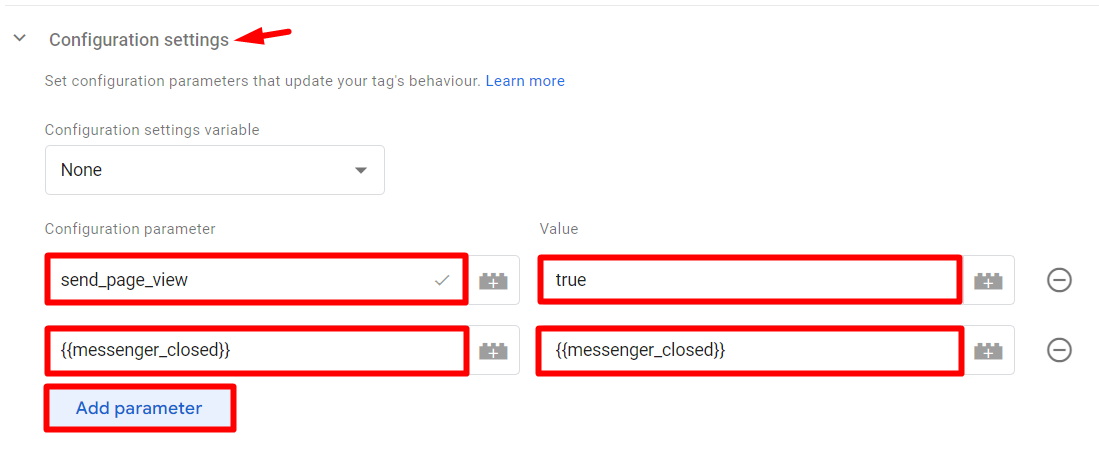
On the [Configuration] settings section, add the parameters that was created in the first step:
-
send_page_view; value: true
-
{{messenger_closed}}; value: {{messenger_closed}}
-
-
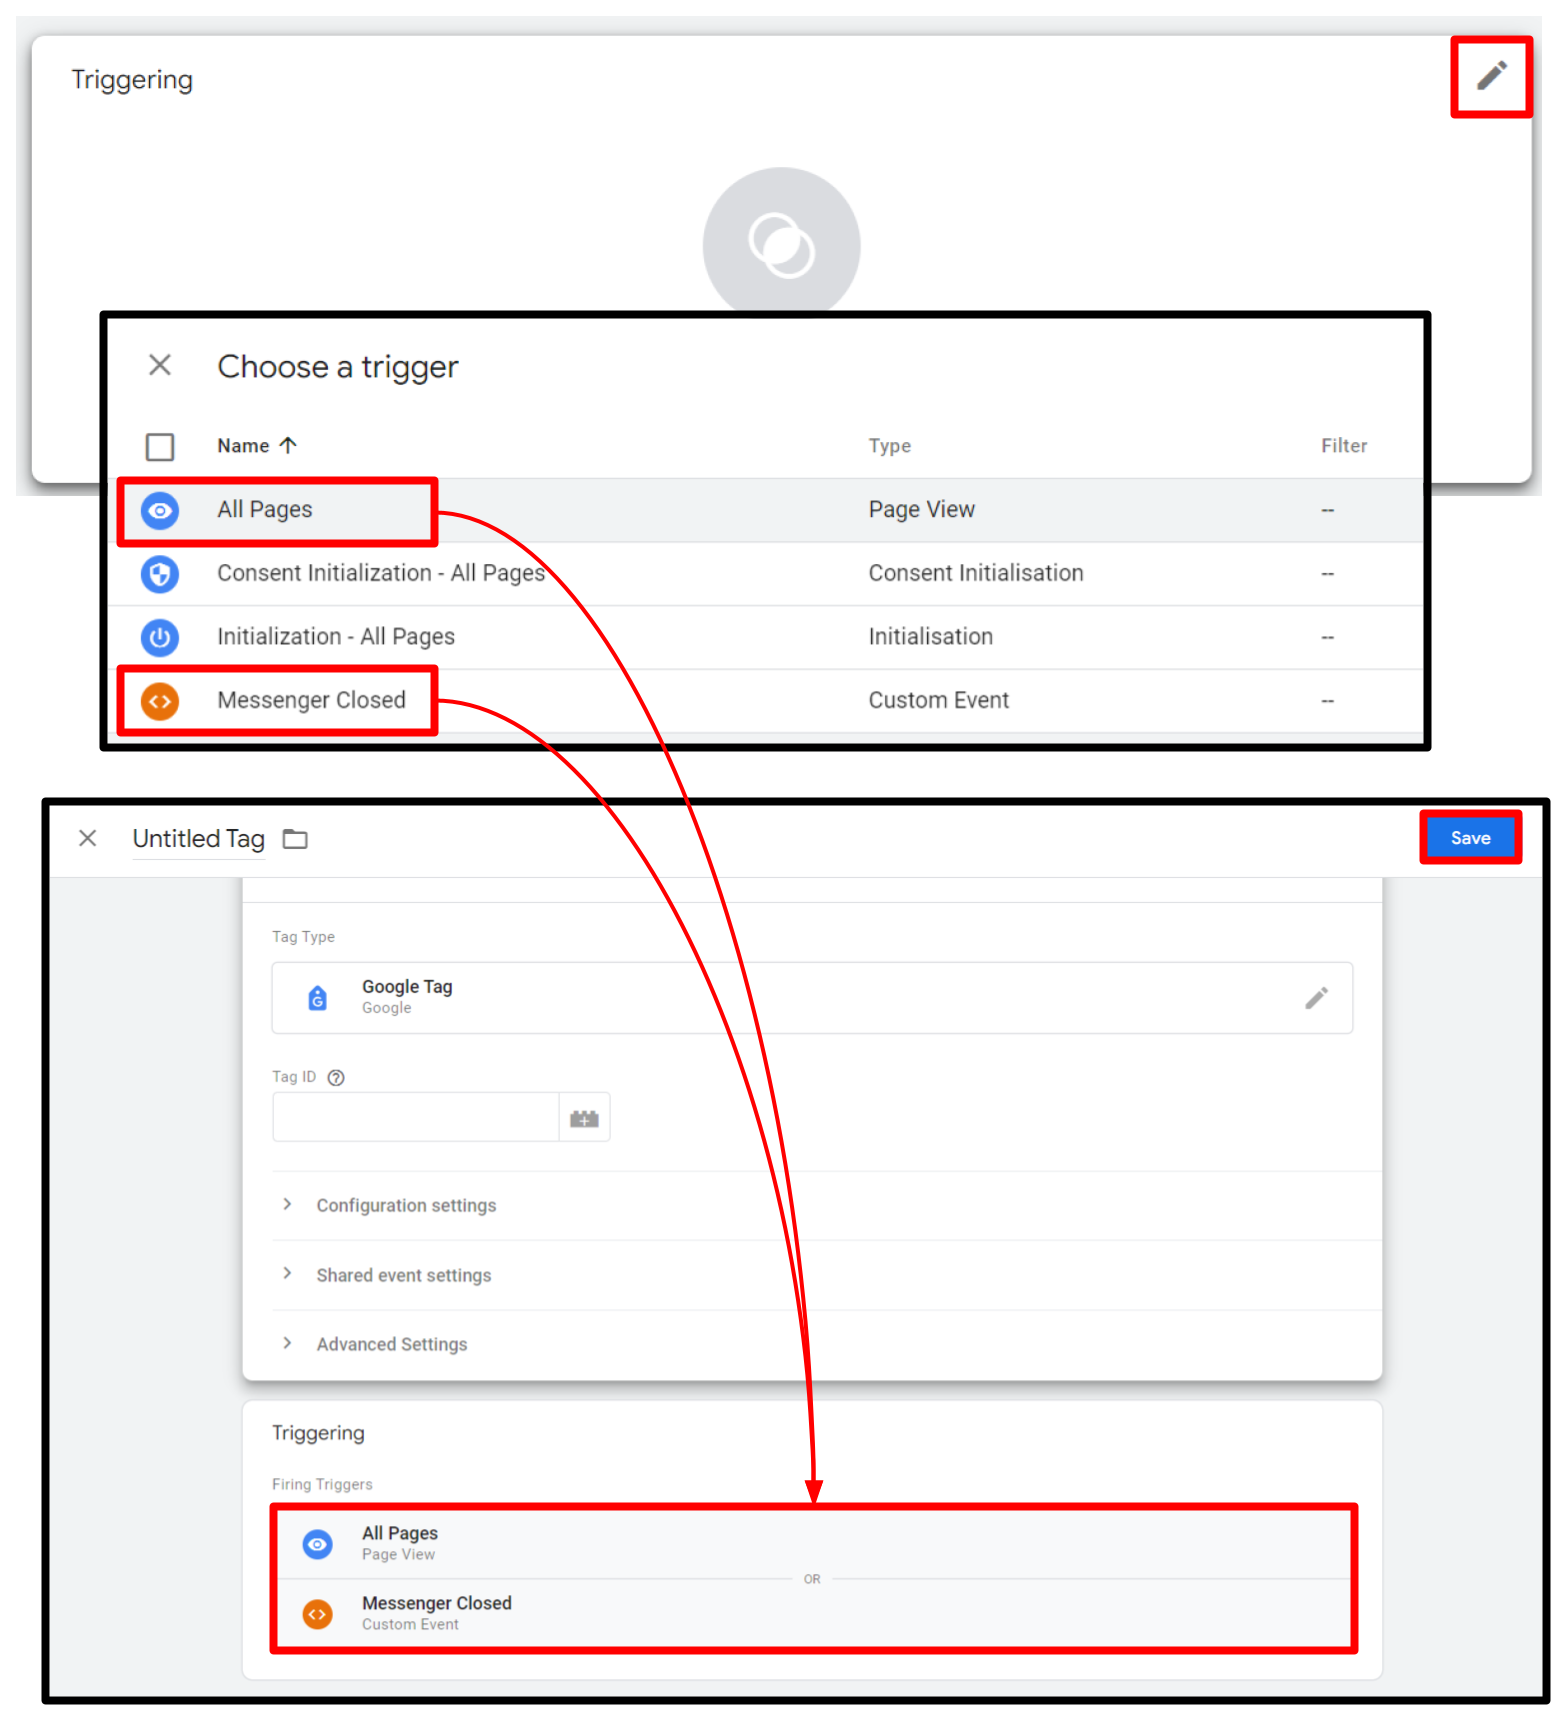
Add all the triggers that were created in the previous step
-
Updated 3 months ago
