
Salesforce Ticketing System
Learn how to integrate and setup Salesforce to automatically create a ticket when a user asks for support
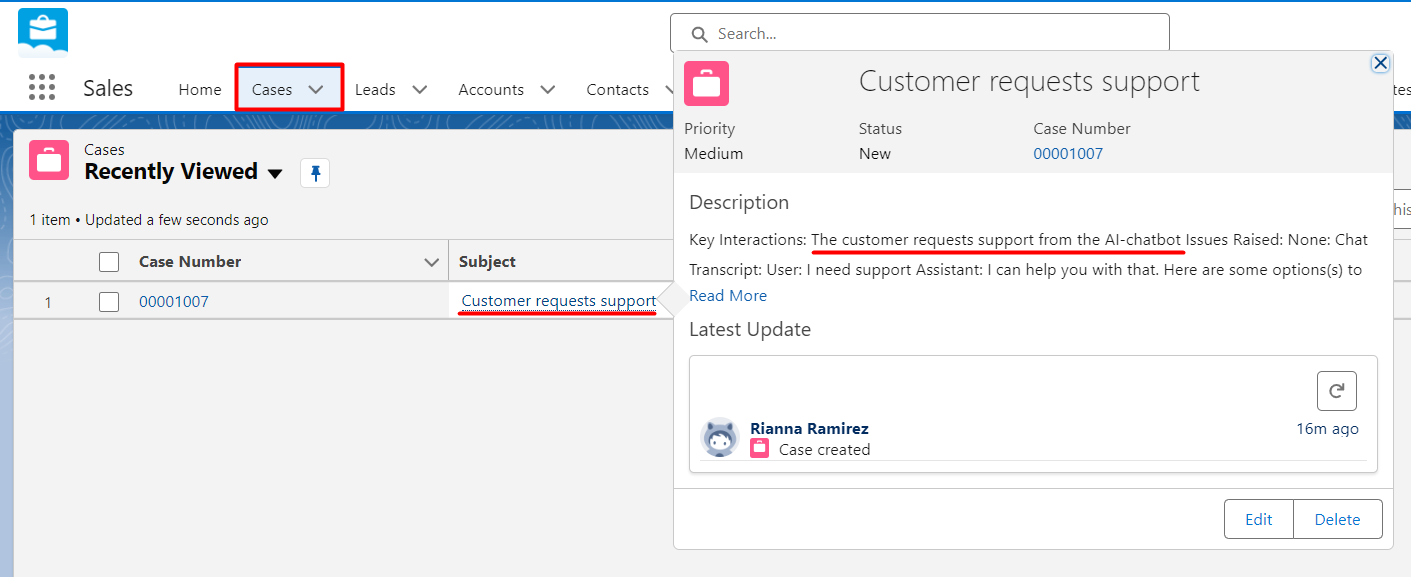
This integration automatically creates a ticket in Salesforce when a user wants to submit a ticket or if they request for support.
Step 1 - Connect & Install
-
Navigate to your Botsonic Dashboard by clicking on [Home] from the left hand side menu. Then click and open the Bot you want to connect. If you haven't created a Bot yet, read thisQuick Start Guide.

-
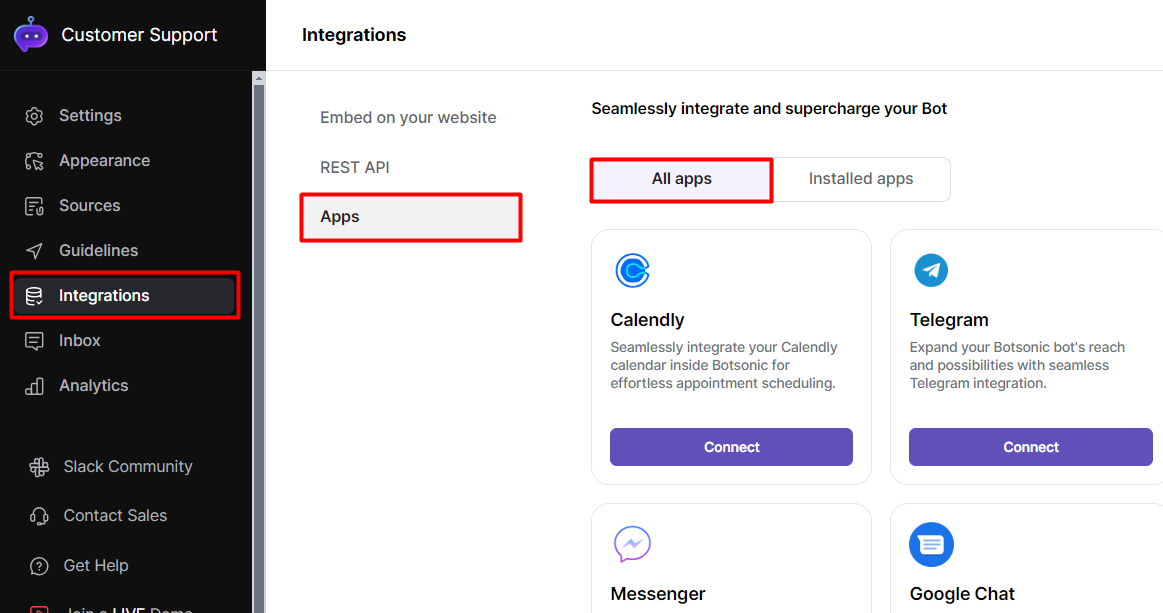
Click [Integrations] from the left hand side menu, then click [Apps]
-
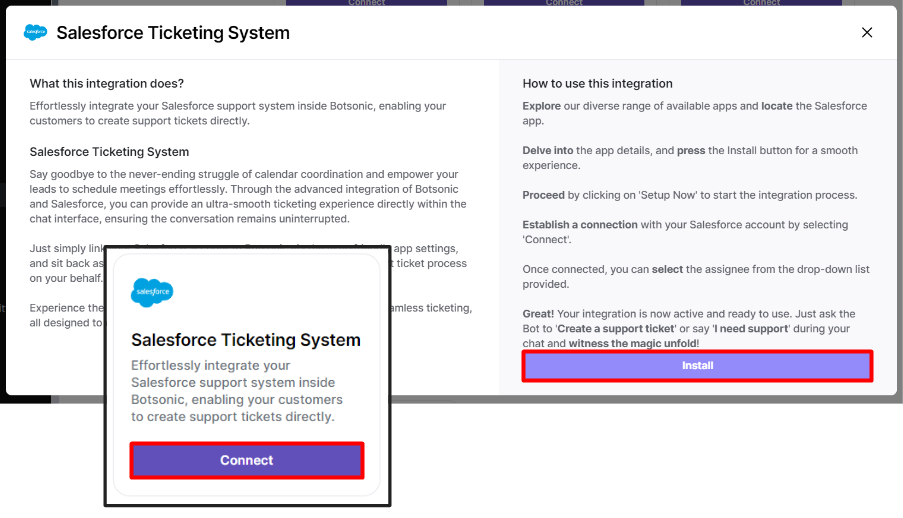
Look for the [Salesforce Ticketing System] integration. Click [Connect], then click [Install]
-
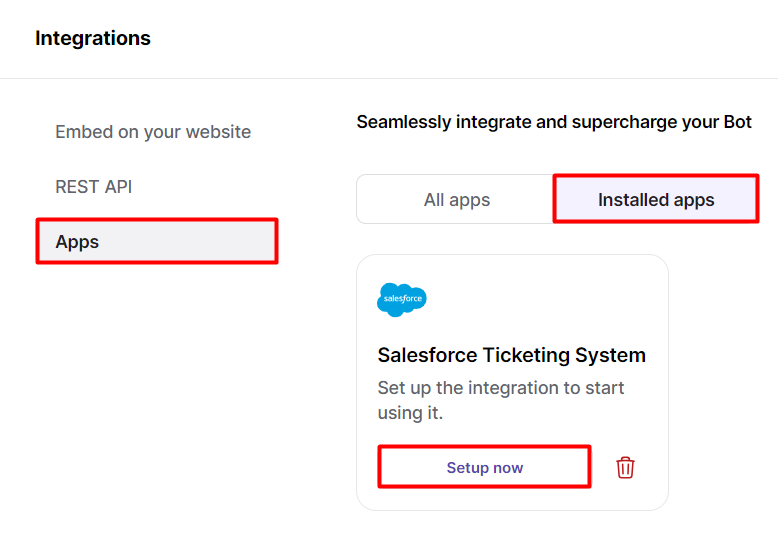
Go to [Installed apps], then click [Setup Now] on the Salesforce integration
-
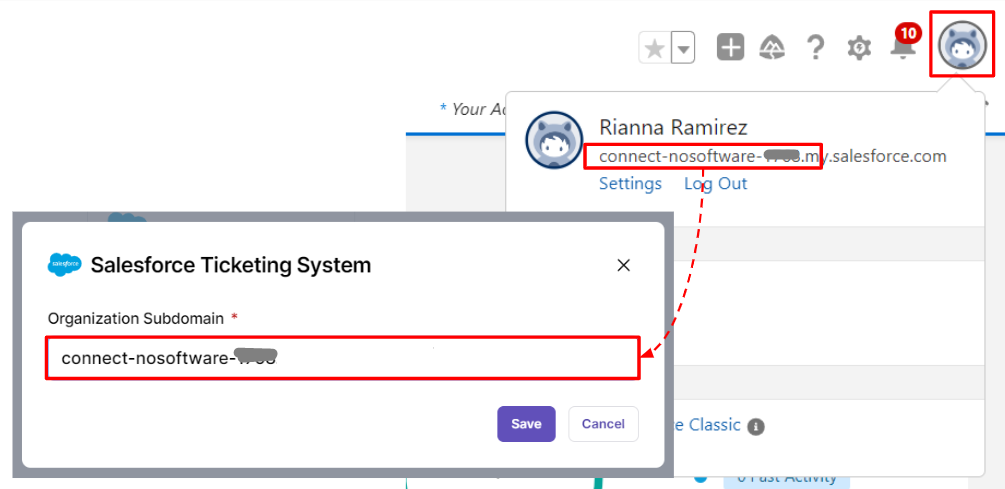
Enter your Salesforce subdomain, then click [Save]. You can find your subdomain when you click your avatar in your Salesforce account.
-
You will be prompted to log into your Salesforce account. Enter your credentials, then click [Log in]

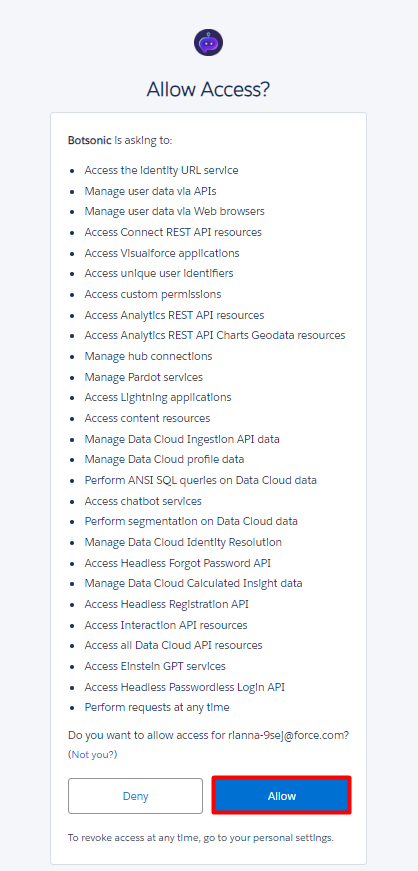
- Click [Allow]
-
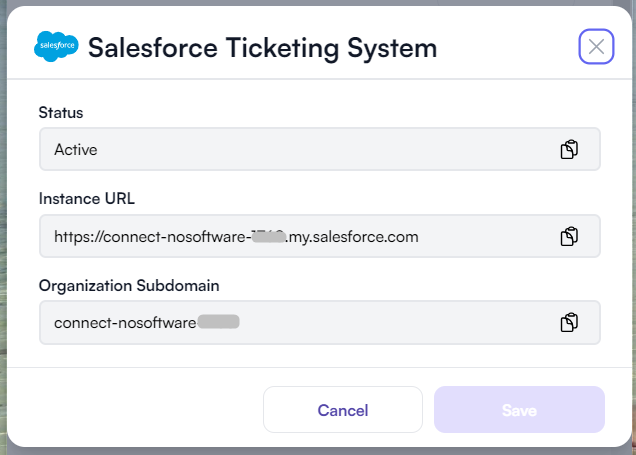
Refresh the page then click [View Details] to check that the connection was successful, all fields should be filled out.

Step 2 - Test the Integration
NOTE: Make sure the Bot is trained with an uploaded file or FAQ that answers the question/message that you're posting
-
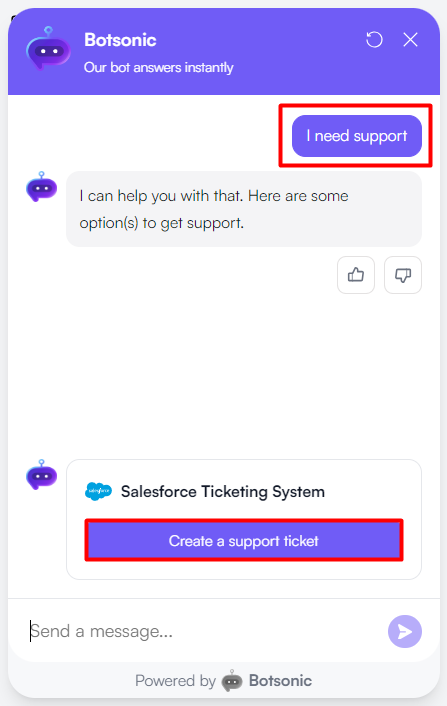
Interact with the chatbot and ask for support, then click [Create a support ticket]
-
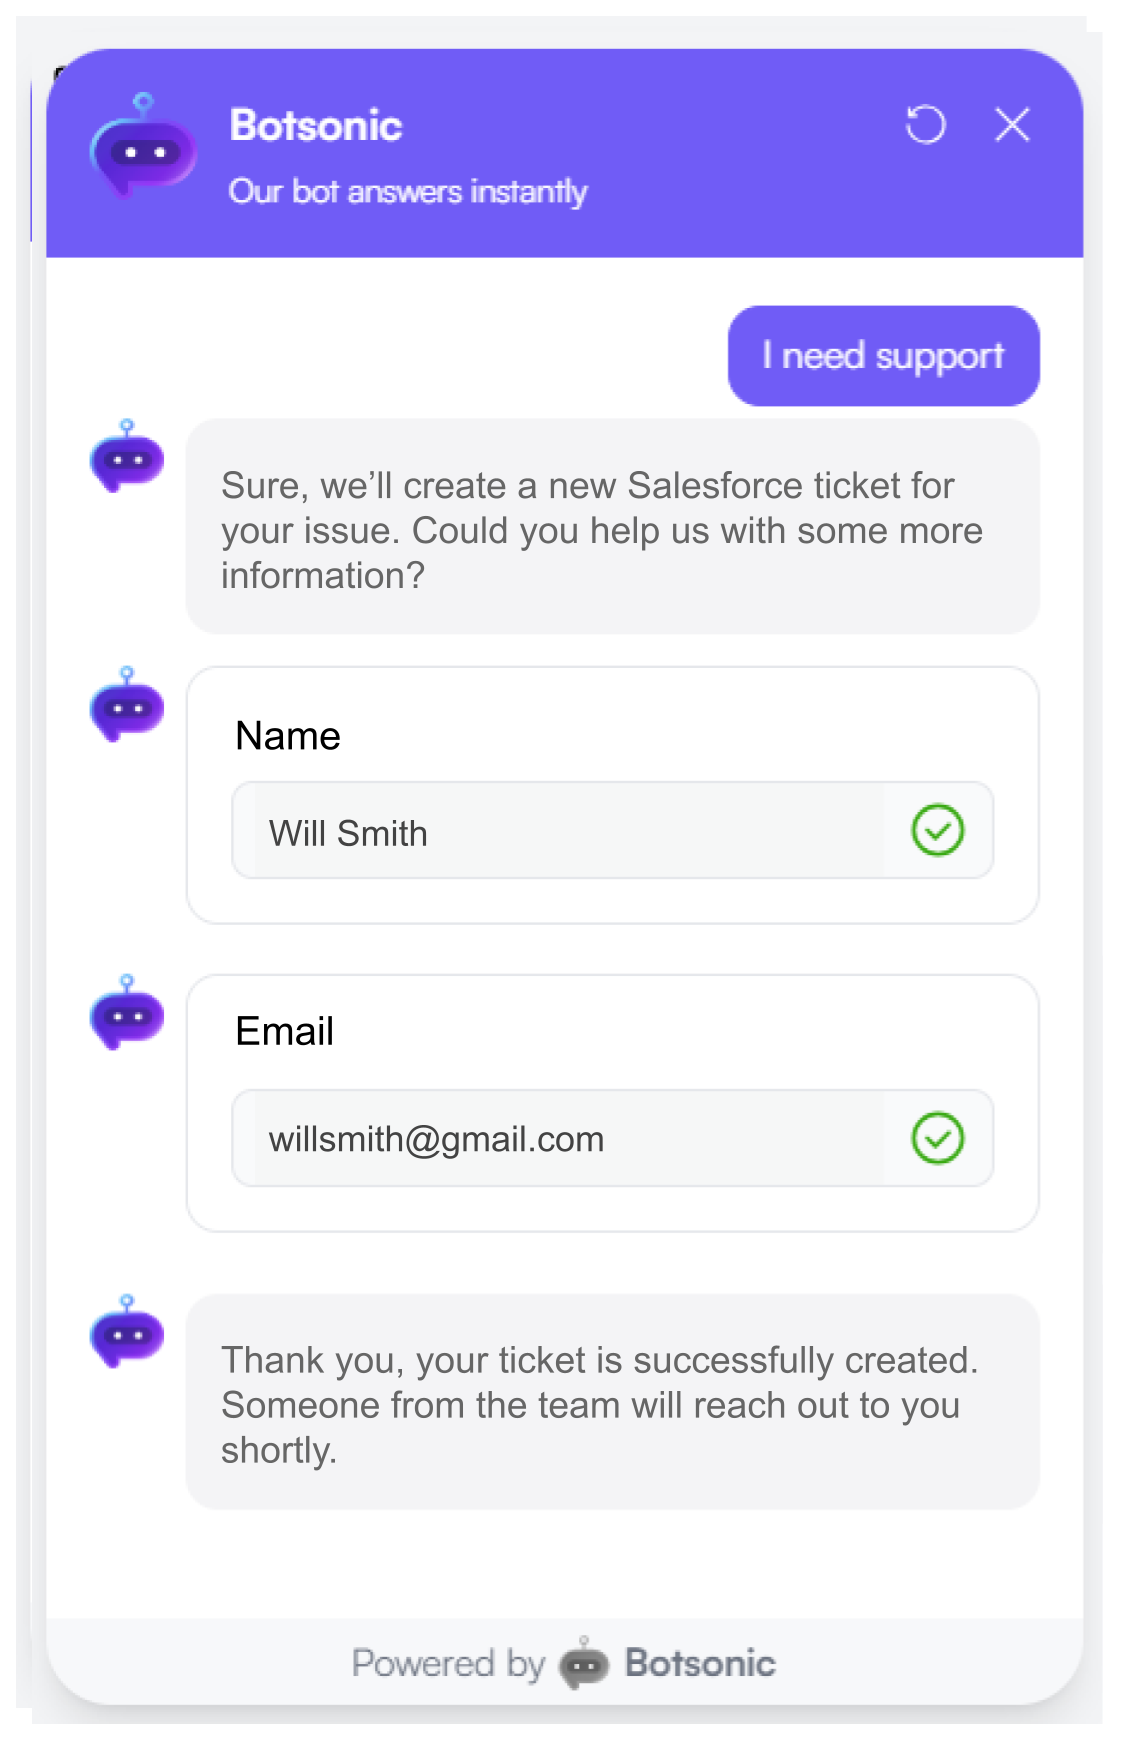
Provide the information requested by the chatbot.
-
Go to your Salesforce Account > Cases to view the newly created ticket.
Updated 9 months ago