
Whatsapp Integration
This integration allows your Bot to respond and answer queries sent through the Whatsapp app.
Step 1- Create an App and Generate a Token from the Meta for Business Suite
-
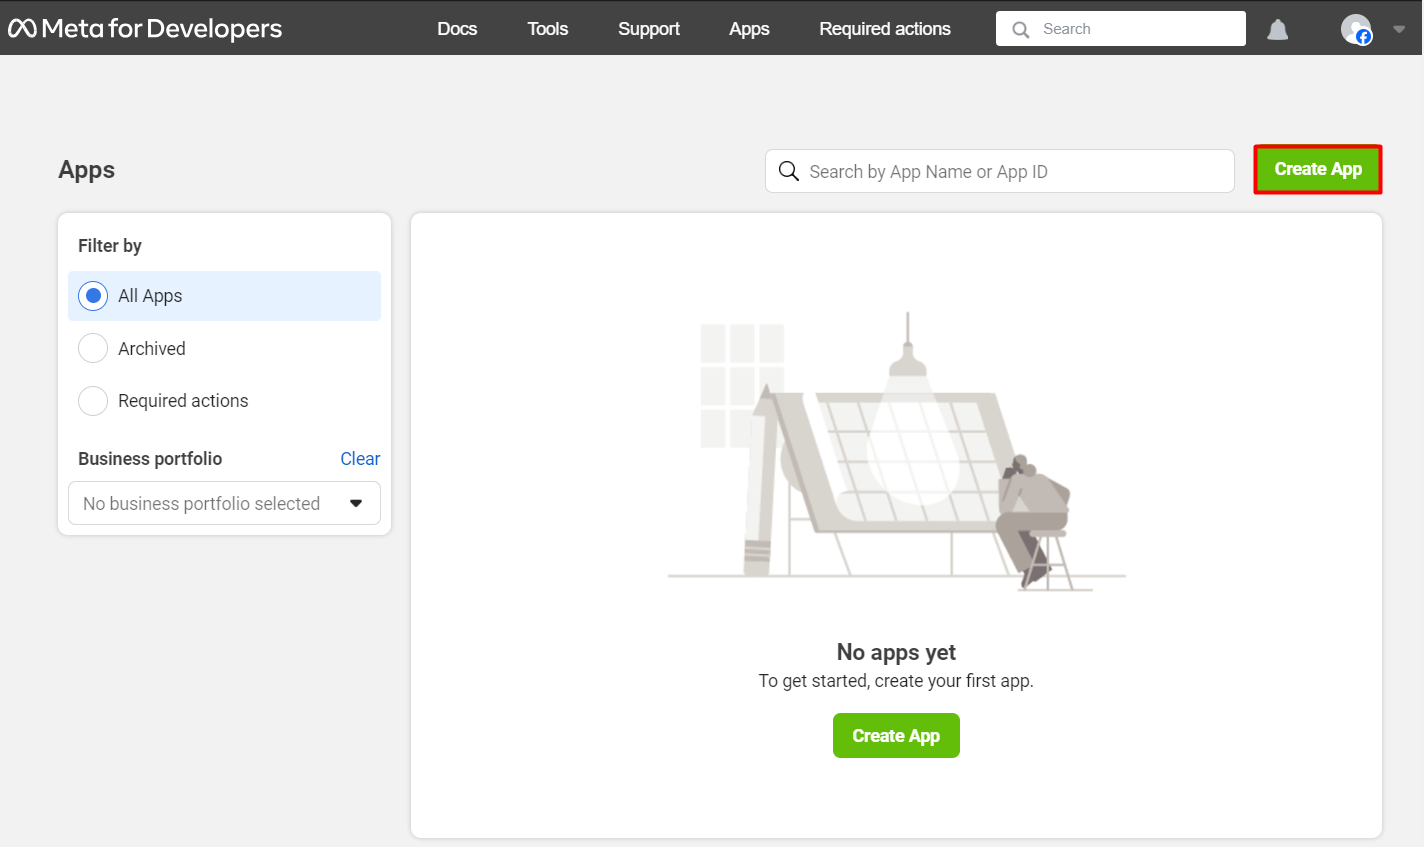
Visit https://developers.facebook.com/apps
- Click the [Create App] button
- NOTE: You need to register yourself as a Meta Developer, if you haven't done this yet, read this step by step guide to Register as a Meta Developer
-
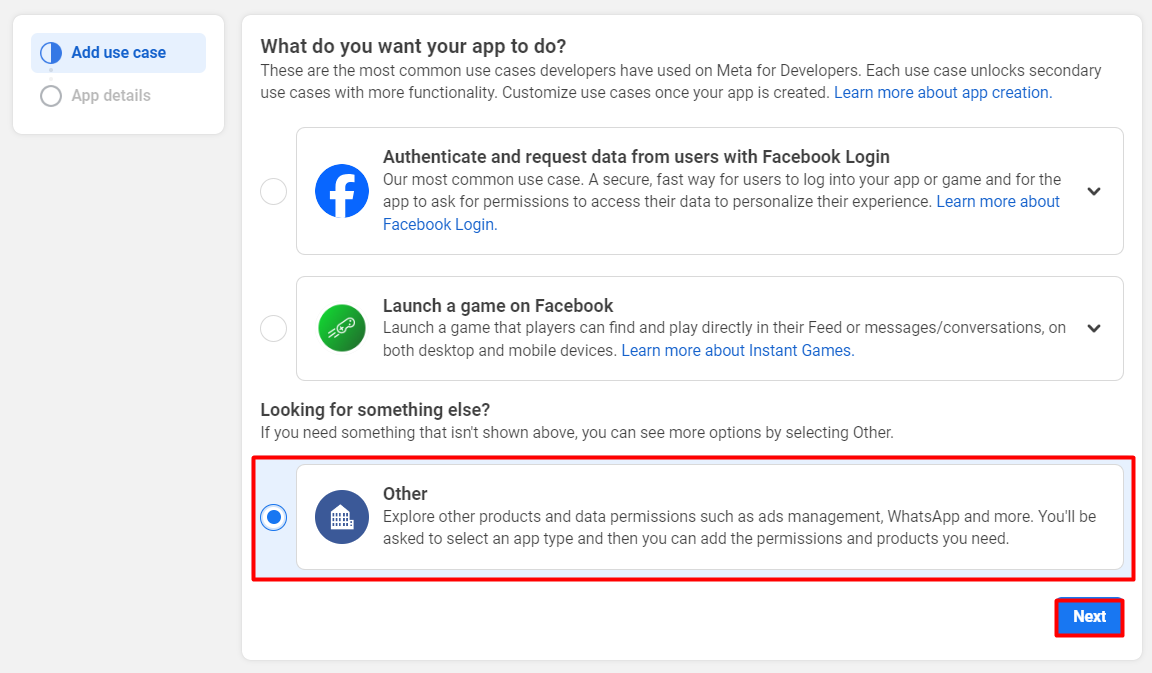
What do you want your app to do? Select [Other], then click [Next]
-
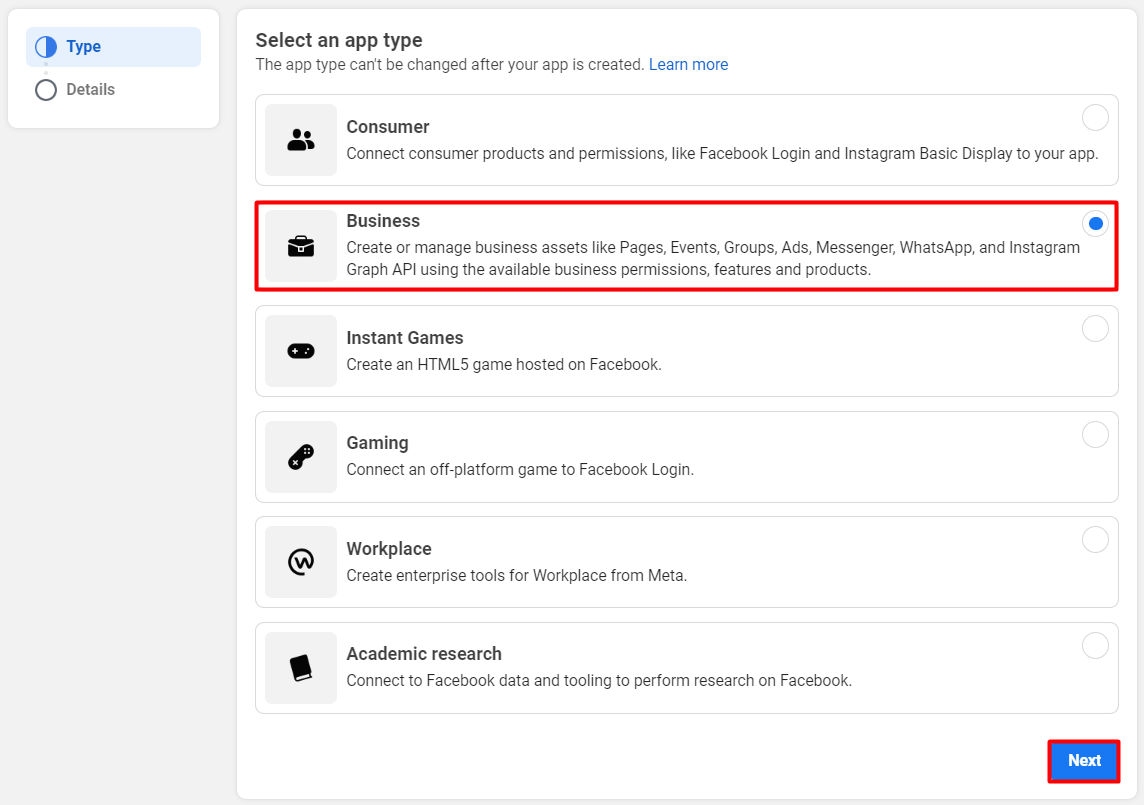
Select an app type. Select [Business], then click [Next]
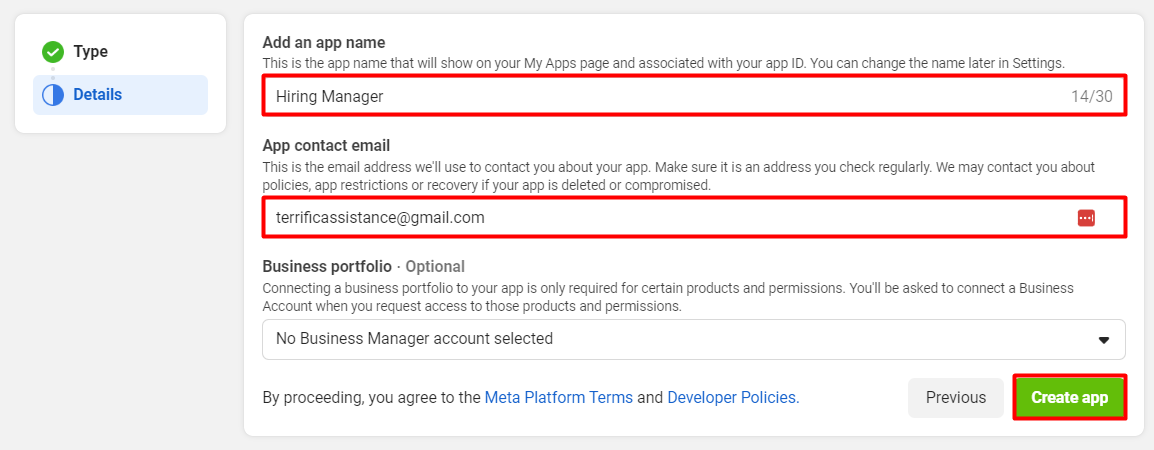
- Add the following details:
- App Name
- App Contact Email
-
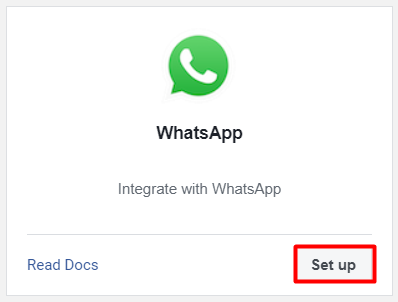
Search for [Whatsapp] then click [Set up]
-
Select your Meta Business Account.
- Click the [Quickstart] tab under the Whatsapp section on the left hand side menu
- Then select a Meta Business Account, then click [Continue]

-
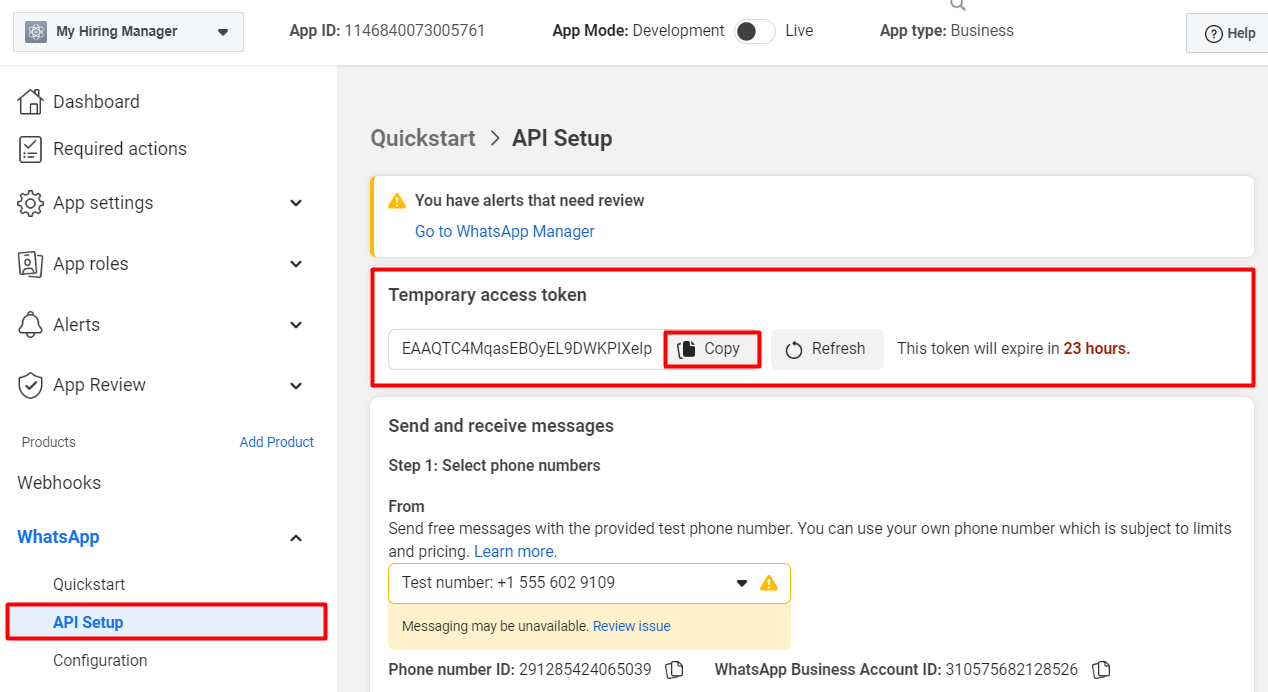
Copy the Temporary Access Token
- Click the [API Setup] tab under the Whatsapp section on the left hand side menu
- Copy the API access token (you will need it on the next steps). This token is specific to connected phone number.
- NOTE: Save the token somewhere where you can copy it, if it gets lost, you'll need to create a new one.
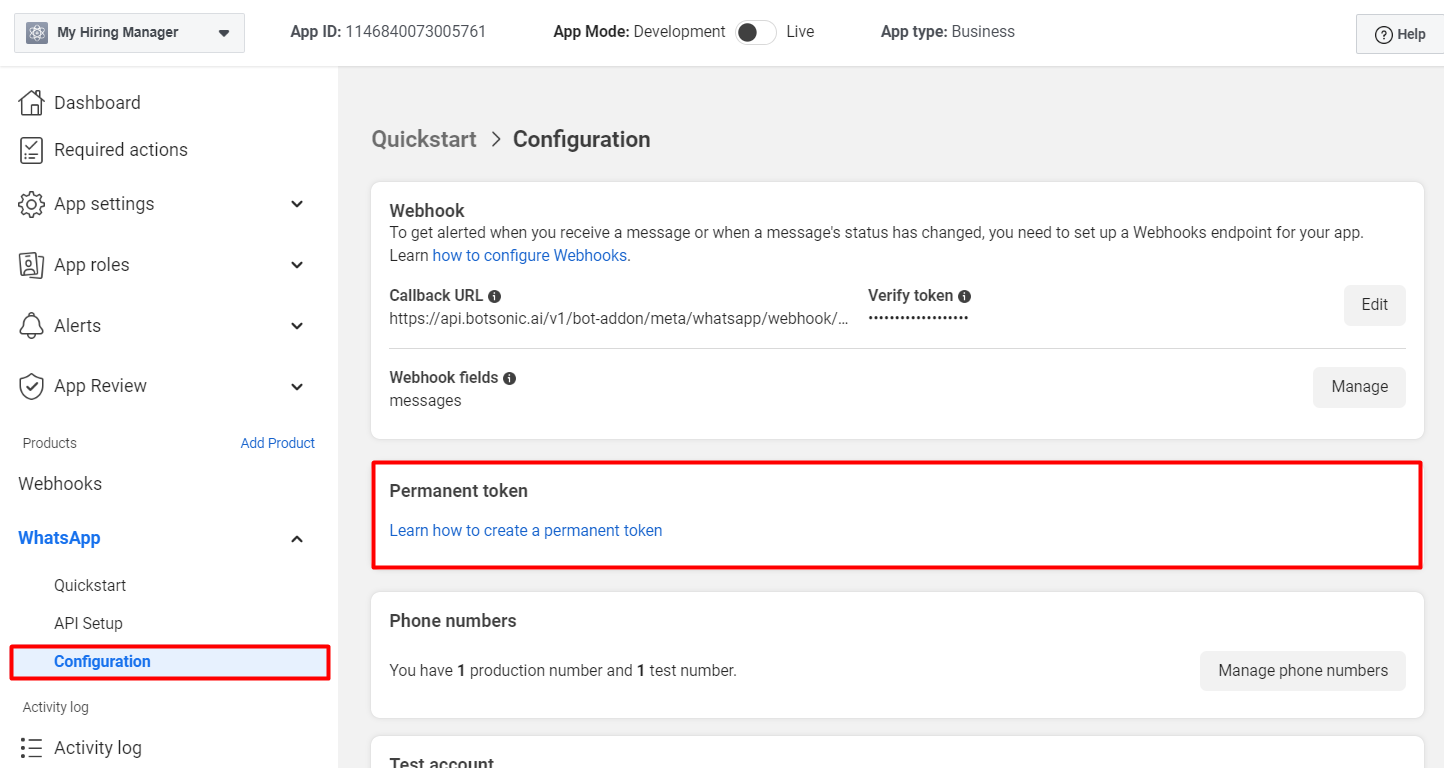
To create a permanent token, click [Configuration] on the left hand side menu under the WhatsApp section then follow the same steps above.
Step 2 - Connect & Install
-
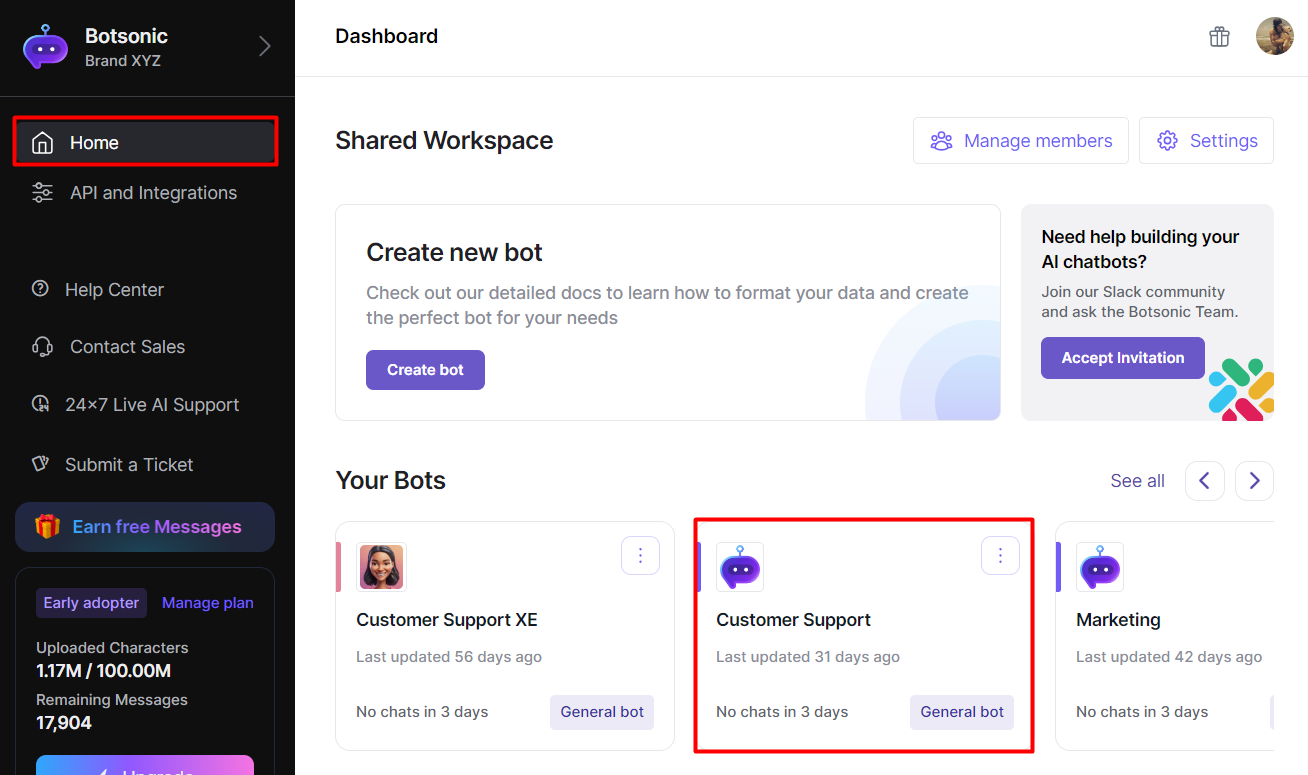
Navigate to your Botsonic Dashboard by clicking on [Home] from the left hand side menu. Then click and open the Bot you want to connect. If you haven't created a Bot yet, read thisQuick Start Guide.
-
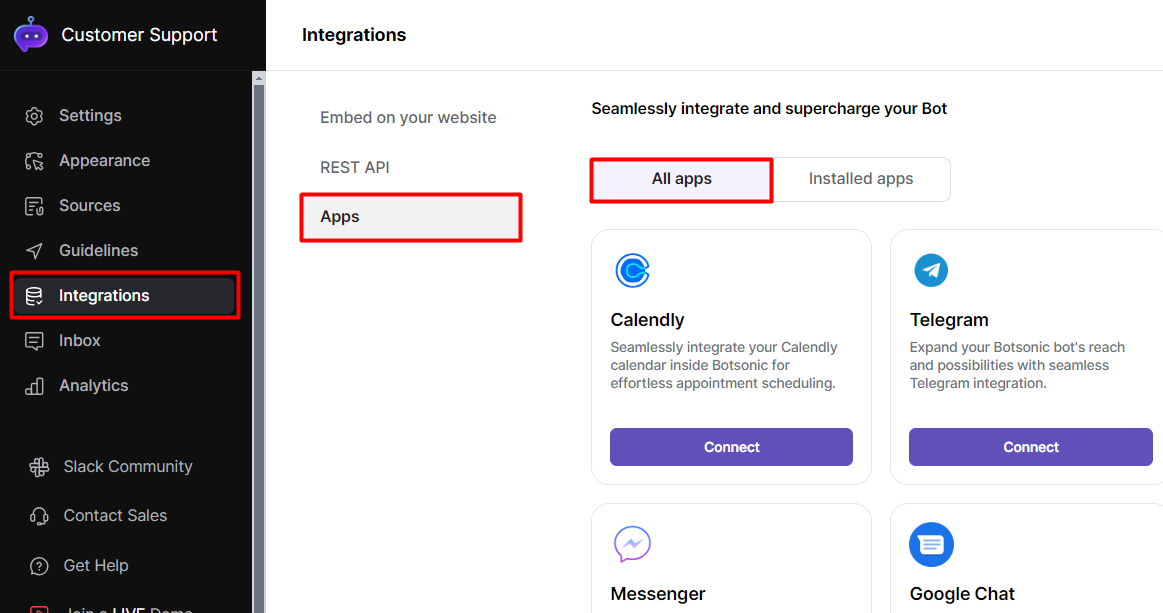
Click [Integrations] from the left hand side menu, then click [Apps]
-
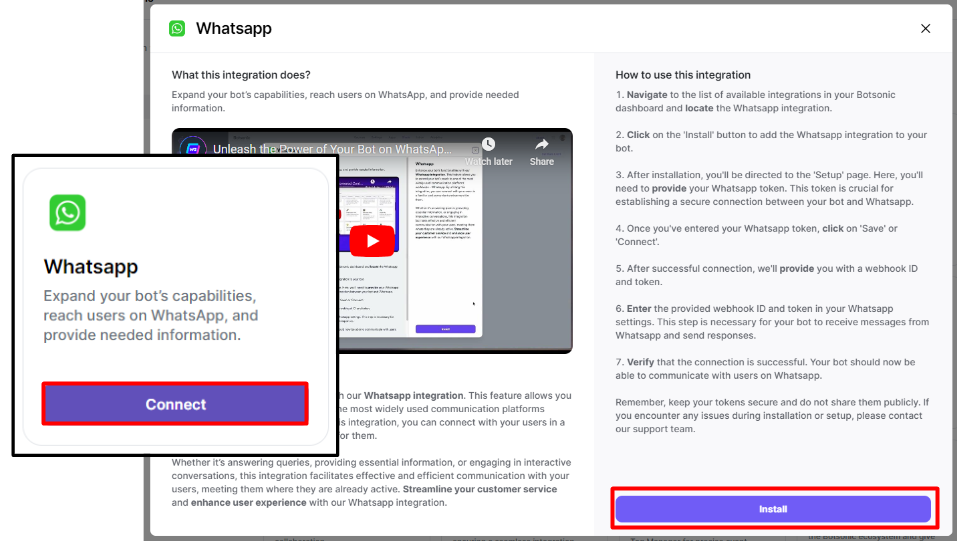
Look for the [Whatsapp] integration. Click [Connect], then click [Install]
-
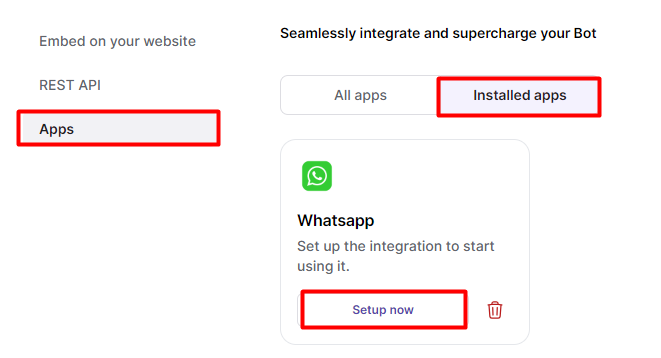
Go to [Installed apps], then click [Setup Now] on the [Whatsapp] integration box
-
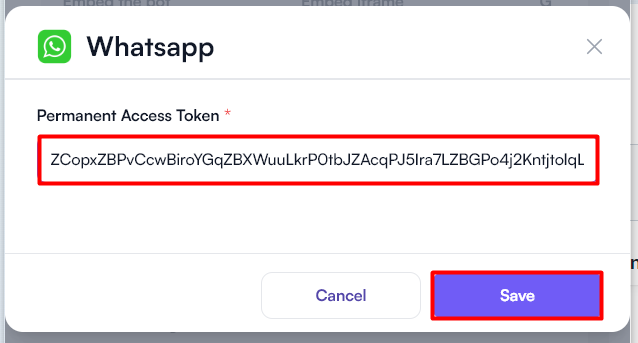
Paste the Whatsapp access token
-
Click SAVE
-
-
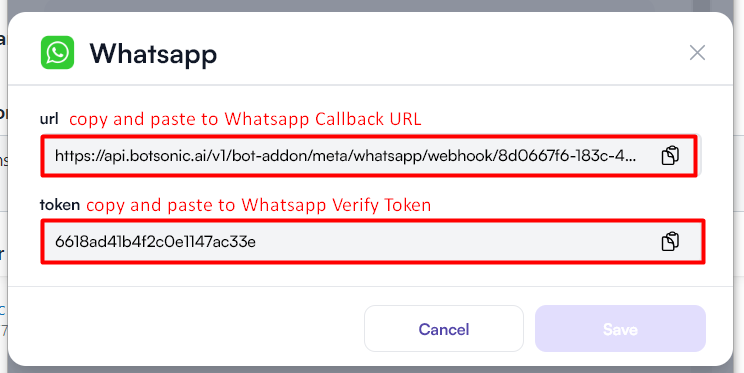
Copy the URL and Token (from Botsonic) and paste it into the Whatsapp settings page in your Meta Suite account
-
Copy the URL and Token from your Botsonic account
-
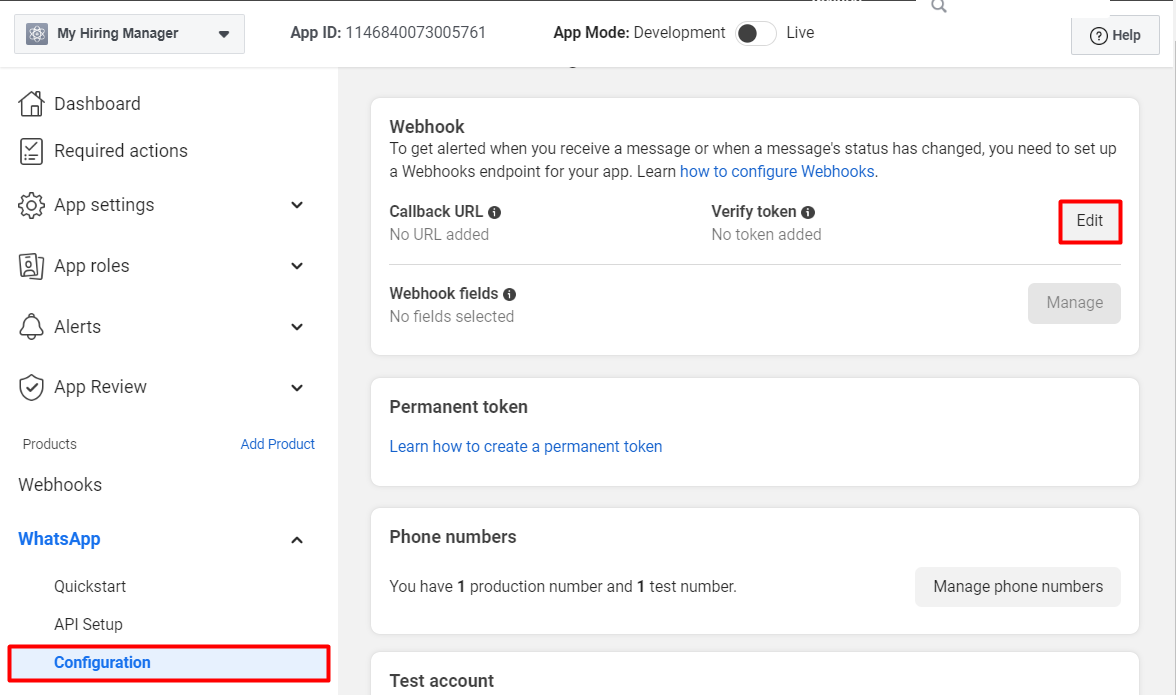
Go to the Whatsapp settings in your Meta Suite account
- Click [Configuration] from the left hand side menu
- Click [Edit] on the Webhook section
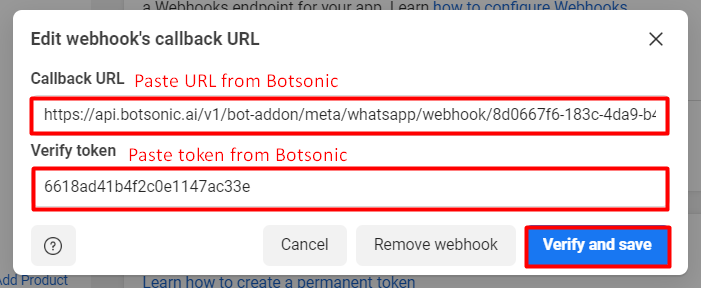
- Paste the Botsonic URL into the [Callback URL] field
- Paste the Botsonic Token into the [Verify Token] field
- Click [Verify and Save]
-
-
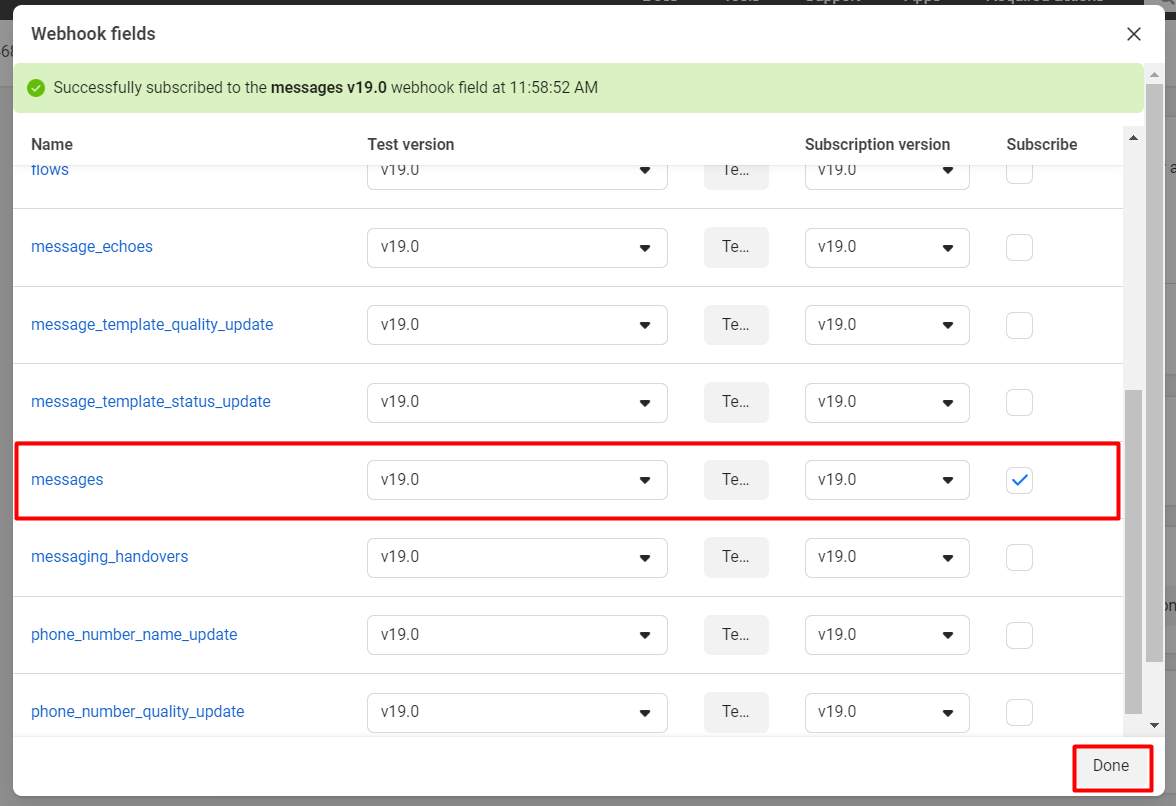
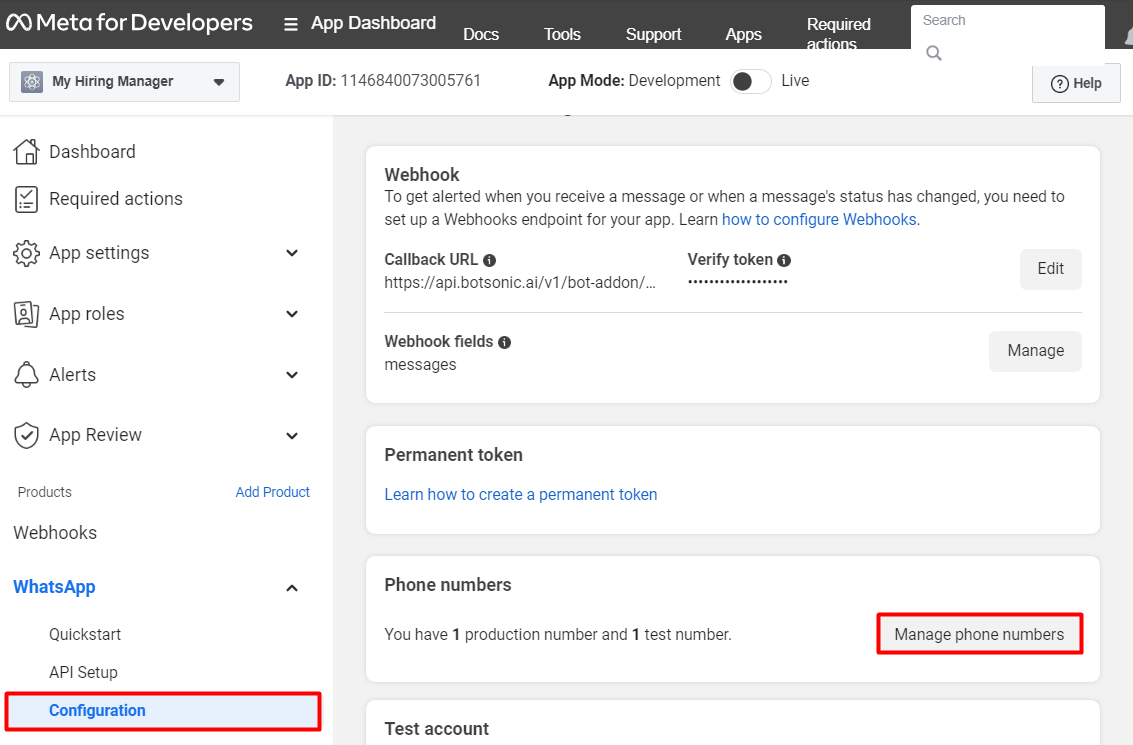
On the [Configuration] tab
- Click [Manage] from the Webhook section
- Check the [Messages] box
- Click [Done]

Step 3 - Go through the set up checklist
Go through the following and make sure it's been setup correctly
Phone Number
- On the Meta for Developers page, make sure you have 1 production number and 1 test number. To set this up:
- Click [Configuration] from the left hand side menu under the Whatsapp section
- Click [Manage phone numbers] on the Phone number section
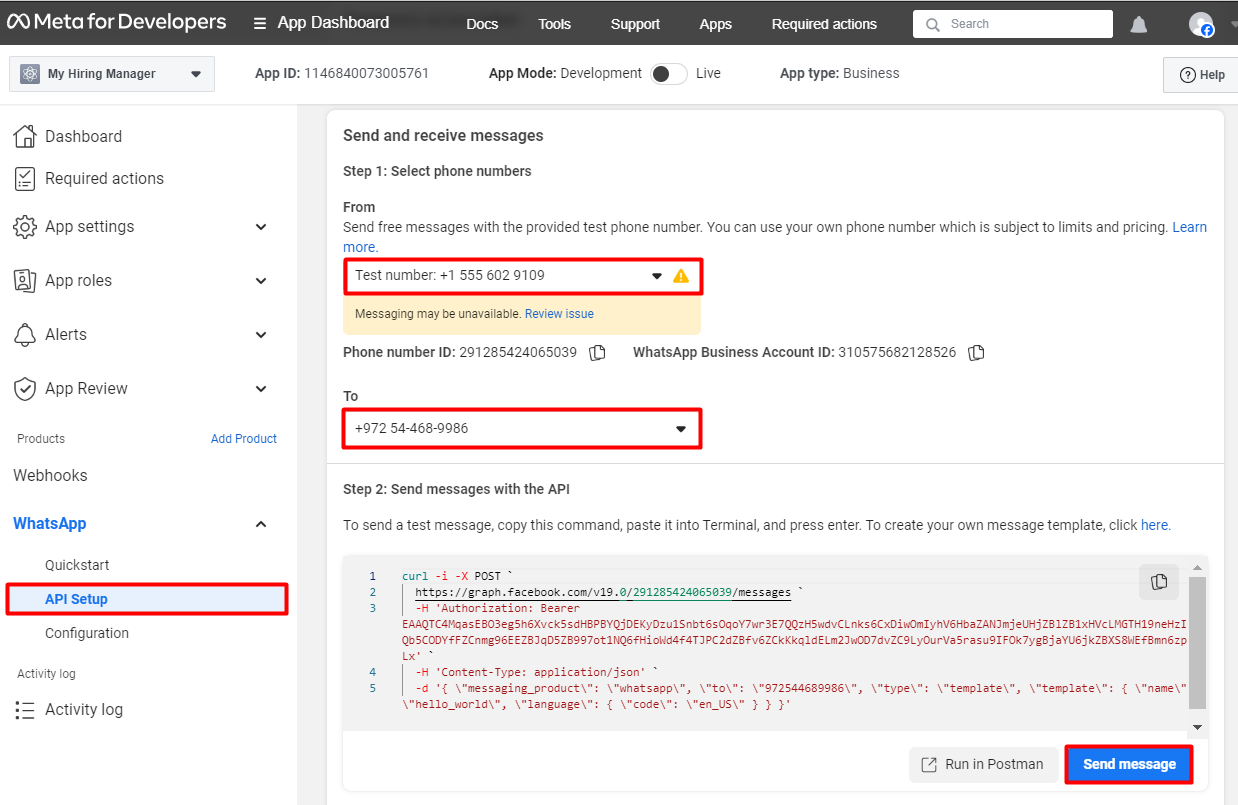
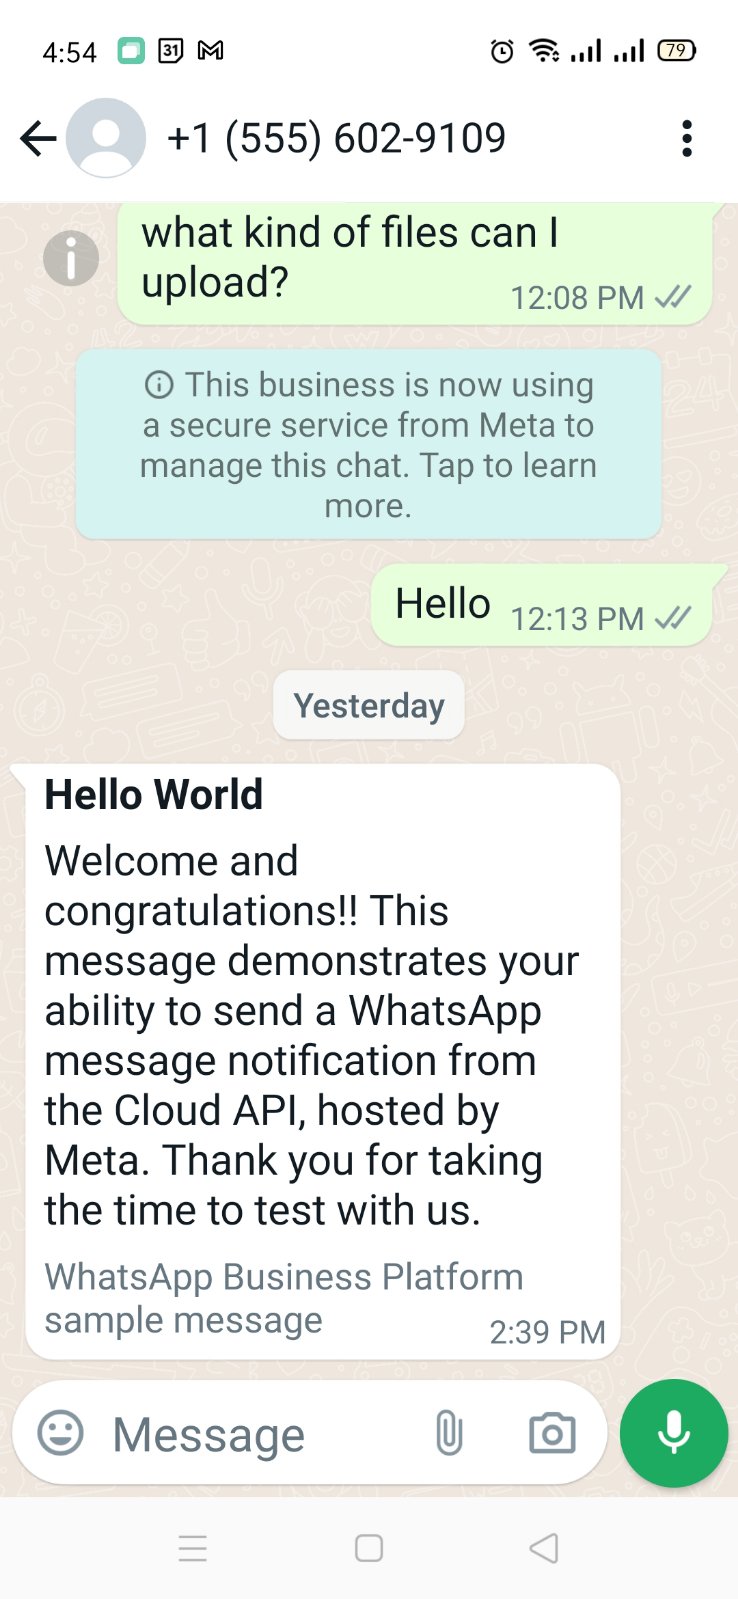
To send a test message, click [API Setup] under the Whatsapp section. Select a "from" test number and a "to" number, then click [Send message].You should receive a message like this:
-
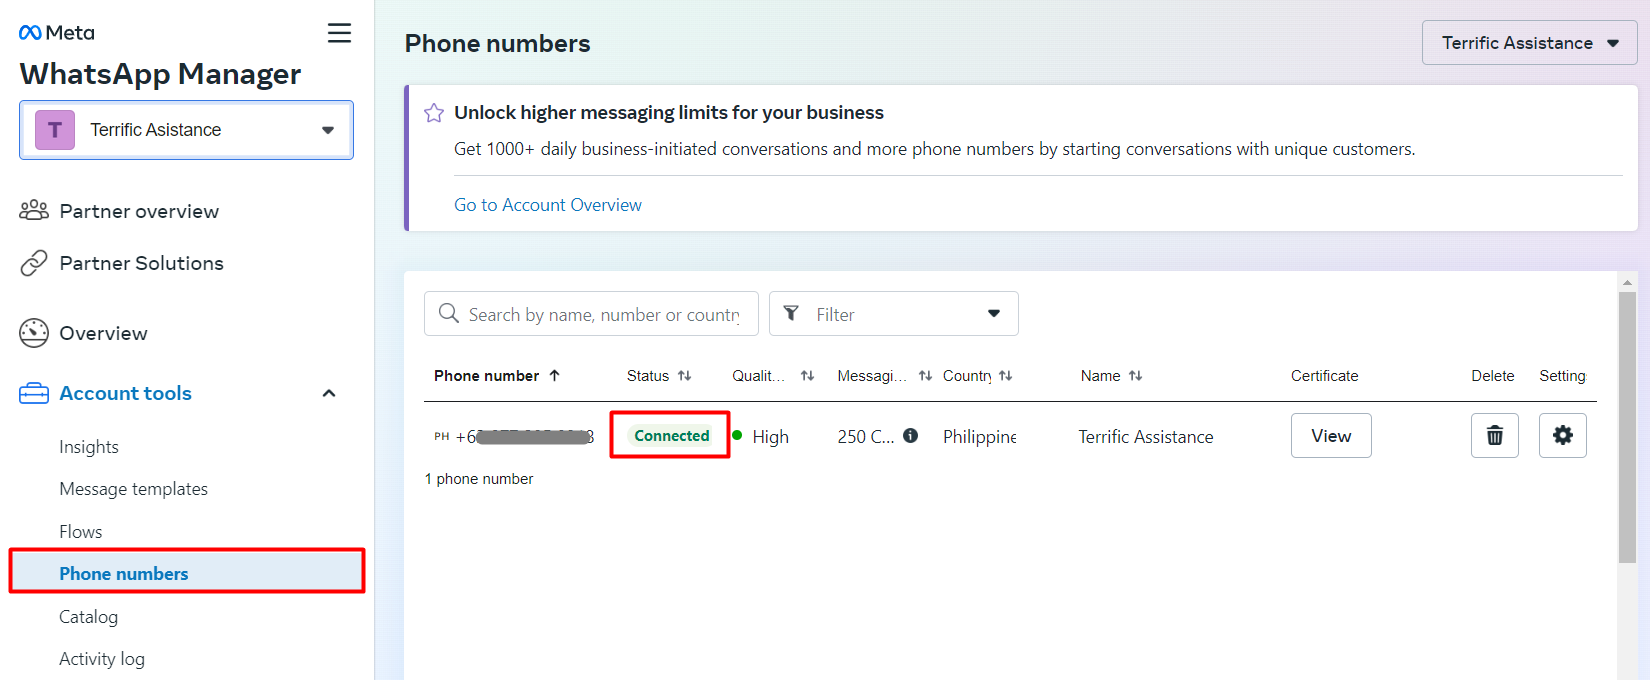
Confirm that the phone you've added has a "connected" status
-
Click the [settings icon], then select [Whatsapp Manager]
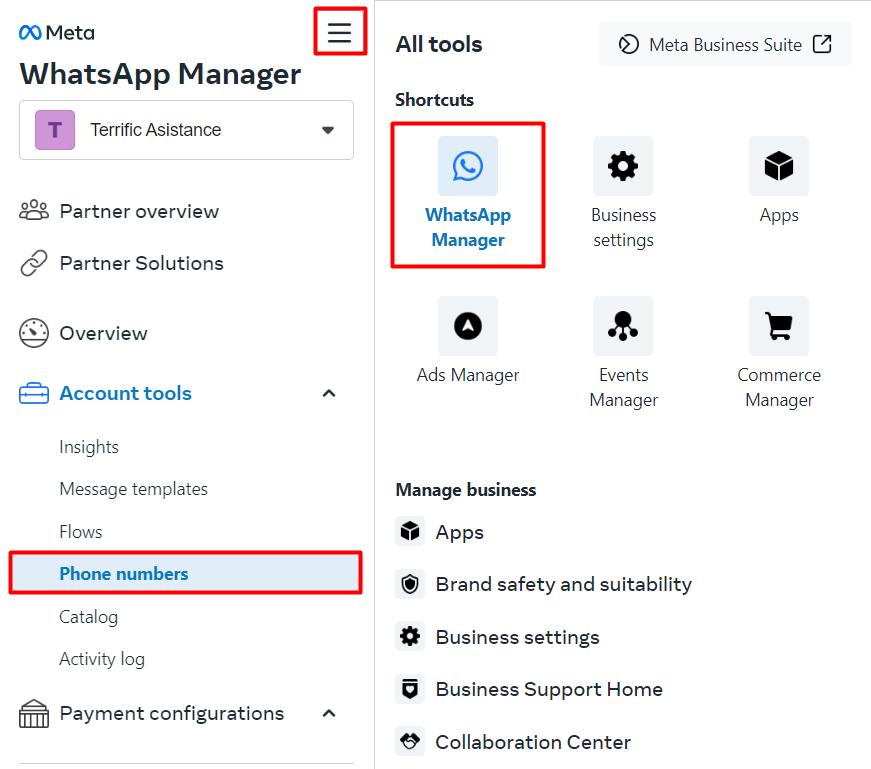
-
Select [Phone numbers] from the left hand side menu. Your phone number you've added should be listed with a "Connected" status
Whatsapp Profile
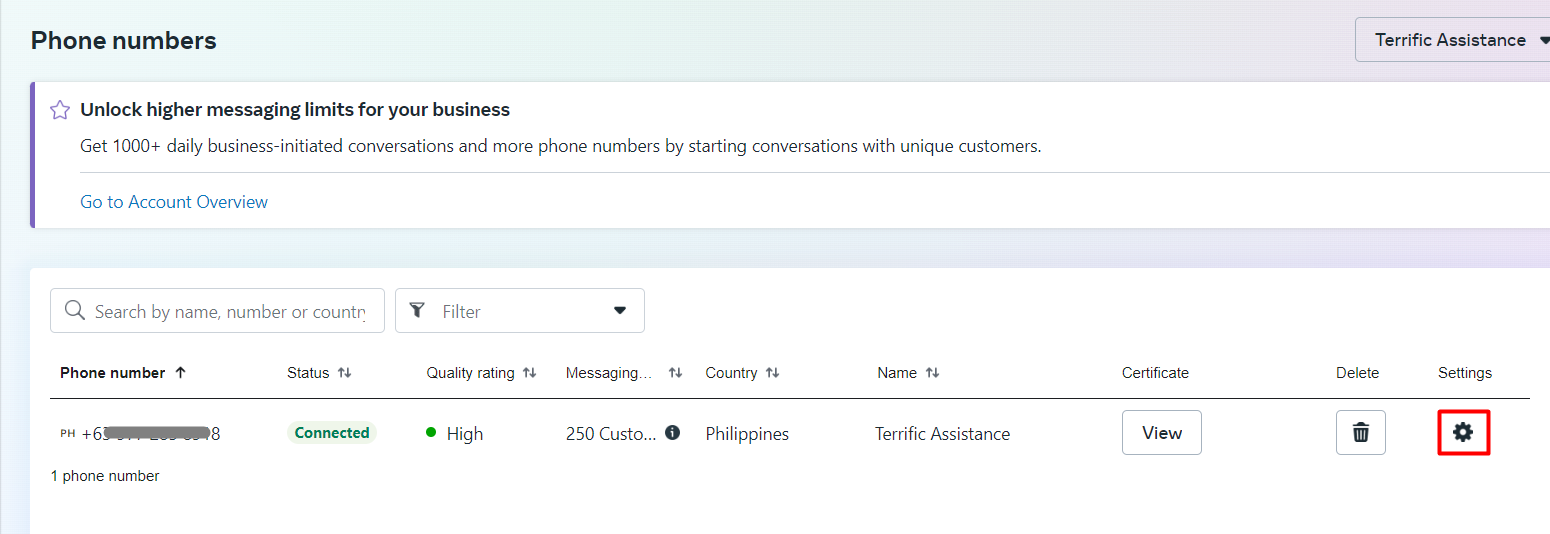
Update your WhatsApp profile. On the Phone numbers page:
-
Click the [settings icon] of the phone number you've added
-
Then select [Profile] from the left hand side menu
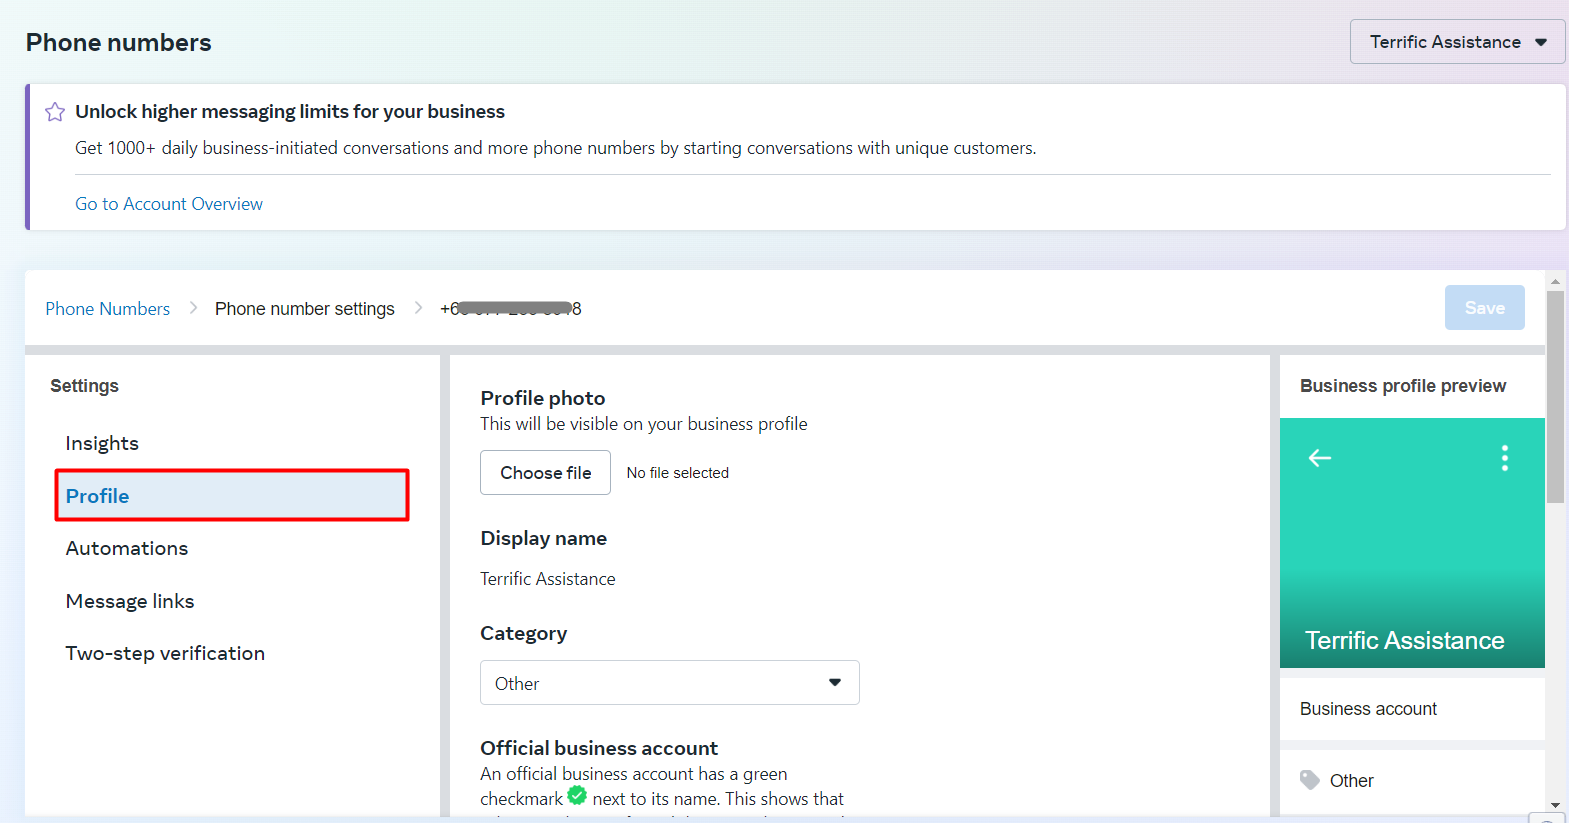
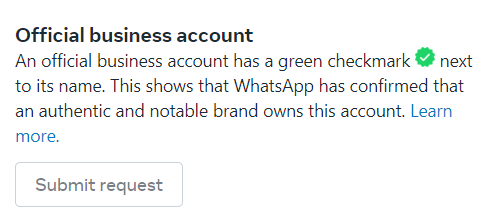
Official business account is not mandatory, but if you want to get searched on Whatsapp, you'll have to submit a request to verify your business.
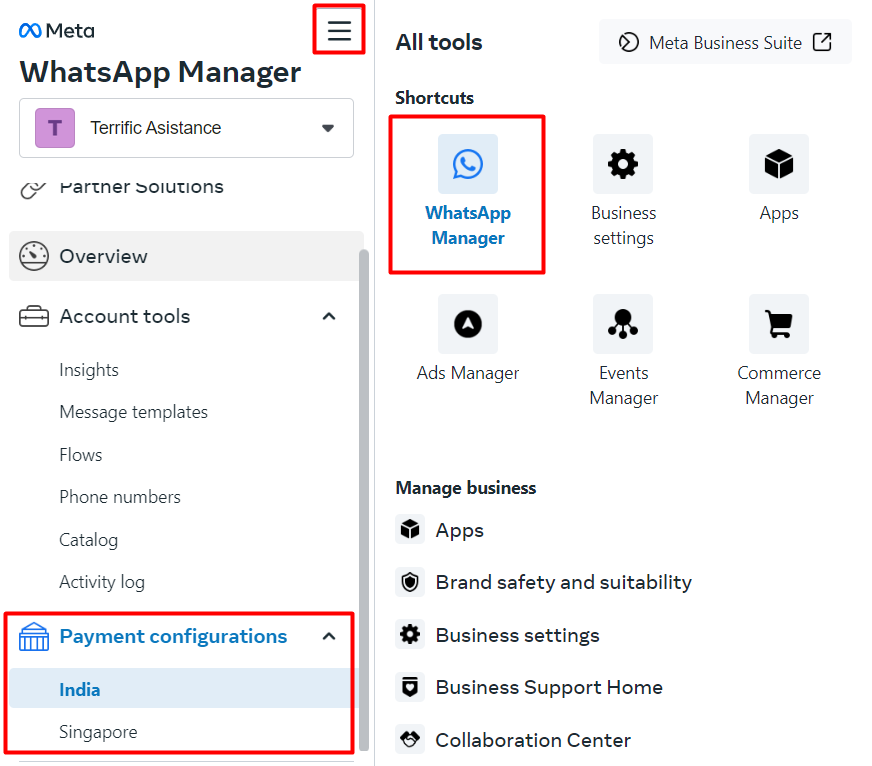
If you want to receive payments, go to the WhatApp Manager the refer to the [Payment configurations] tab on the left hand side menu
Business Info
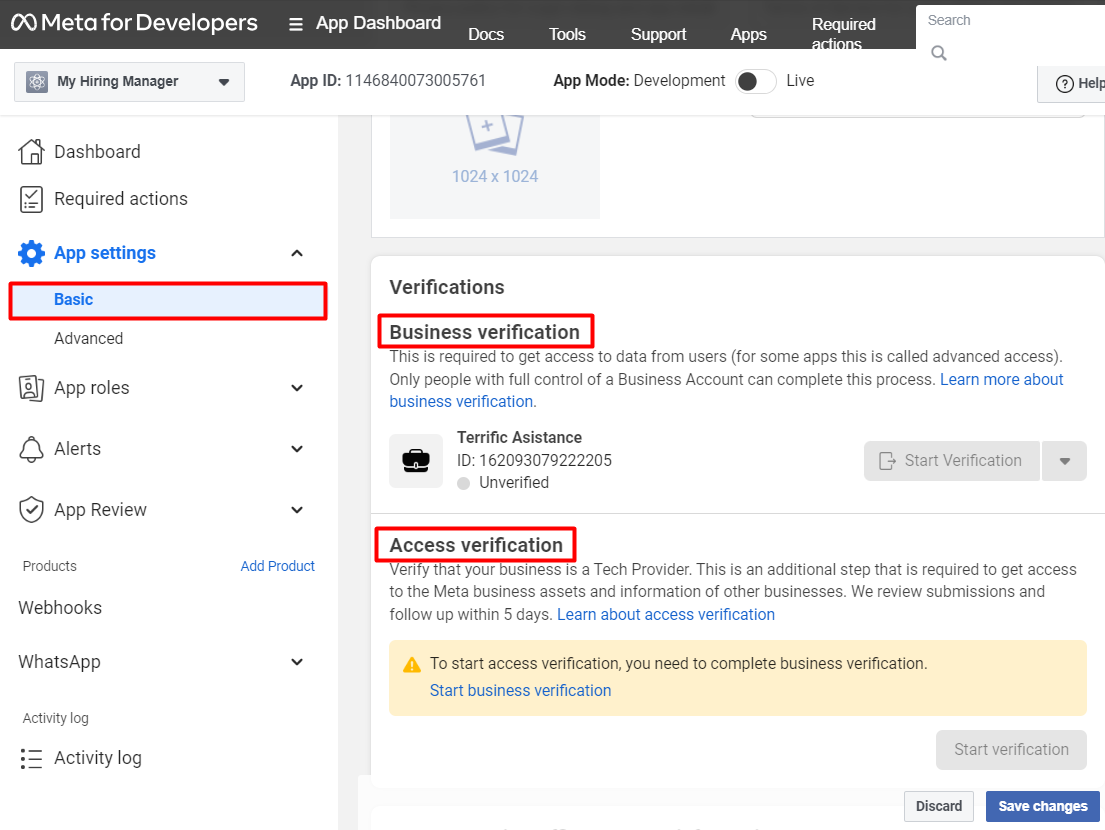
On the Meta for Developers page, make sure your business information has been verified, to do this:
- Click [Basic] under the App settings on the left hand side menu
- Proceed with the Business verification process
- Then continue with the Access verification process
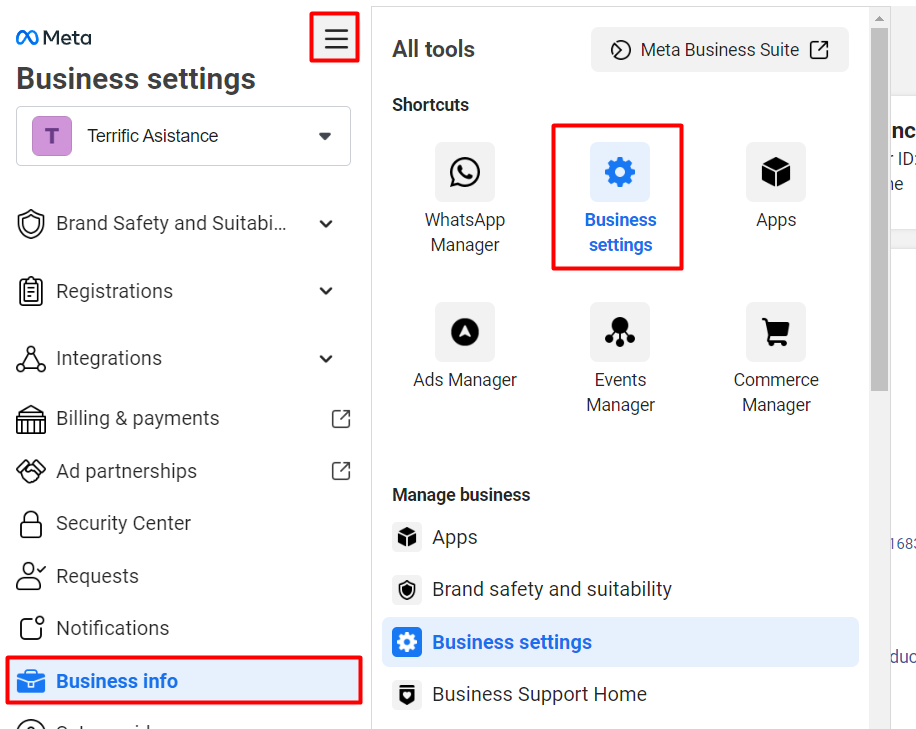
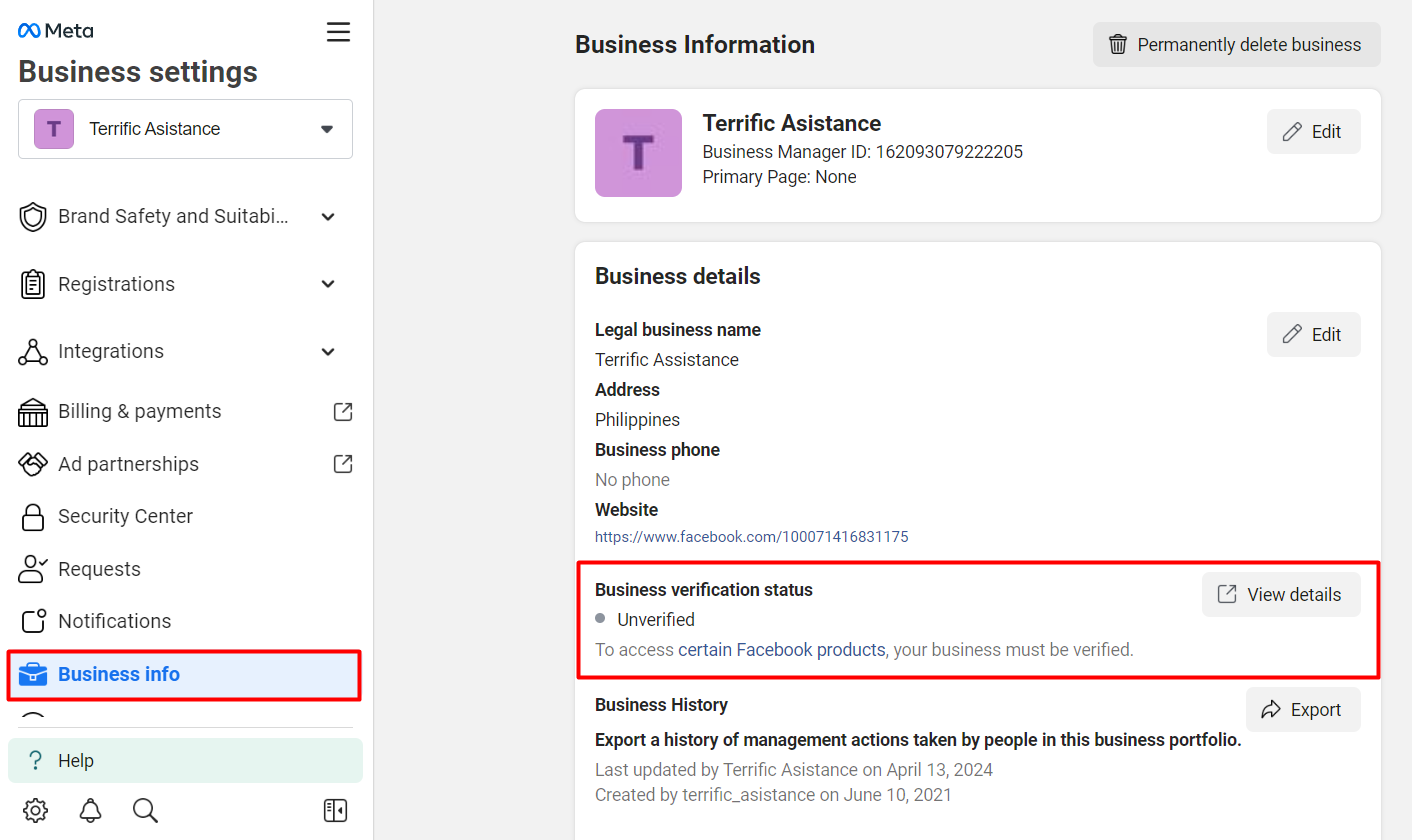
To check your business verification statusGo to https://business.facebook.com/settings/info, click the [settings icon] then select [Business Settings]
Click [Business info] from the left hand side menu
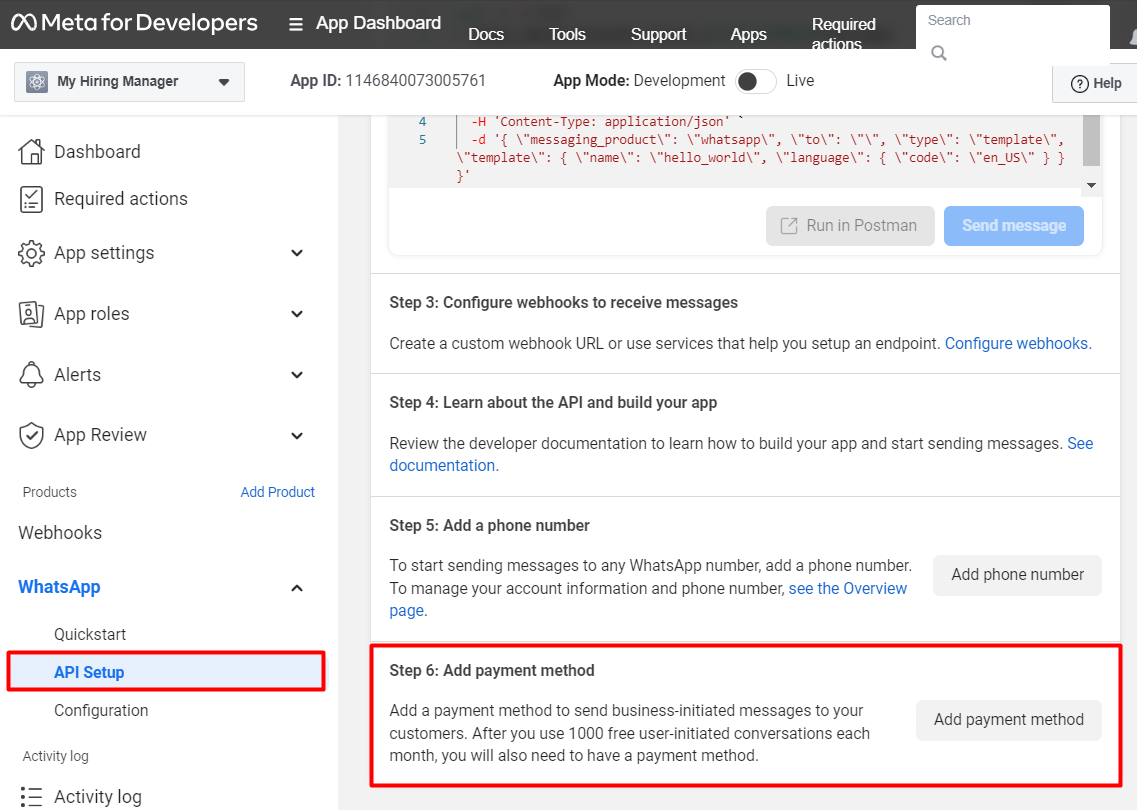
Payment Info
On the Meta for Developers page, make sure your payment information has been added, to set this up:
- Click [API Setup] under the WhatsApp settings on the left hand side menu
- Click [Add payment method]
Step 4 - Submit Whatsapp App for Review
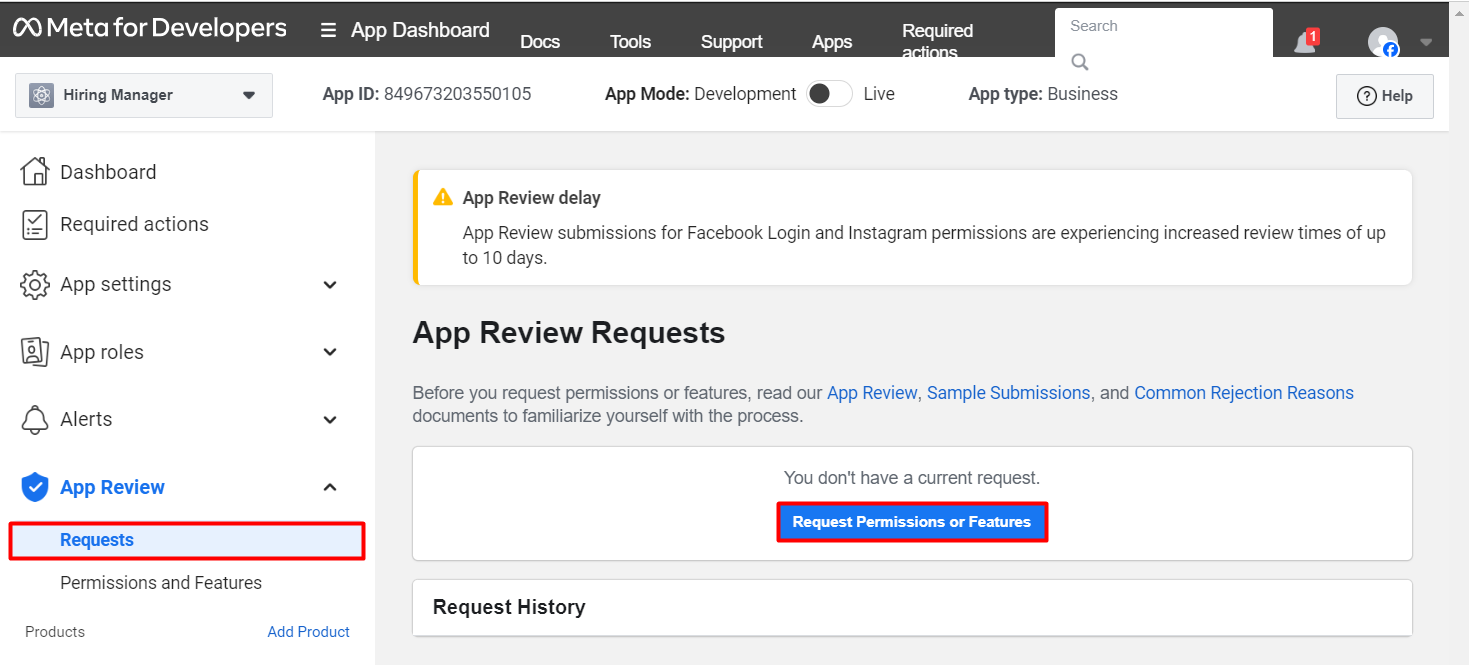
- Go to your Whatsapp settings page > App Review > Requests
- Click [Request Permissions or Features]
- Select and submit request/s for advanced access for required features. For more information, read this guidehttps://developers.facebook.com/docs/whatsapp/embedded-signup/app-review/
Guidelines for Submitting the App for Review
-
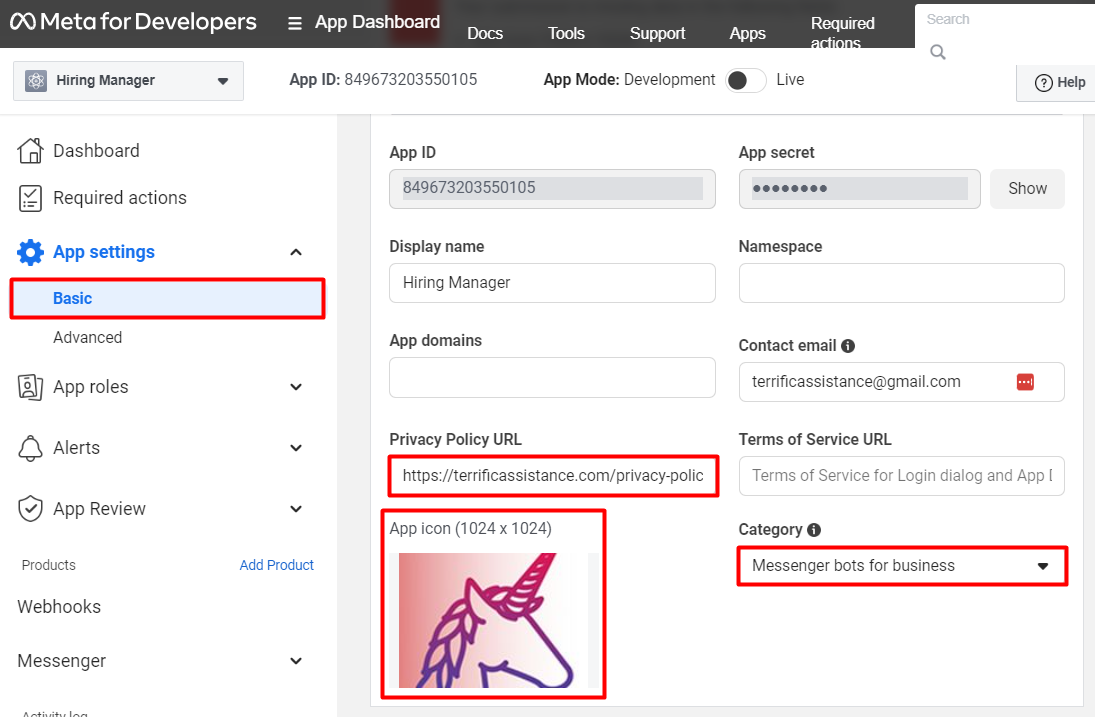
Update the App's Basic Settings. Click [Basic] from the [App settings] section on the left hand side menu and update the following:
-
App Icon - upload an icon for your app
-
Privacy Policy URL - create and paste the URL of your privacy policy page
-
Category - select "Messenger bots for business
-
-
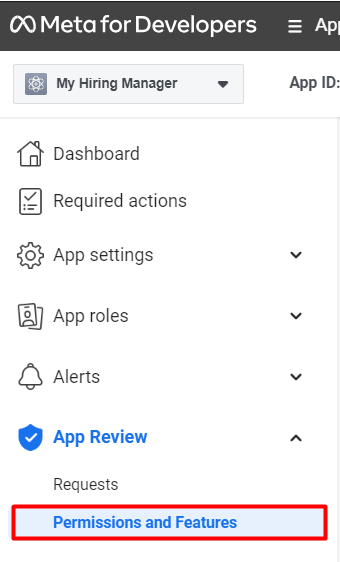
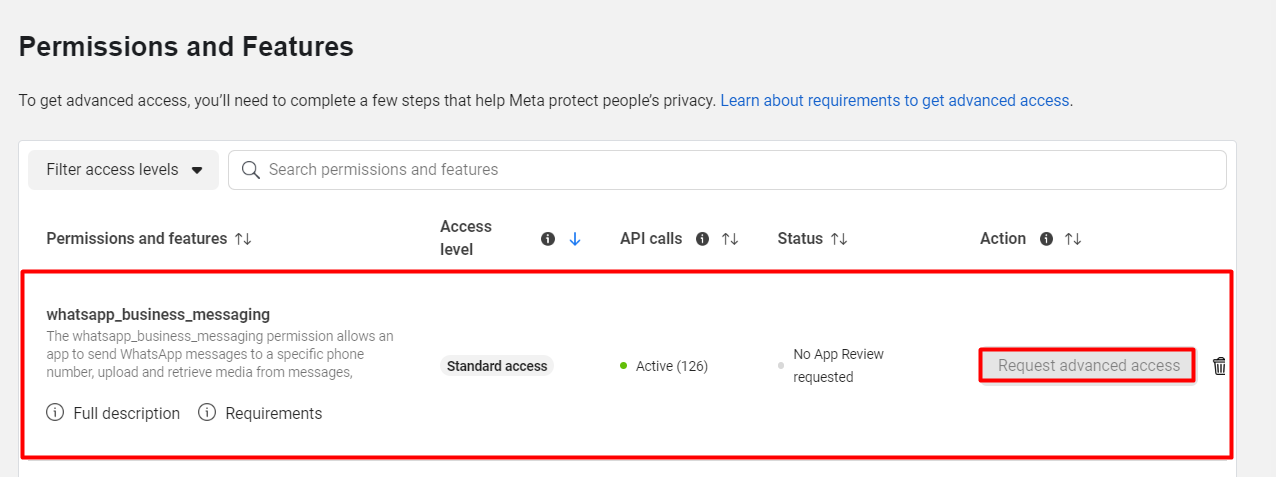
Select Permissions and Features.
-
Click [Permissions and Features] from the [App Review] section.
-
Click the [Request Advanced Access] button for whatsapp_business_messaging
-
-
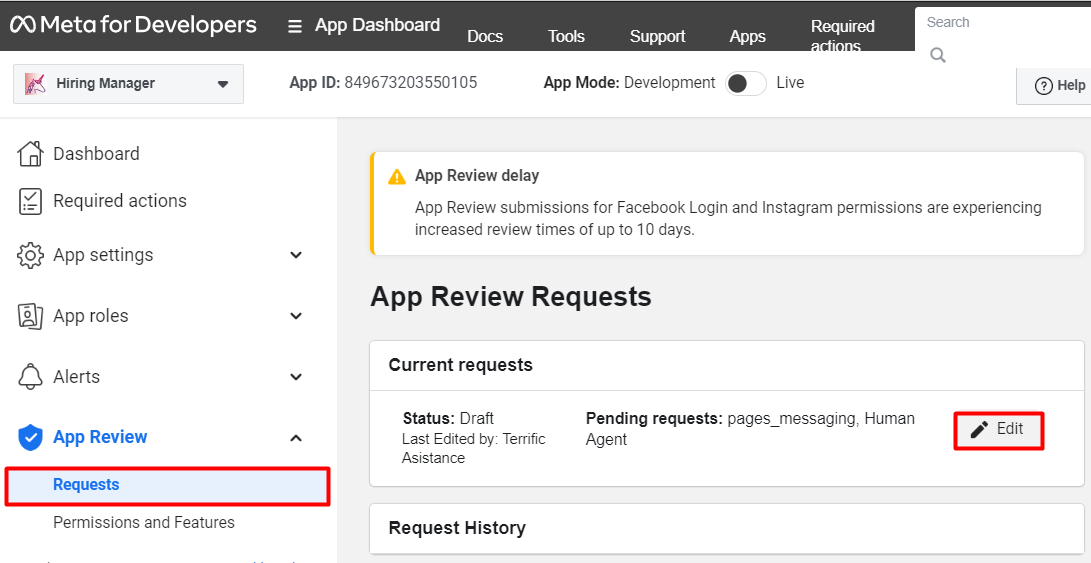
Edit, Review, and Submit the Request
-
Click [Requests] from the [App Review] section, then click the [Edit] button in the [Current Requests] section
-
Read and follow the guidelines provided
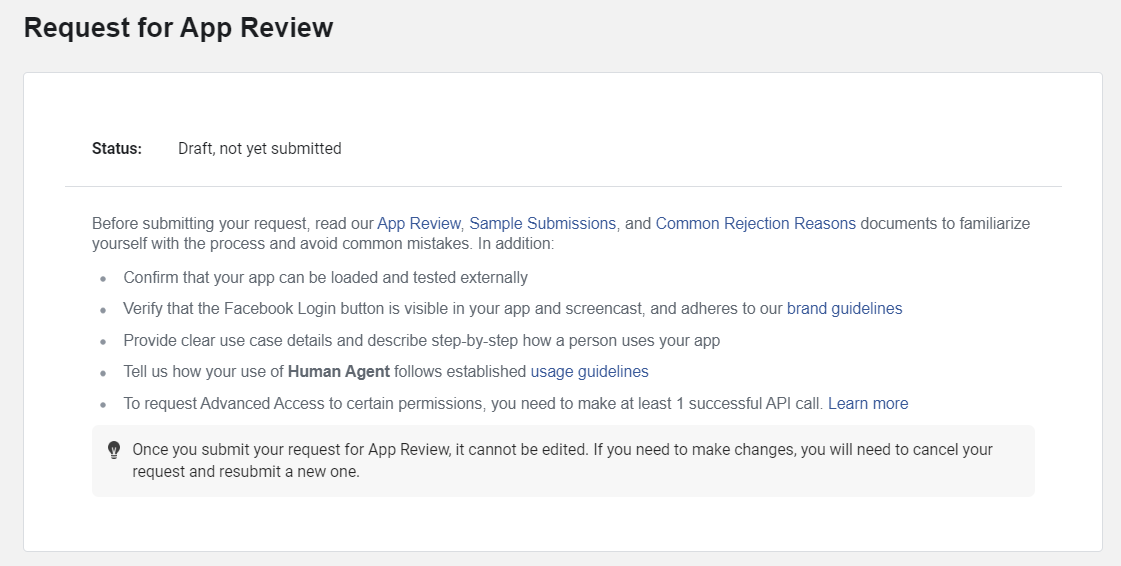
-
-
Click[Submit for Review] NOTE: You can only proceed to test the integration once the review has been approved.
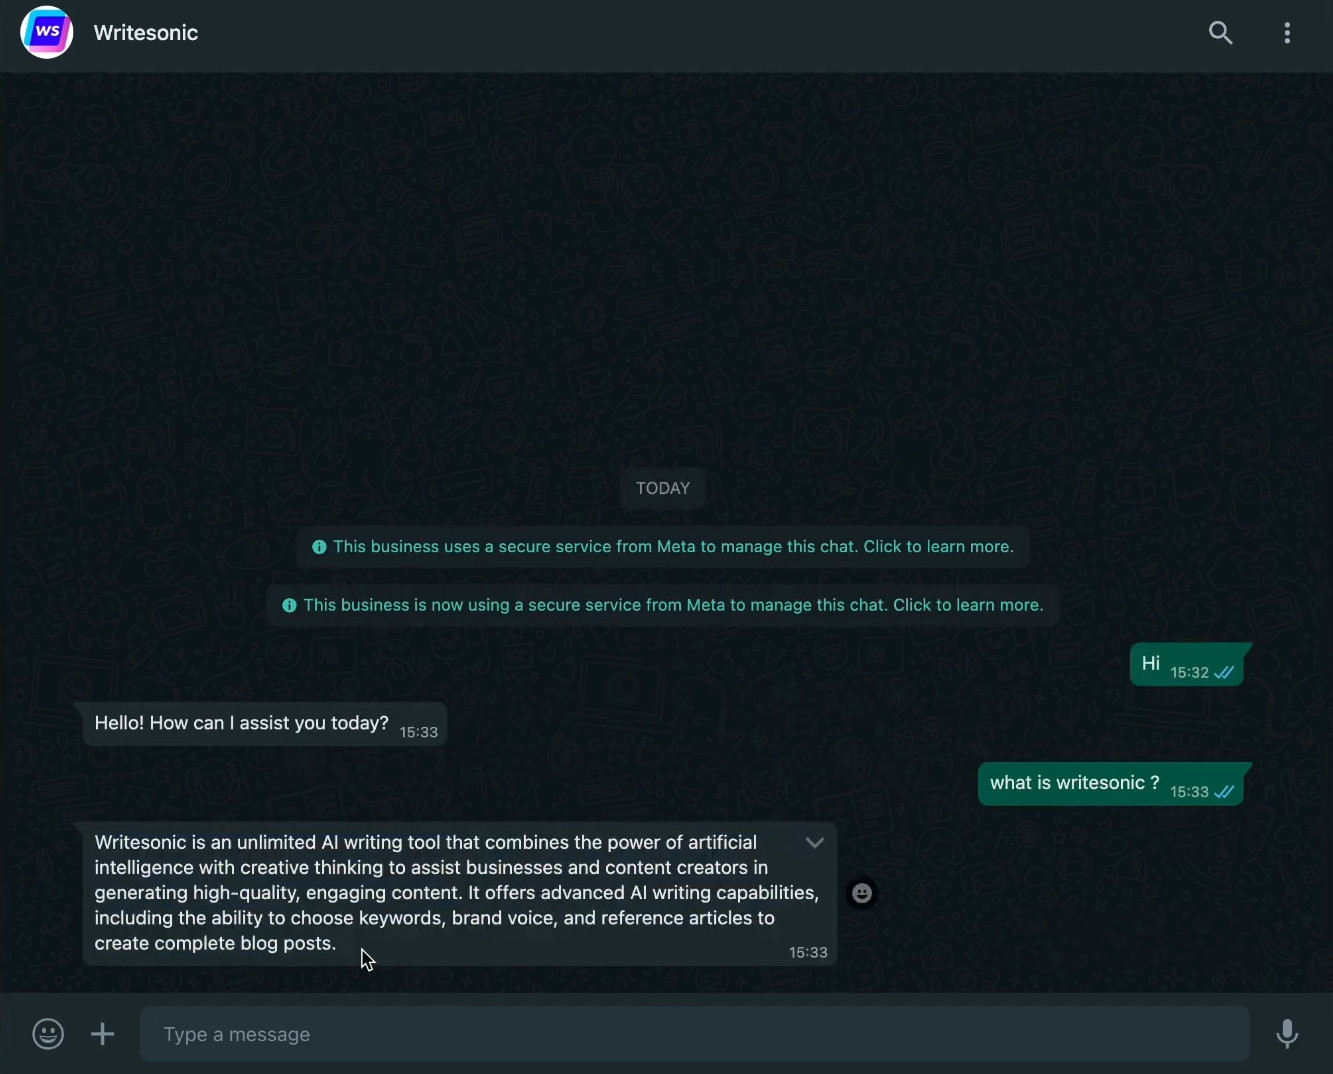
Step 5 - Test the integration
NOTE: Make sure the Bot is trained with an uploaded file or FAQ that answers the question/message that you're posting
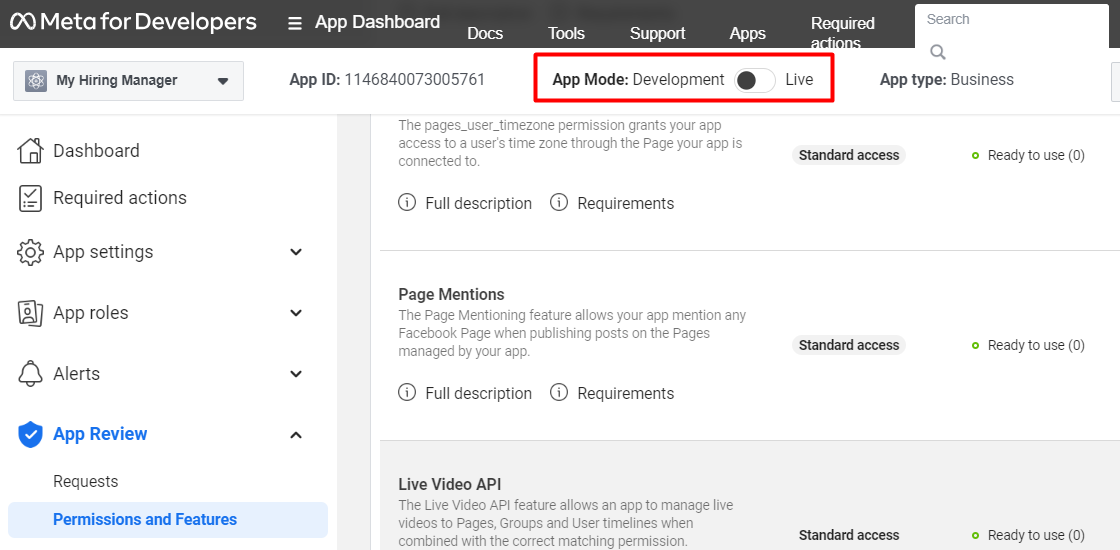
-
Change the app mode to Live. Toggle switch can be found on the top bar ofyour Whatsapp settings page.
-
Engage with the Bot by sending a Whatsapp message to the test or production phone number.
Updated 8 months ago