
How to Configure Your BOT SETTINGS
Learn how to set the length of responses, set multilingual support, select an AI model, send email transcripts and follow up questions, limit messages, and block users with masked IPs.
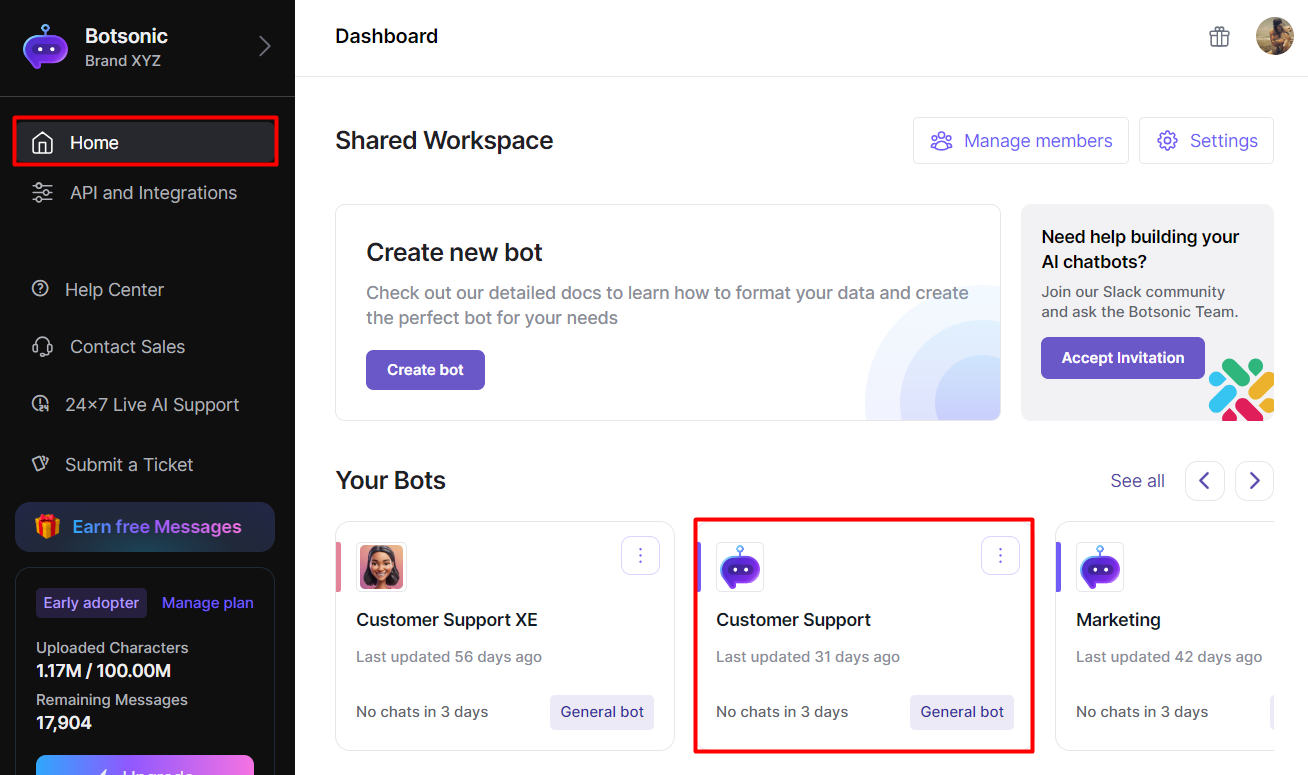
Step 1 - Access the Bot Settings
-
Navigate to your Botsonic Dashboard by clicking on [Home] from the left hand side menu. Then click and open the Bot you want to connect. If you haven't created a Bot yet, read thisQuick Start Guide
-
Click [Settings] from the left hand side menu
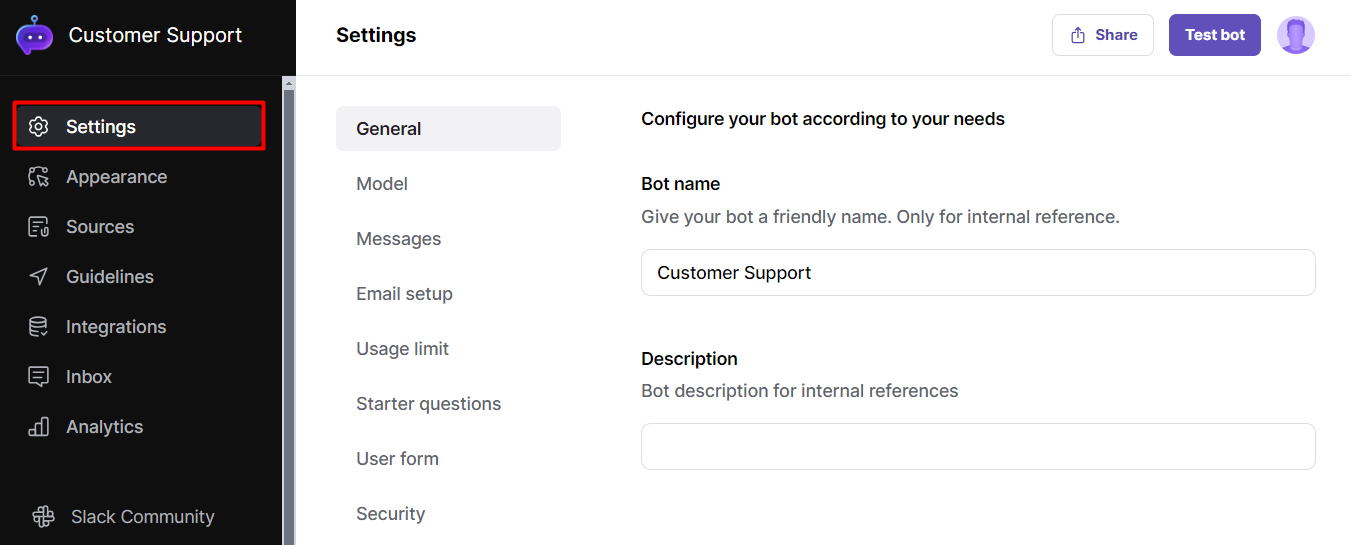
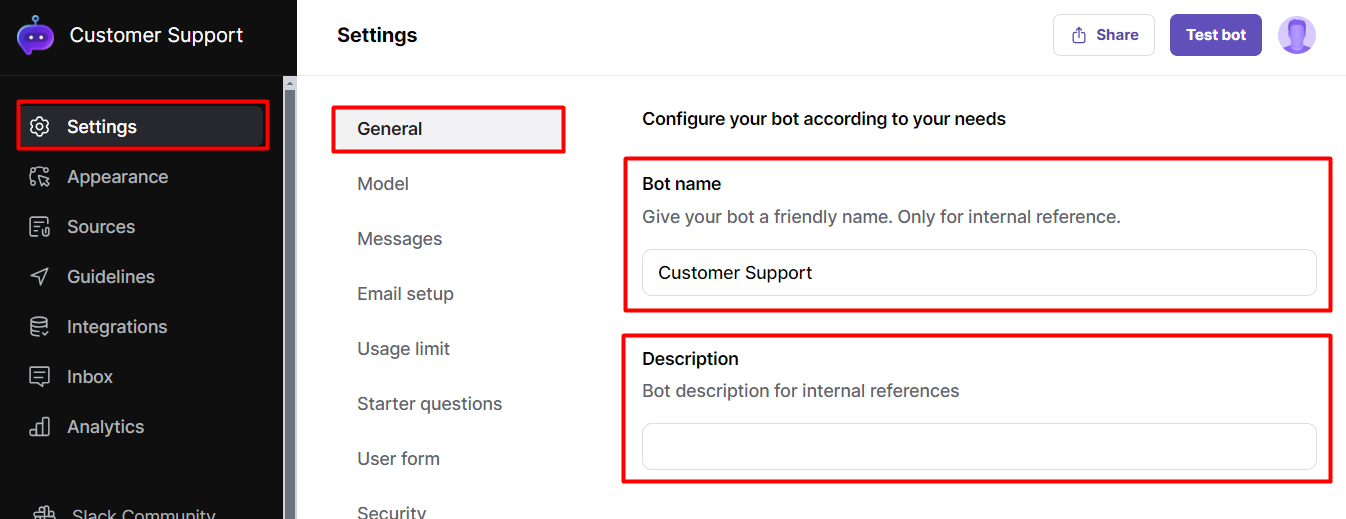
Step 2 - Configure the General Bot Settings
Click [Settings], then click the [General] tab
- Give your Bot a name (for internal reference)
- Give your Bot a Description (for internal reference)
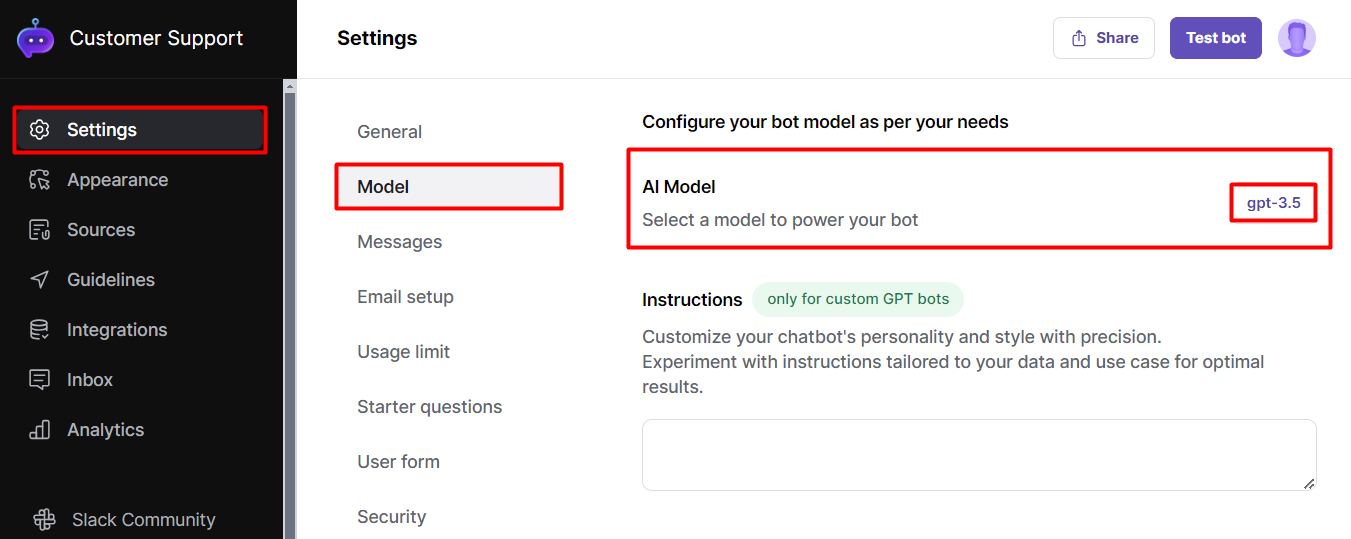
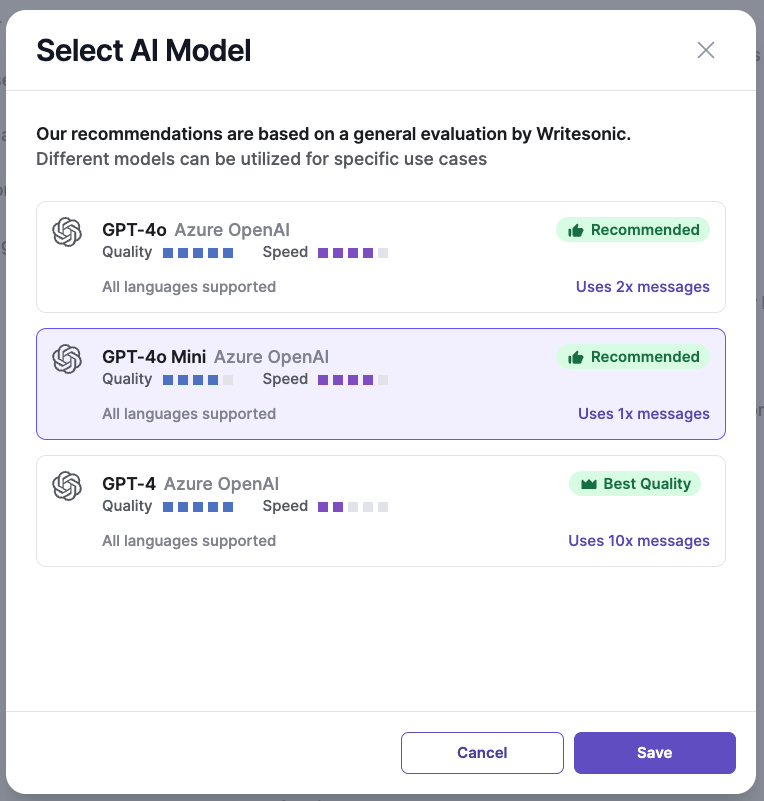
Step 3 - Configure the AI Model
Click [Settings], then click [General] and the [Model]
- AI models differ in their quality when it comes to analyzing, extracting, summarizing, and otherwise using textual information to generate output that resembles human language.
- Note: GPT-4o mini is available for all plans, access to other AI Models depend on the plan you choose.
Step 4 - Configure the Bot's Messages
Click [Settings], then click [Messages] to customize and fine-tune the message settings of your bot
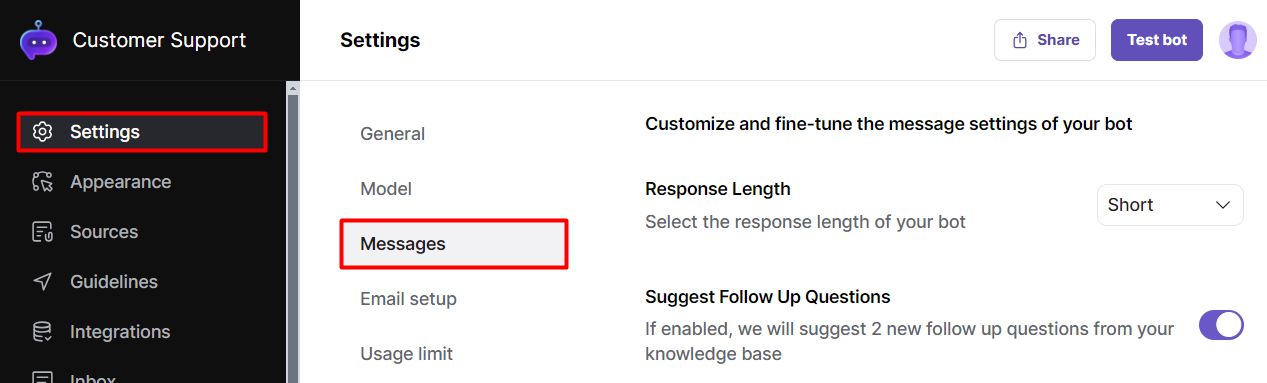
Response Length
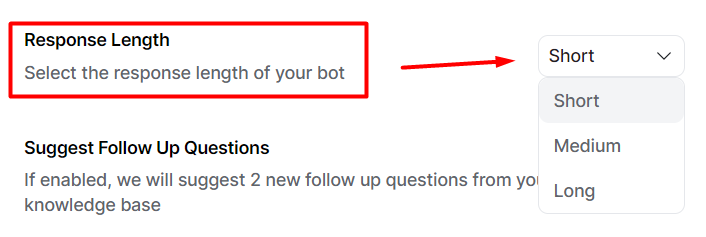
You can configure your Bot to reply with short, medium, or long responses.
- Short responses are brief and concise, providing quick answers
- Medium responses offer more detail and explanation without being overly lengthy.
- Long responses are comprehensive and detailed, often delving into thorough explanations or providing extensive information.
Suggest Follow Up Questions
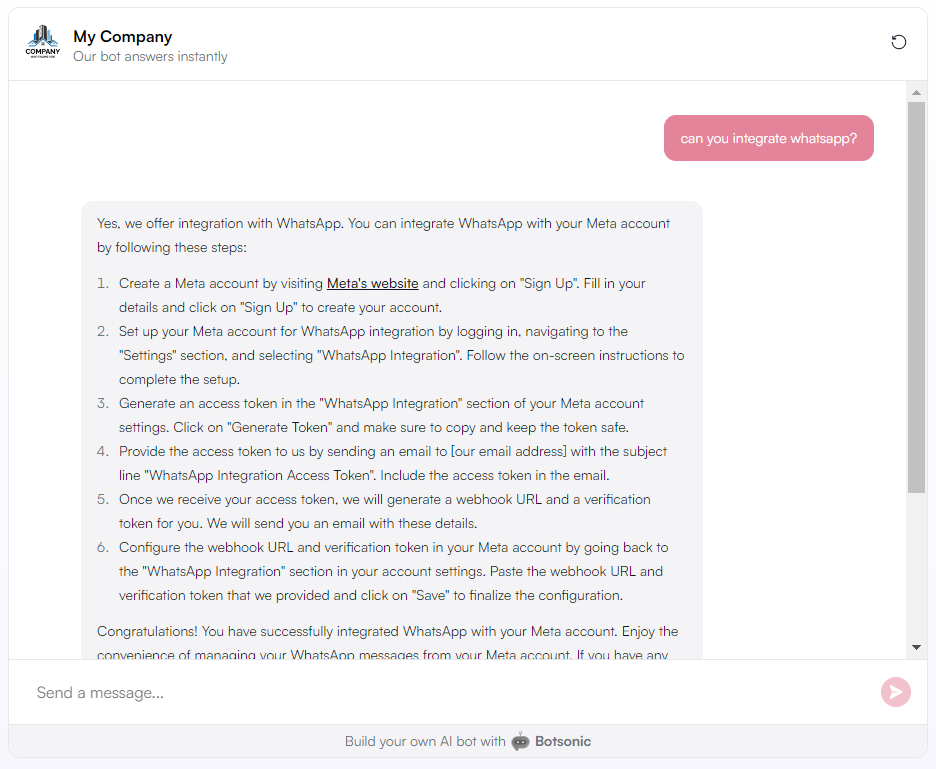
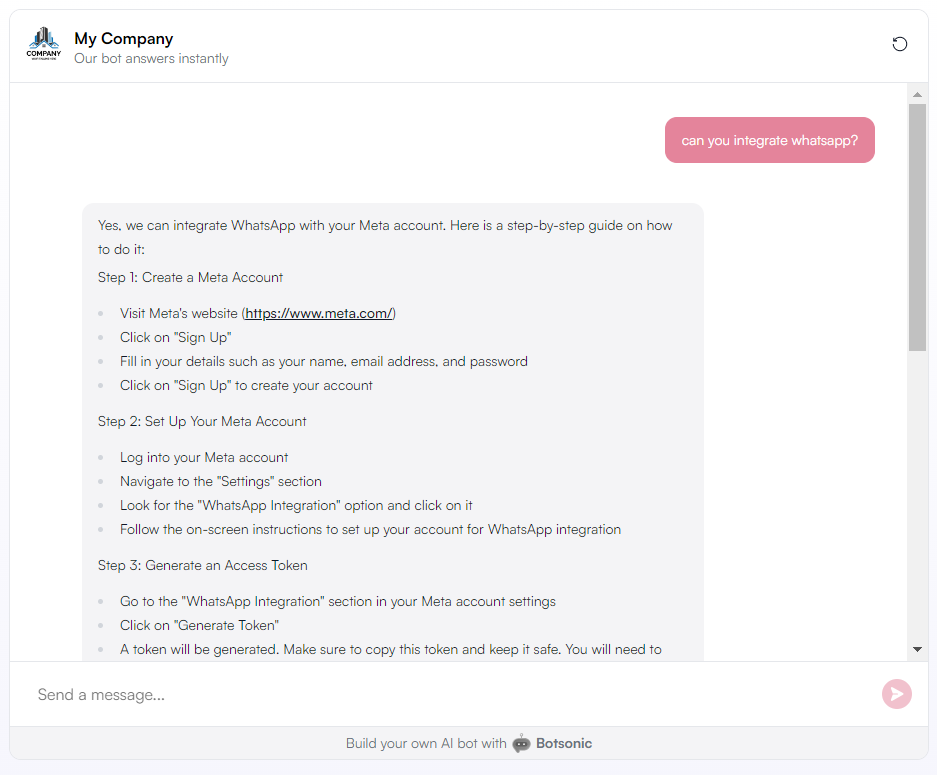
When enabled, the chatbot will suggest 2 new follow up questions based from your knowledge SOURCES. Read more aboutHow to Upload Training SOURCES for Your Bot

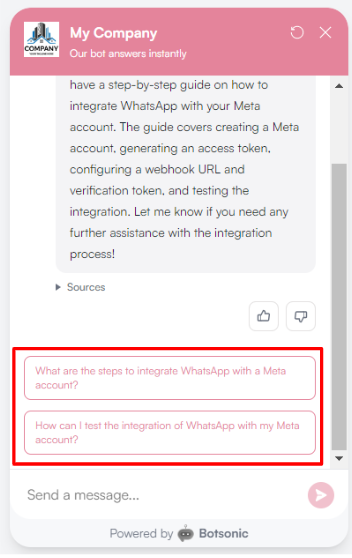
Show Source references with the chatbot's response
-
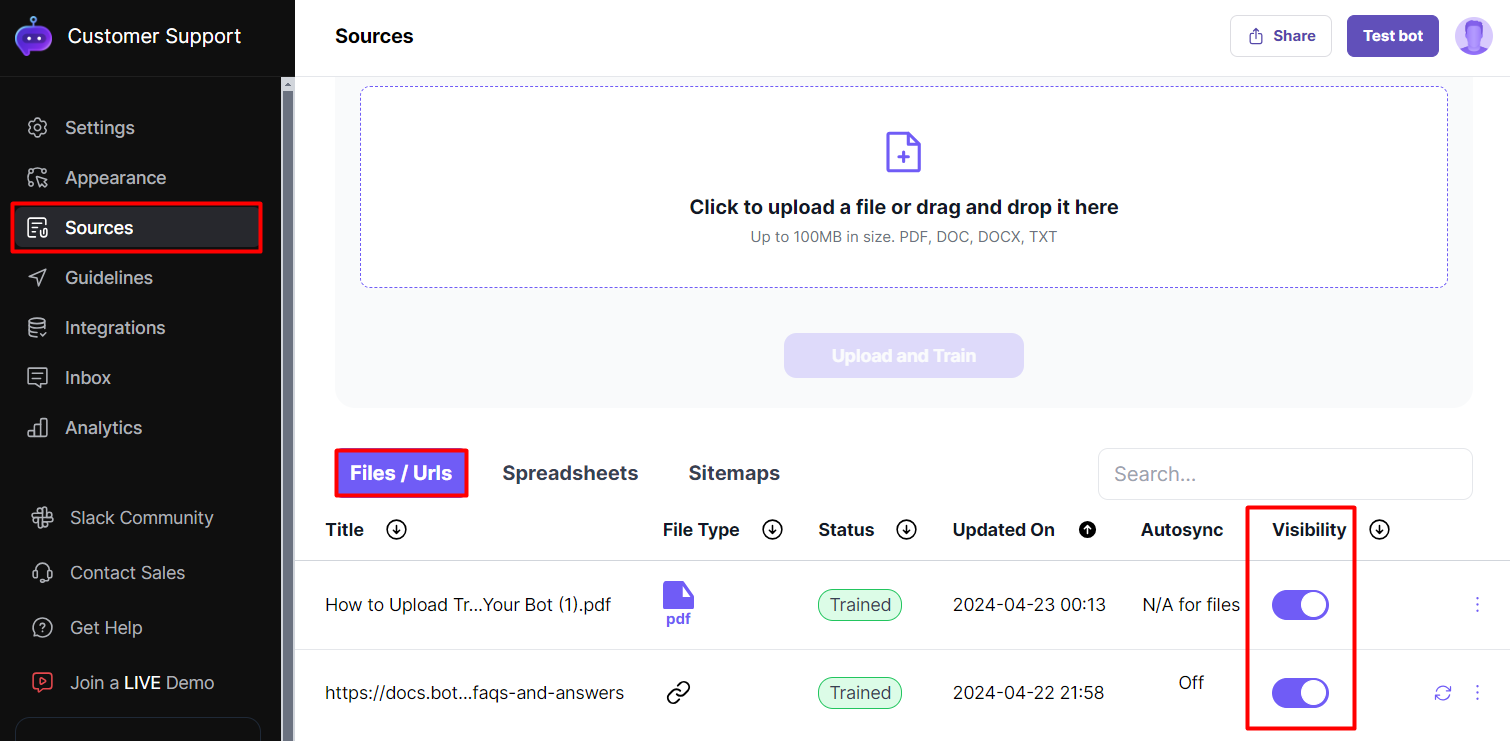
You can set your ALL uploaded data Sources to be shown as a reference on your chatbot's responses.


IMPORTANT: This setting overrides the individual source visibility settings from the [Sources] section where you uploaded your Files and Links.To learn more about Sources, read this article on How to Upload Training SOURCES for Your Bot
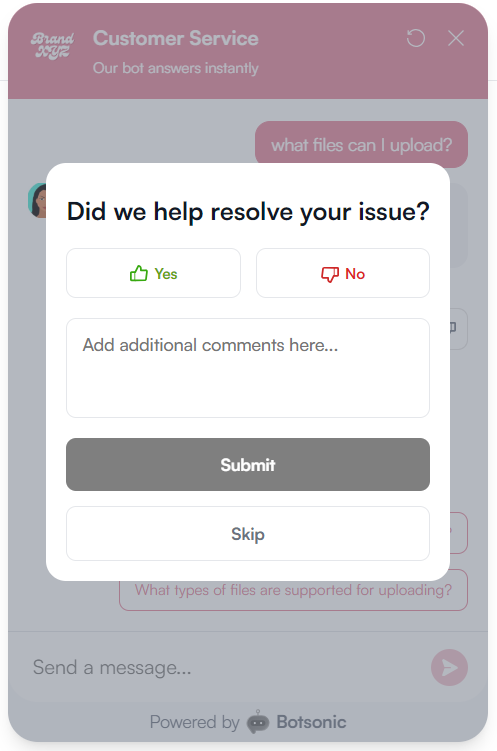
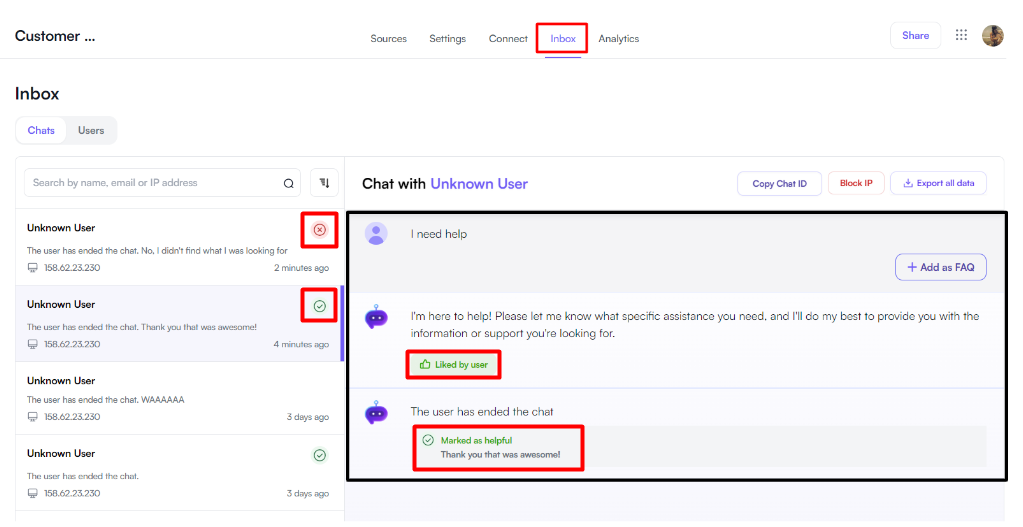
Post chat feedback
-
The Bot can show/hide a post chat feedback popup. When enabled, the pop-up is displayed when the user ends the chat.

-
Feedback can be viewed in the [Inbox]. Read this article to learn more about Viewing Chat Messages and Post Feedback Chat
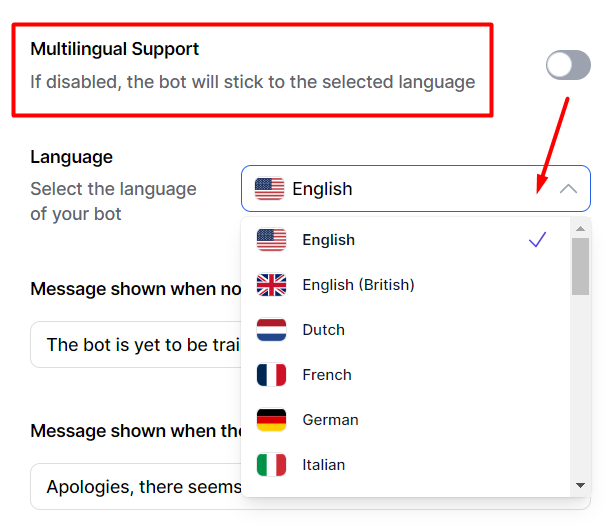
Multilingual Support
-
When disabled, you can select one specific language for bot responses. Based on your chosen language, the bot will remain active in a single language. If a user asks a question in any language, the bot will understand the question and reply in your chosen language.
-
When enabled
-
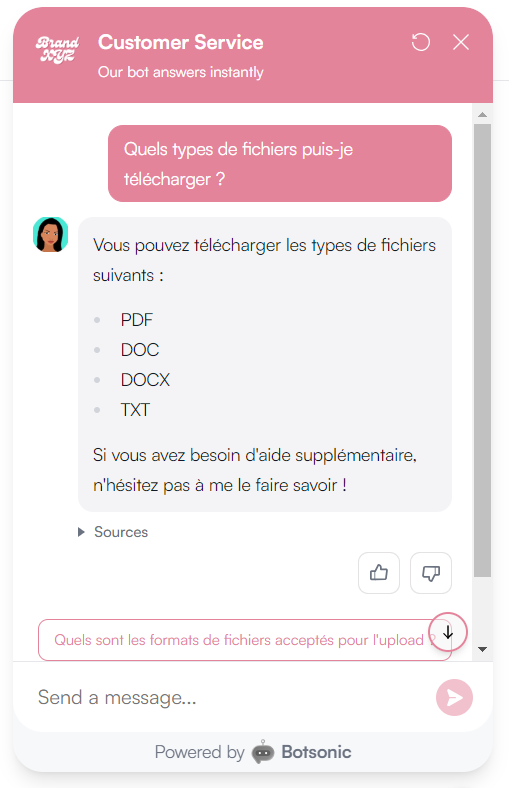
If you enable the multilingual mode, the bot will be able to understand and reply in the same language as the user’s question.
-
To see display the list of supported languages, click [Disabled]
-
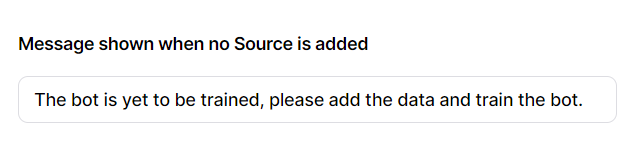
Message shown when no Source is added
Enter a custom message to display if your Bot is still yet to be trained. Read this step by step guide onHow to Upload Training SOURCES for Your Bot
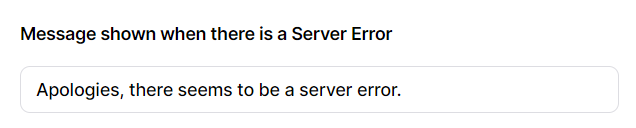
Message shown when there is a Server Error
Enter a custom message to display if the Bot fails to respond due to a server error.
Step 5 - Configure the Bot's Email Setup
Click [Settings], then click [Email setup] to enable sending transcripts and support email addresses
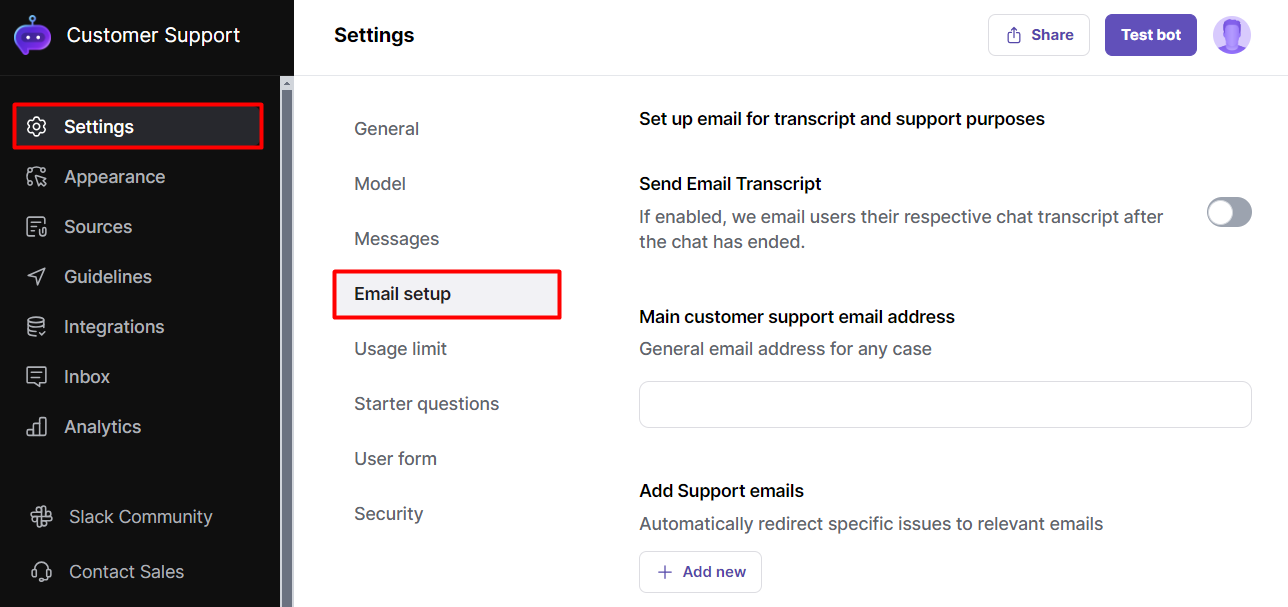
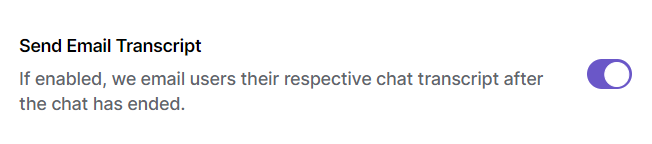
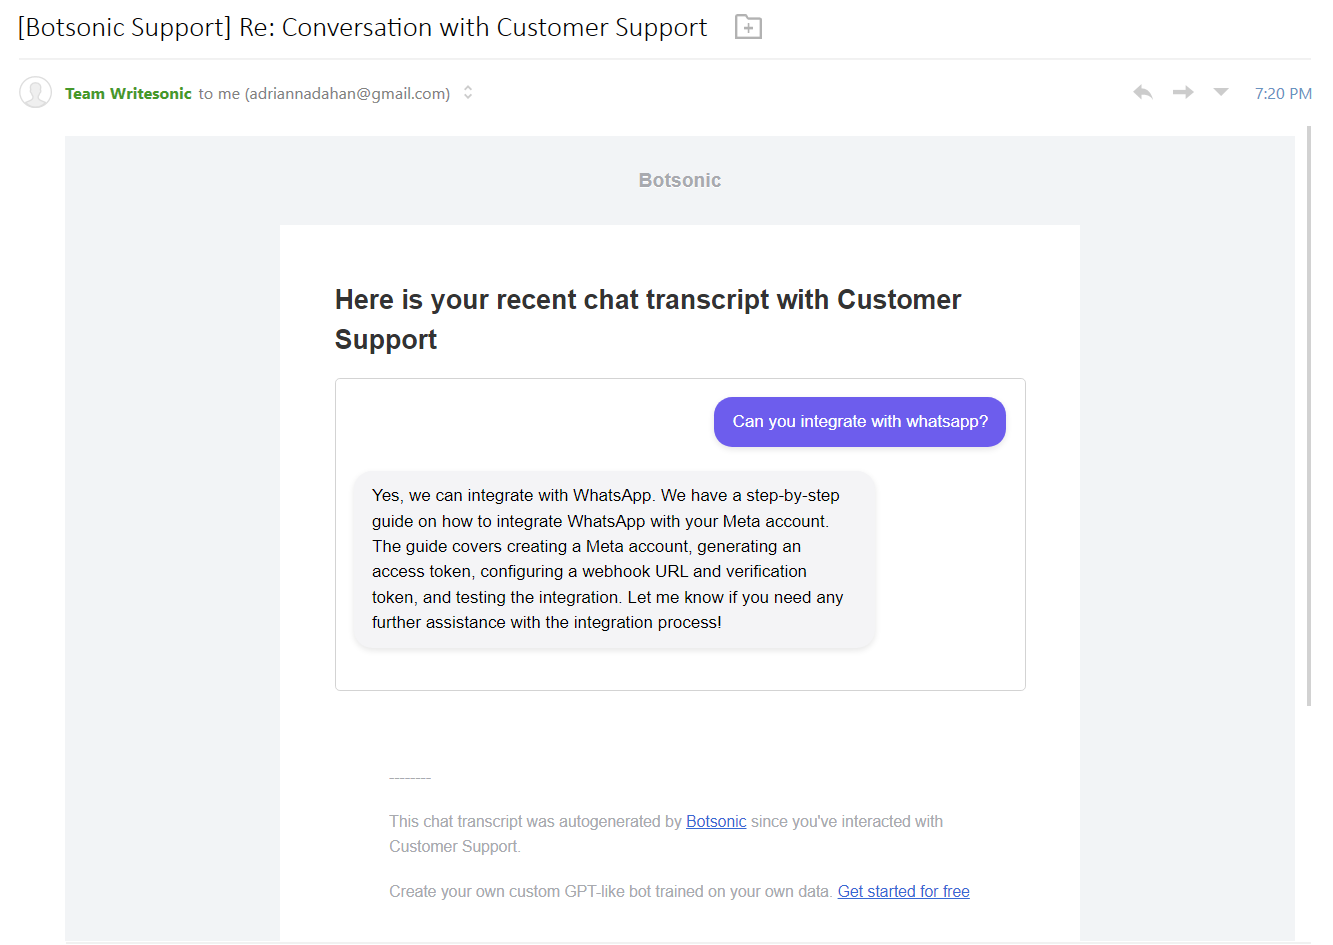
Send Email Transcript
-
When enabled, a transcript of the conversation will be automatically emailed to the user when the user exits the chat / conversation.
-
IMPORTANT: The USER FORM feature must be enabled to make this work. Read more aboutHow to Collect Data with a USER FORM
Add a Main Customer Support Email Address
In case the Bot is unable to provide the user with the answer they are looking for, and the user prefers to send a message directly to an email address, the Bot can refer a specific email address to contact the customer service team.
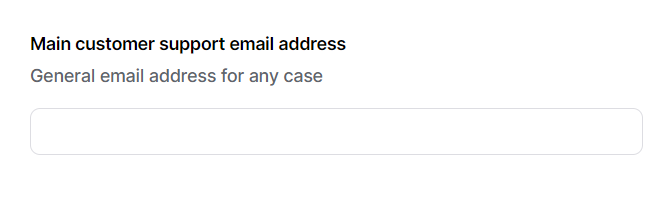
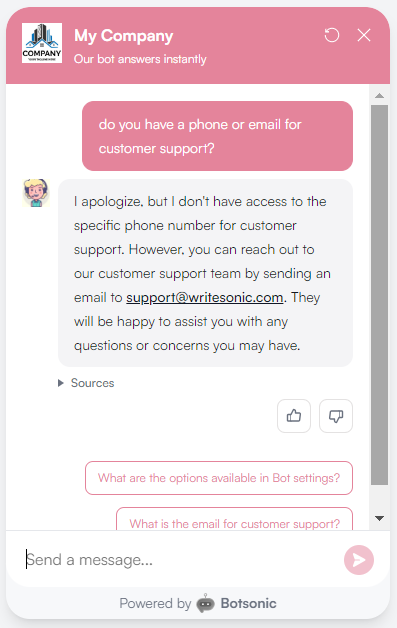
Based on the chat context, Botsonic can detect which is the ideal role/email to provide
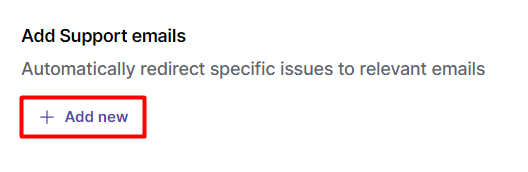
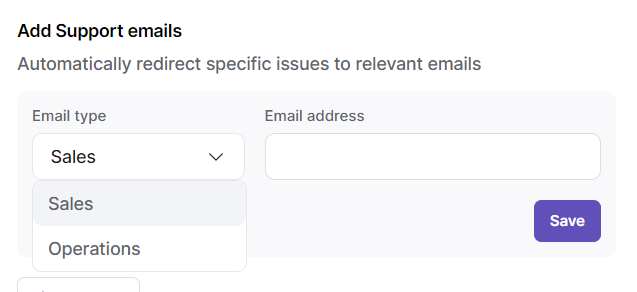
Add Support Emails
You can assign an email address for different roles.
- Sales Support
- Operations Support
Step 6 - Configure Bot's Usage Limits
Click [Settings], then click [Usage Limit]
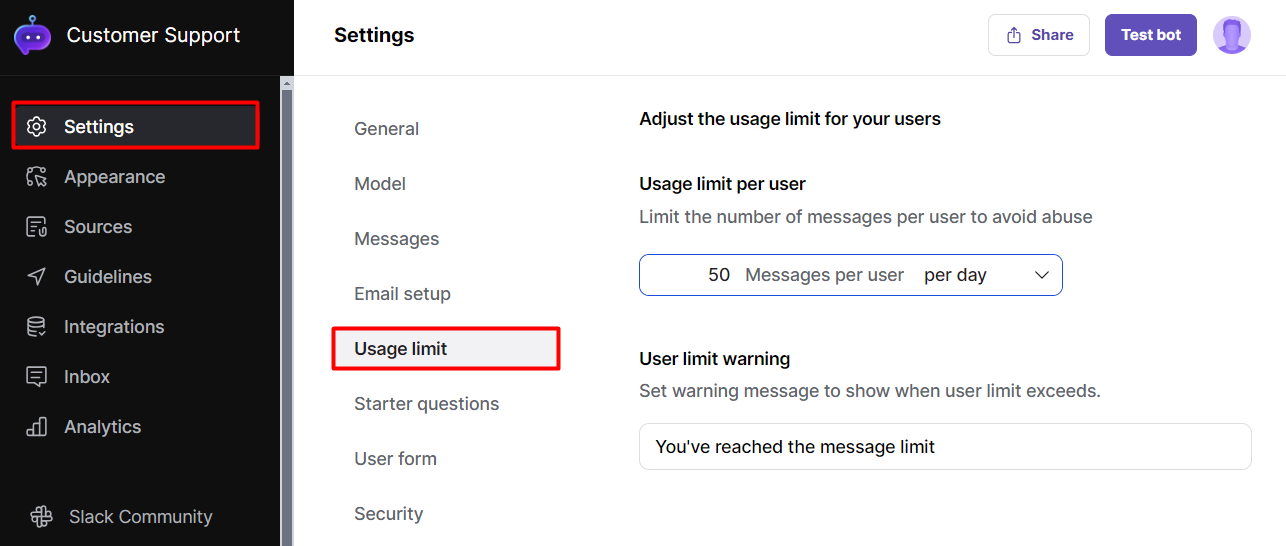
To avoid abuse,
-
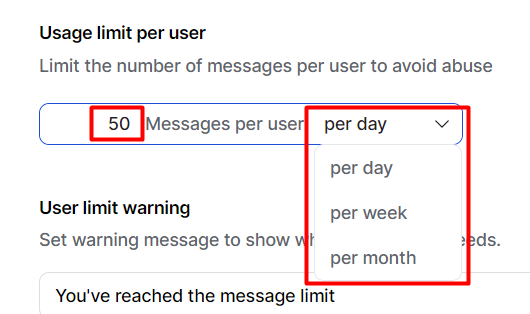
Set a limit on the number of messages sent per user.
-
Set a daily, weekly, or monthly limit per user.
-
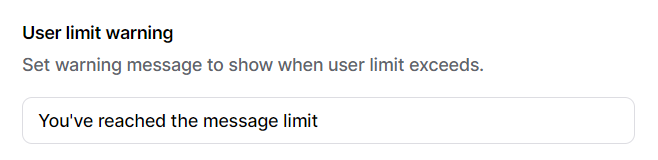
Set a warning message when the limit exeeds
Step 7 - Configure the Security Settings of the Bot
Click [Settings], then click [Security]
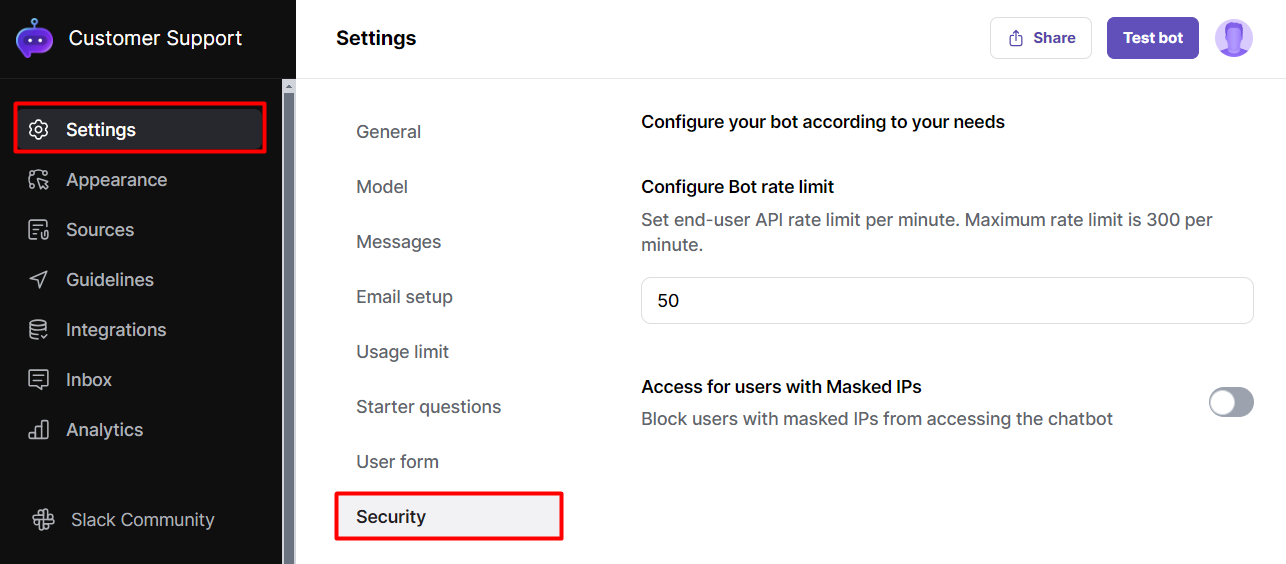
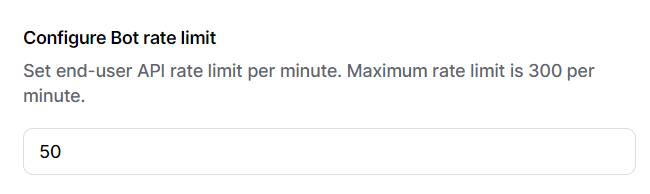
Bot Rate Limit
Set end-user API rate limit per miniute. Maximum rate limit is 300 per minute
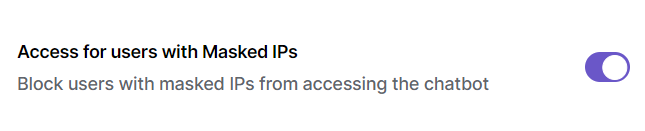
Access for Users with Masked IPs
When enabled, users with masked IPs will not be able to interact with the chatbot
Updated 9 months ago