
Create an Action
Learn how to create human-like action-taking abilities for your Chatbot
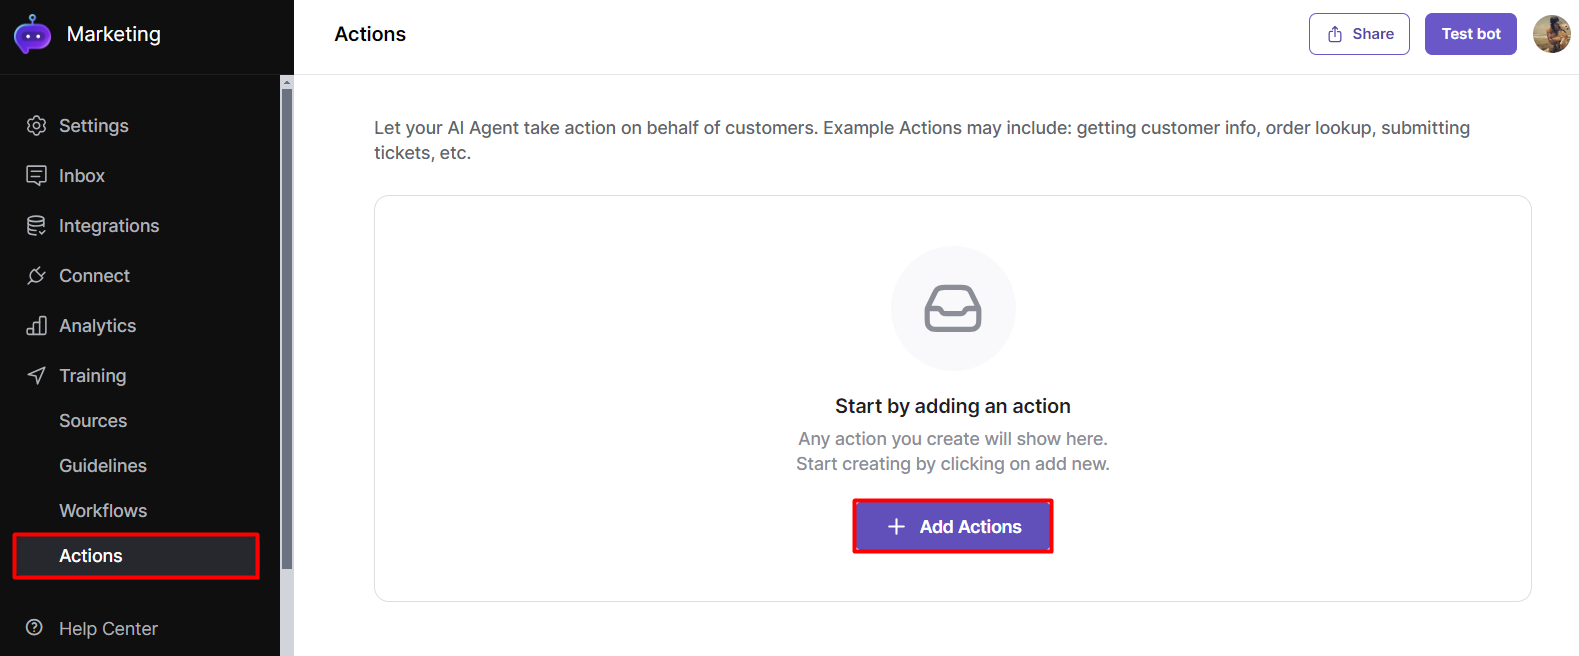
- On the Bot's settings page, click on [Actions] from the left hand side menu.
- Click [Add Actions]
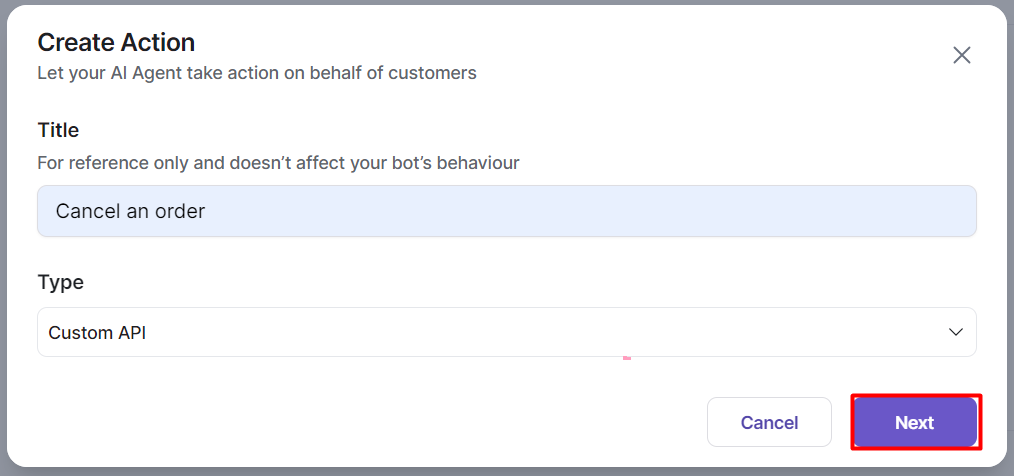
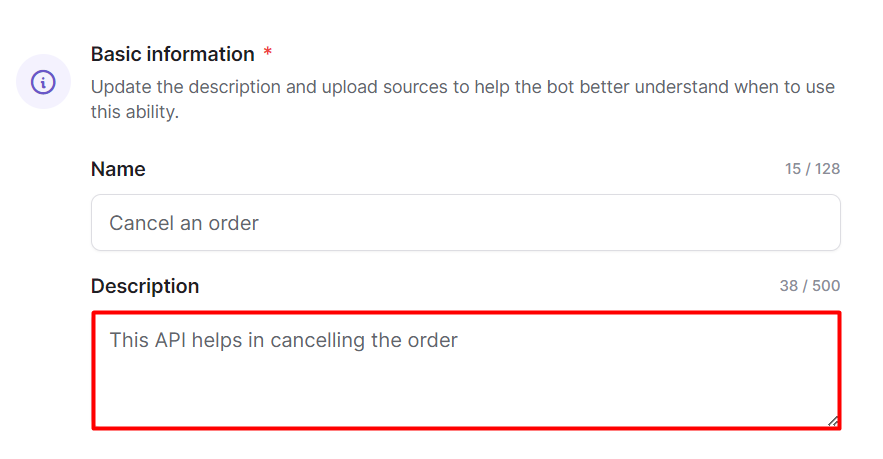
- Enter the Action Title. Enter a concise and descriptive name for your new ability. For example, "Cancel Order" or "Book a Ticket." This reference helps you identify the ability later.
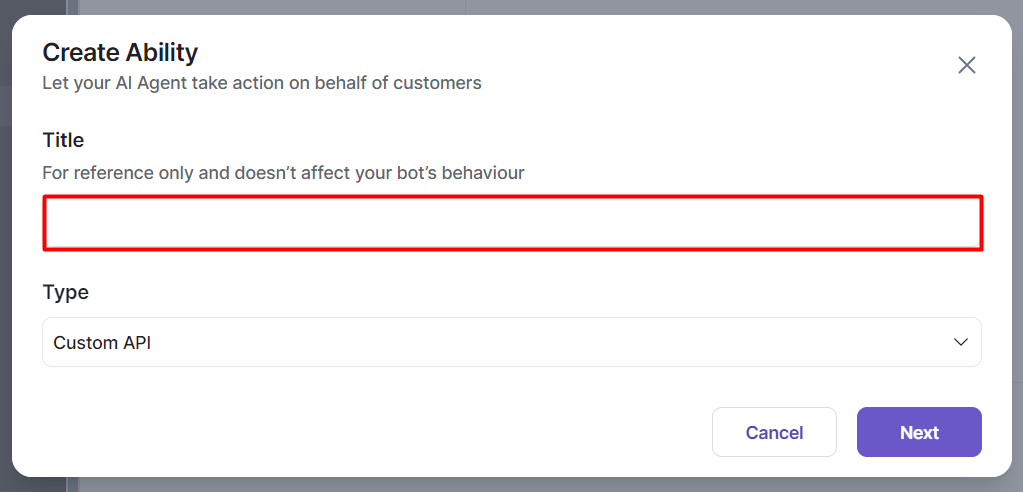
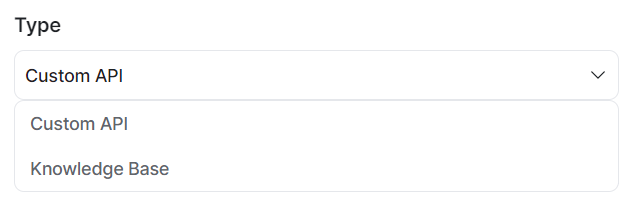
- Select Type of Action. You have two types of abilities you can add:
- a custom API or
- a knowledge base
Add a Custom API
- Select[Custom API], then click [Next]
- Provide a Description. In the "Description" field, explain what the ability does. For example, "This API helps with cancelling the order" or "this API helps with booking a ticket" This description helps you and others understand the purpose of the ability at a glance.
- Gather inputs from chat. Specify the information the bot should look for in the conversation to make this action's API call. Click on [Add] and select a [data type] from the dropdown, then define the [parameters]. You have 3 input types to choose from:
- String: This input type is used for text-based data. For example, you might have an input called "destination" for an airline ticket booking API.
- Number: This input type is used for numerical data. For example, you might have an input called "number of tickets" to specify how many tickets are being booked.
- Boolean: This input type is used for true/false values. For example, you might have an input called "is child" to indicate if the ticket is for a child.
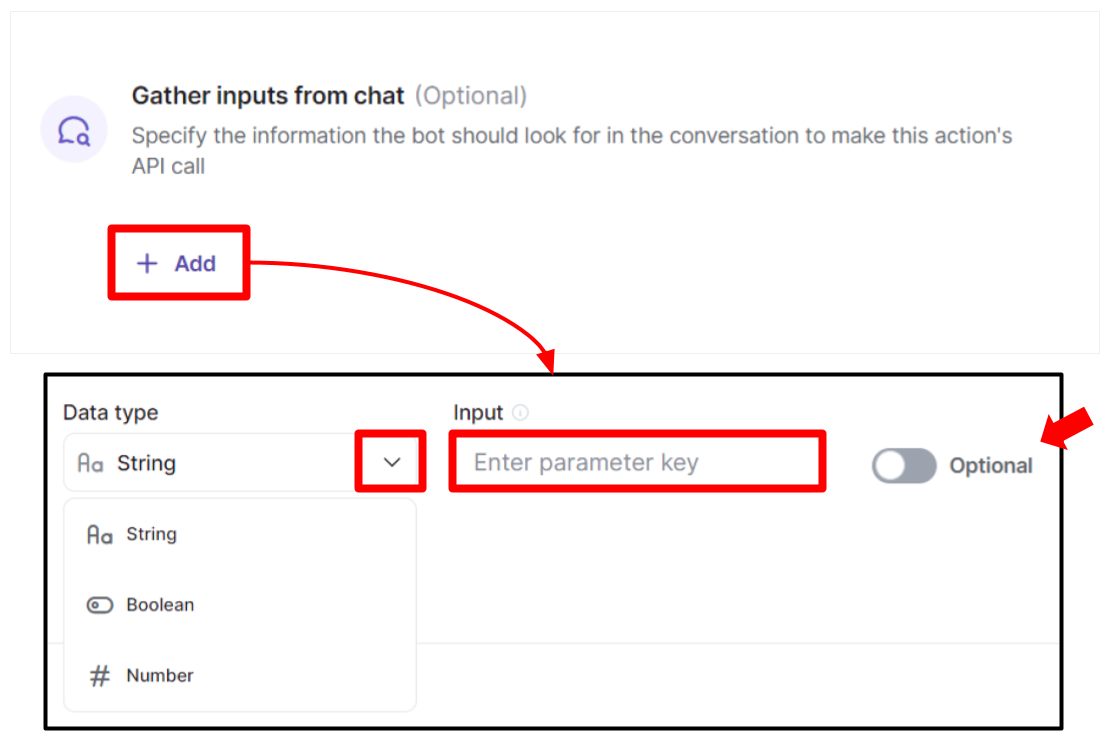
Optional Switch - switching it on makes the input type optional, while turning it off makes the input type required.
Example for Booking Tickets:
| Name | Type | Description |
|---|---|---|
| destination | String | The destination for the ticket booking. |
| number of tickets | Number | The number of tickets to be booked. |
| is child | Boolean | Indicates if the ticket is for a child. |
- The AI will gather these inputs either from the previous conversation context or by asking relevant questions to the user. This ensures that all necessary information is collected before triggering the API.
- For example, if the user has already mentioned the destination in a previous conversation, the AI will use that information. If not, it will prompt the user to provide the destination.
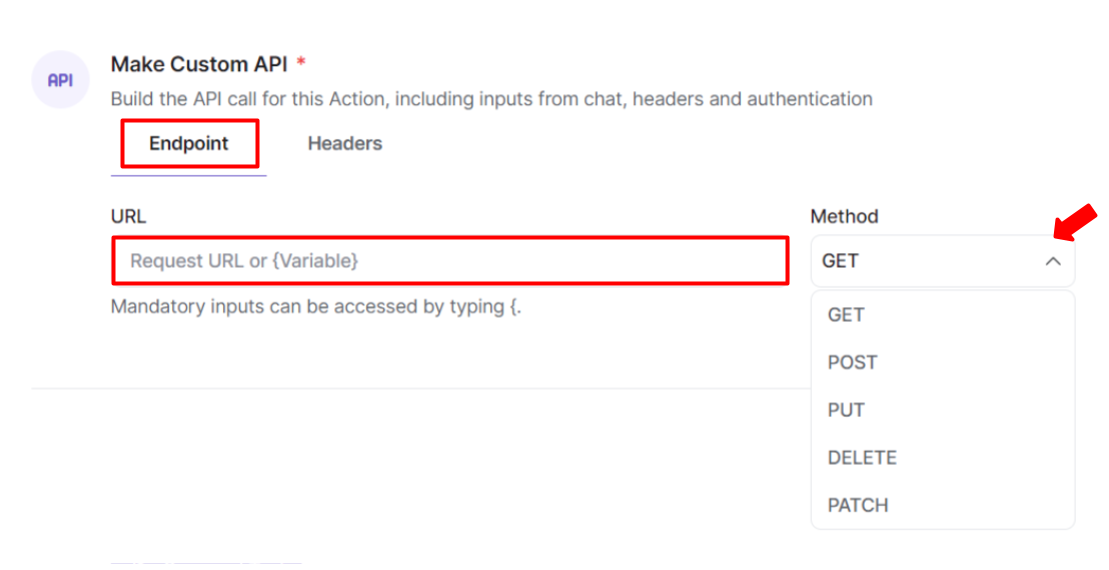
- Make Custom API. Build the API call for the Action, including inputs from chat, headers and authentication.
Define the API Endpoint
- To ensure that the chatbot can correctly send requests and receive responses from the external system, click the [Endpoint] tab to specify the URL and method type for the API your chatbot will interact with.
- Paste the URL: Enter your API's URL in the "URL" field.
- Select the Method Type: POST, GET, PUT, DELETE, PATCH.
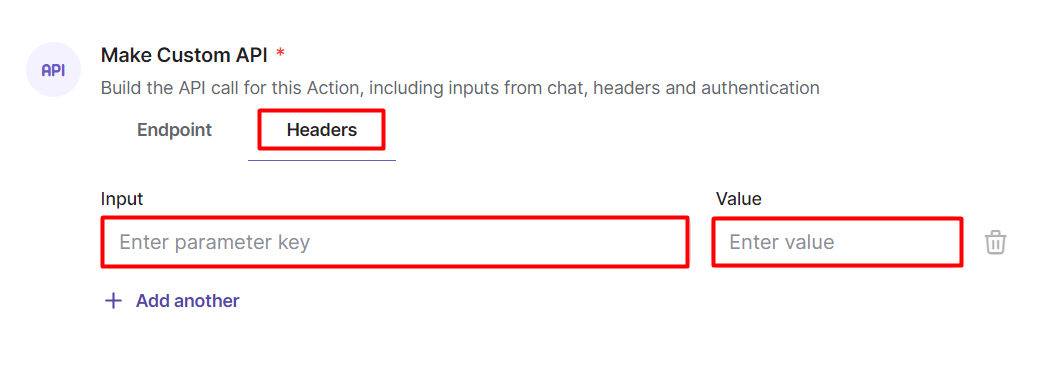
Provide the necessary header keys
- The header key allows you to add custom headers to your API requests. These headers can be used for various purposes, such as identifying the source of the request or passing additional information required by the API.
- Click the [Headers] tab to add any constant type headers that your API requires.
- For example, you might want to add a header to identify that the request is coming from Botsonic. You could add a header like "x-from" with a static value of "botsonic-chatbot". This helps you recognize on your end that the request is coming from Botsonic.
- Test API Response - click [Save and test] to get a sample response.

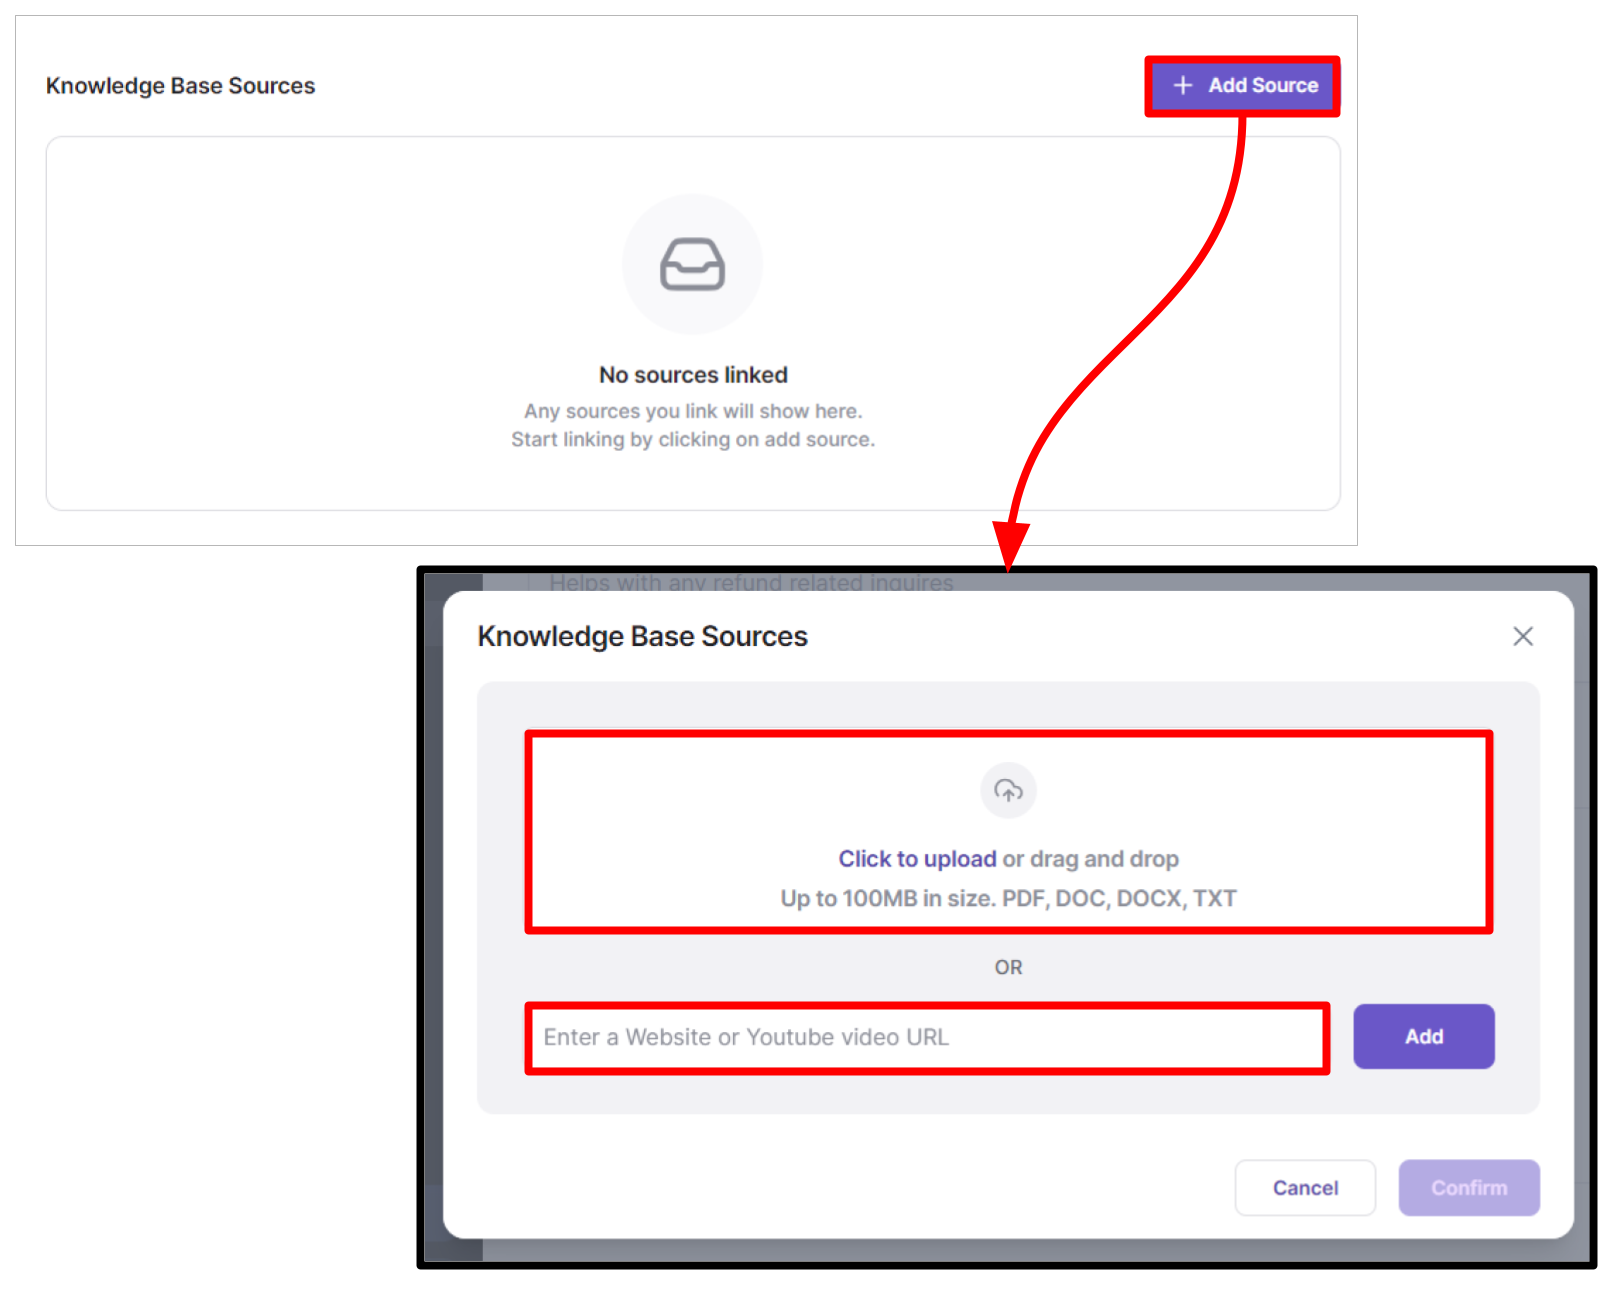
Add a Knowledge Base
This type of Action allows the bot to find answers from a restricted set of documents. You can add sources like PDFs, Word documents, text files, or even a website URL.
Updated 8 months ago
Did this page help you?