
Integrate Your Bot with Your Favorite Tools
Learn how to integrate your chatbot with customer support applications, platforms like WordPress, Google Tag Manager, Zapier, etc.
External integrations play a crucial role in enhancing the capabilities and outreach of your chatbot, effortlessly linking it with a wide range of platforms and services. Through integration with Botsonic's extensive suite of applications and services, you guarantee its availability and usefulness across different domains.
Botsonic's integrations go beyond messaging platforms, facilitating interactions and transactions across scheduling tools like Calendly, customer support systems such as ZenDesk and FreshDesk, and collaboration platforms including Google Chat and Slack. Moreover, by incorporating a Consent Agreement tool, your chatbot respects user privacy and regulatory requirements.
Botsonic's integration with platforms such as WordPress and Google Tag Manager allows for easy embedding into websites and effective management of scripts. It also captures user information via Zapier, bolstering engagement and service. Botsonic is compatible with any JavaScript-supported tech stack, maintaining functionality across different site architectures and security measures, from Single Page Applications to traditional sites, ensuring a customized chatbot experience.
Our comprehensive integration approach not only enhances accessibility but also optimizes user experience by providing a consistent and convenient interaction model across multiple touchpoints. It amplifies your brand's visibility, fosters engagement, and empowers your chatbot to serve as a versatile tool for diverse use cases, catering to the preferences and needs of a broad audience base.
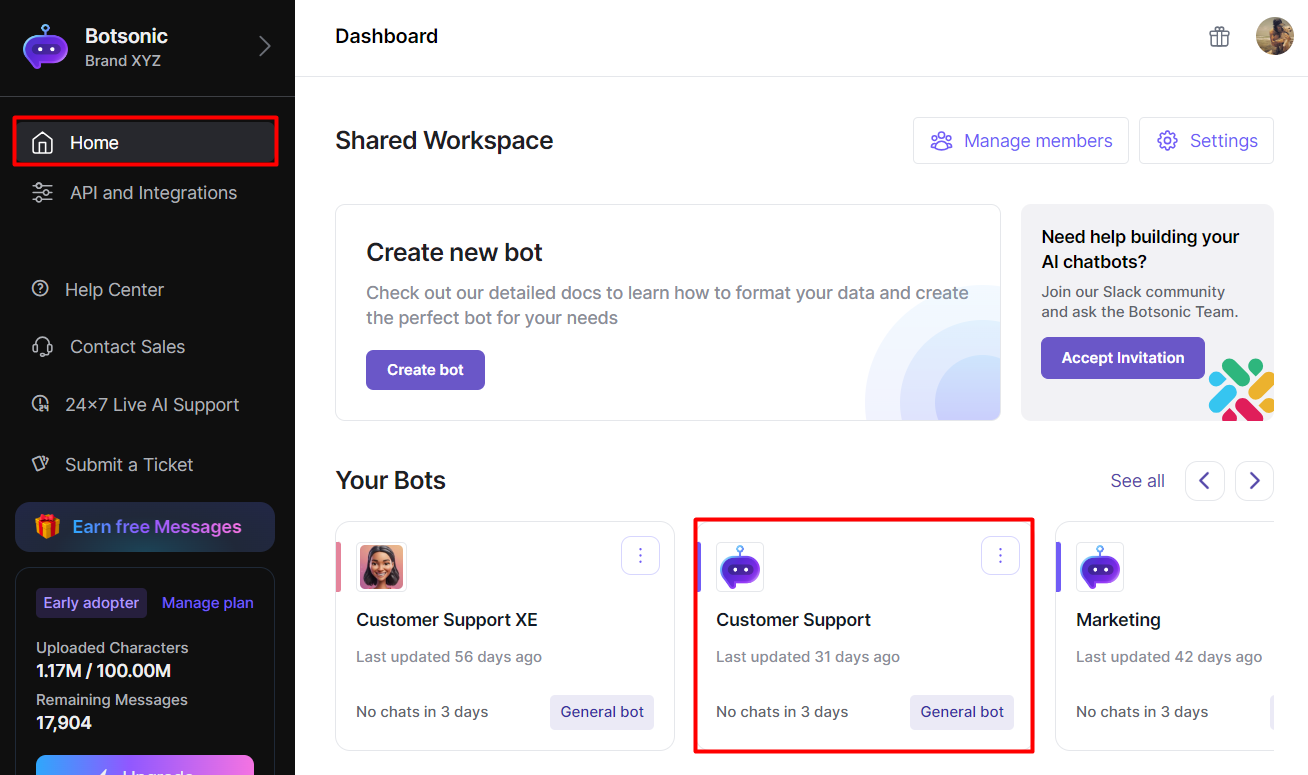
Step 1 - View the Bot Settings
Navigate to your Botsonic Dashboard by clicking on [Home] from the left hand side menu. Then click and open the Bot you want to connect. If you haven't created a Bot yet, read thisQuick Start Guide.
Step 2 - Select an Integration
-
Click [Integrations], then click [Apps]
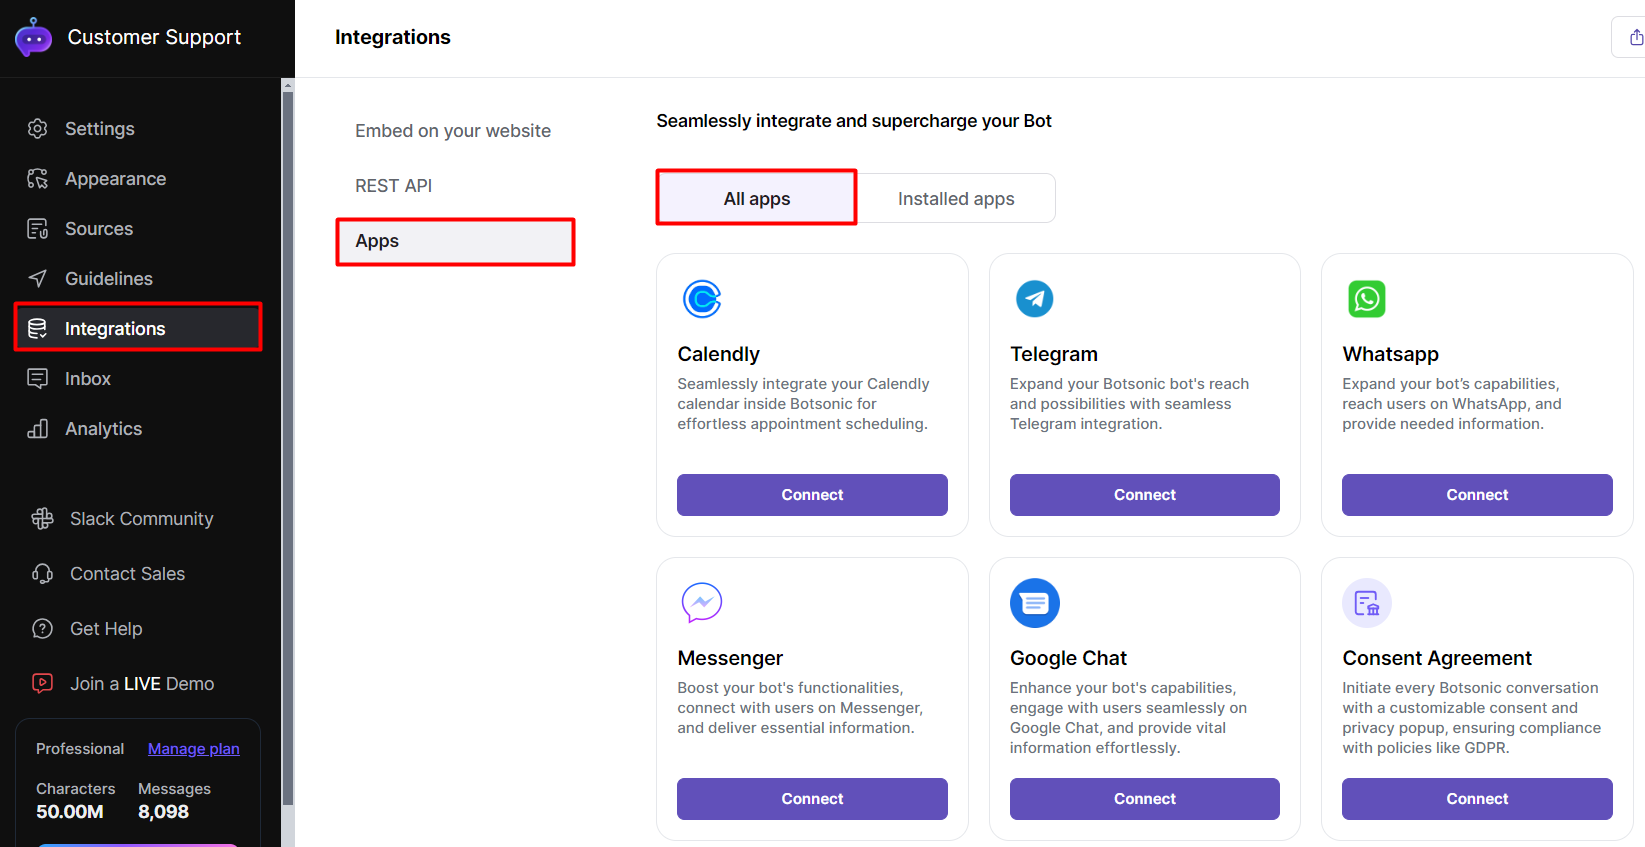
-
Select an integration, then click [View]

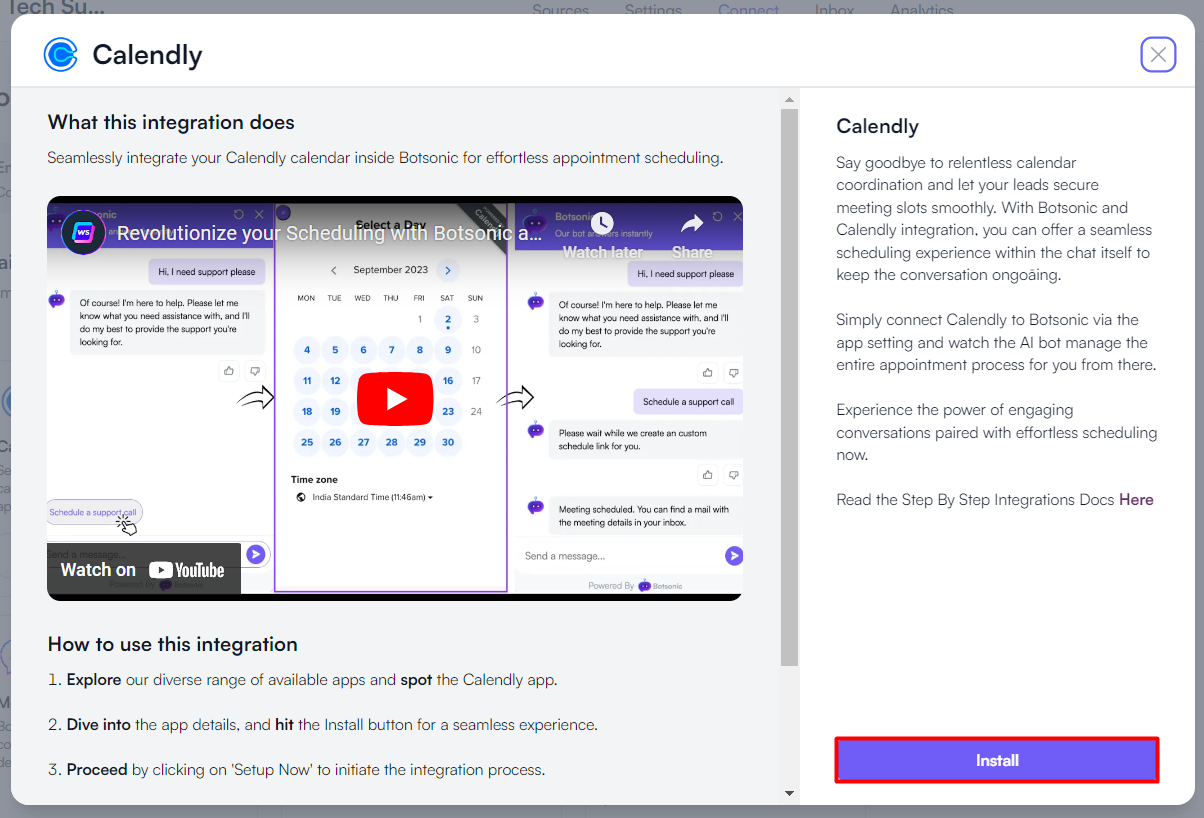
Step 3 - Install & Integrate
Review the step by step instructions or watch the video tutorial. When ready, click the [Install] button then follow the steps provided to integrate the app.
Updated 9 months ago